Adding a Playbook
A playbook in Enlivy is a structured, interactive guide designed to walk users through a specific process, task, or workflow within the app.
Think of it as a personalized manual or SOP (Standard Operating Procedure) that can be used to train team members, standardize operations, or onboard new users.
Playbooks help ensure that everyone follows the same steps and best practices when performing a task, whether it’s creating invoices, managing users, tagging transactions, or any other process in Enlivy.
They’re especially useful for sharing internal knowledge, reducing errors, and boosting team productivity.
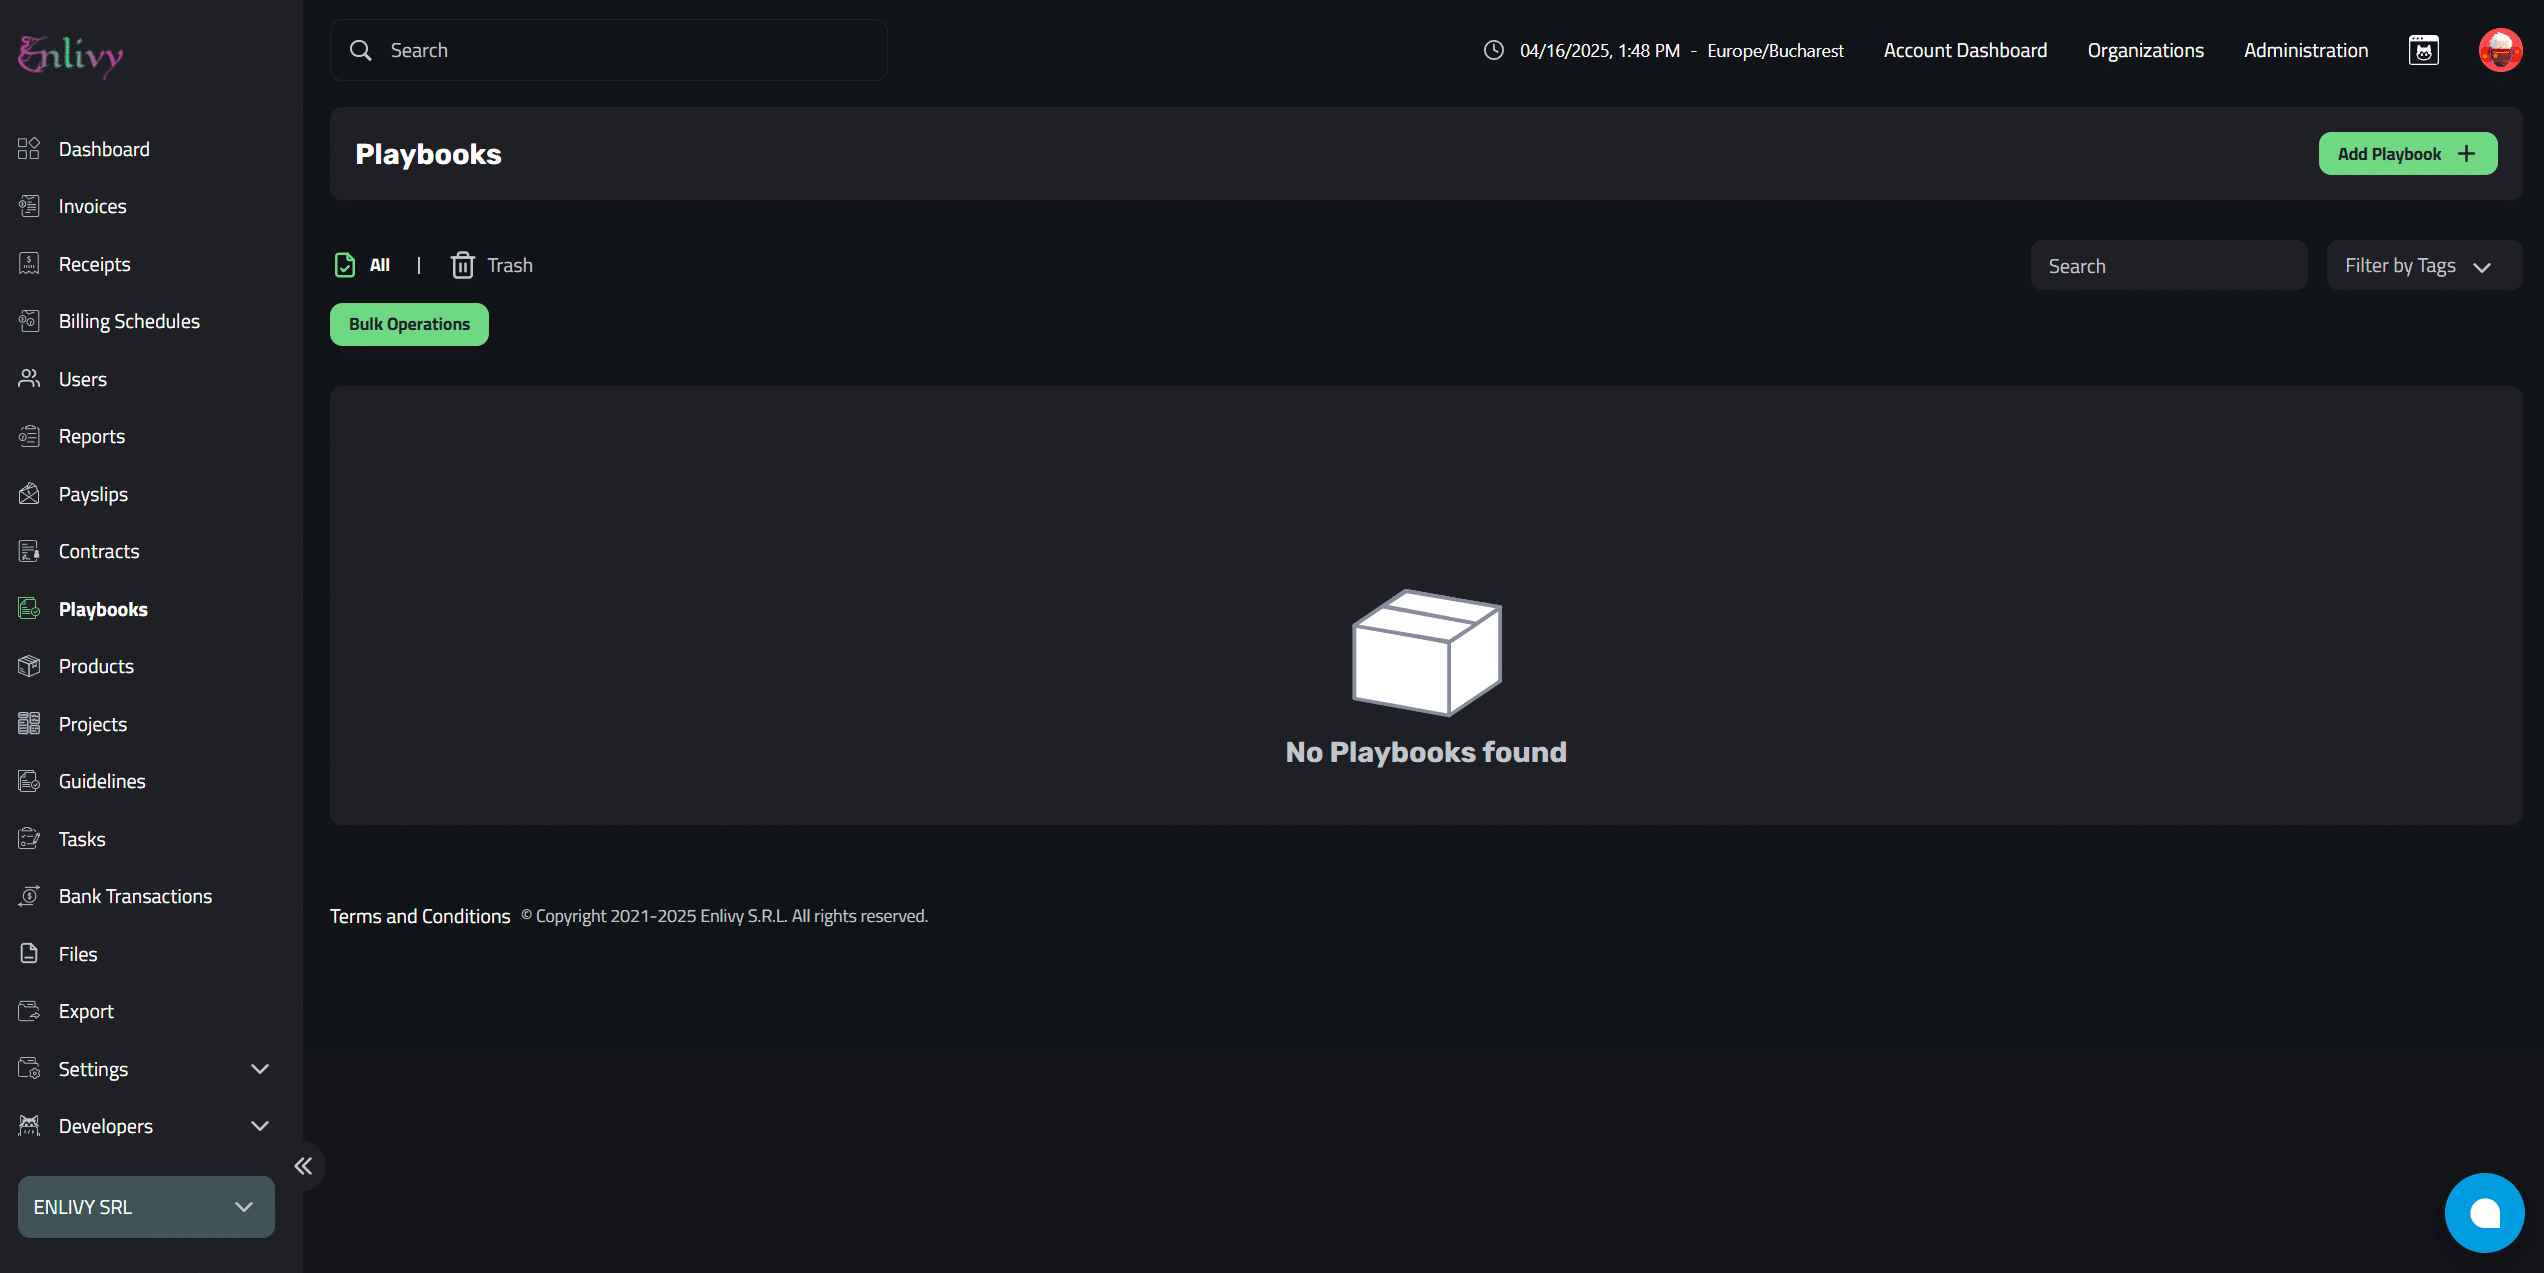
Getting to the Playbook Dashboard
From the main left-side menu, click on Playbooks. This will take you to the Playbook Dashboard, where you can view all existing playbooks, manage them, or create a new one.
Here, you can view, add, delete, and modify existing playbooks.
This dashboard gives you full control over your playbooks, allowing you to manage them easily.
Playbooks Fields Explained
Playbook Details
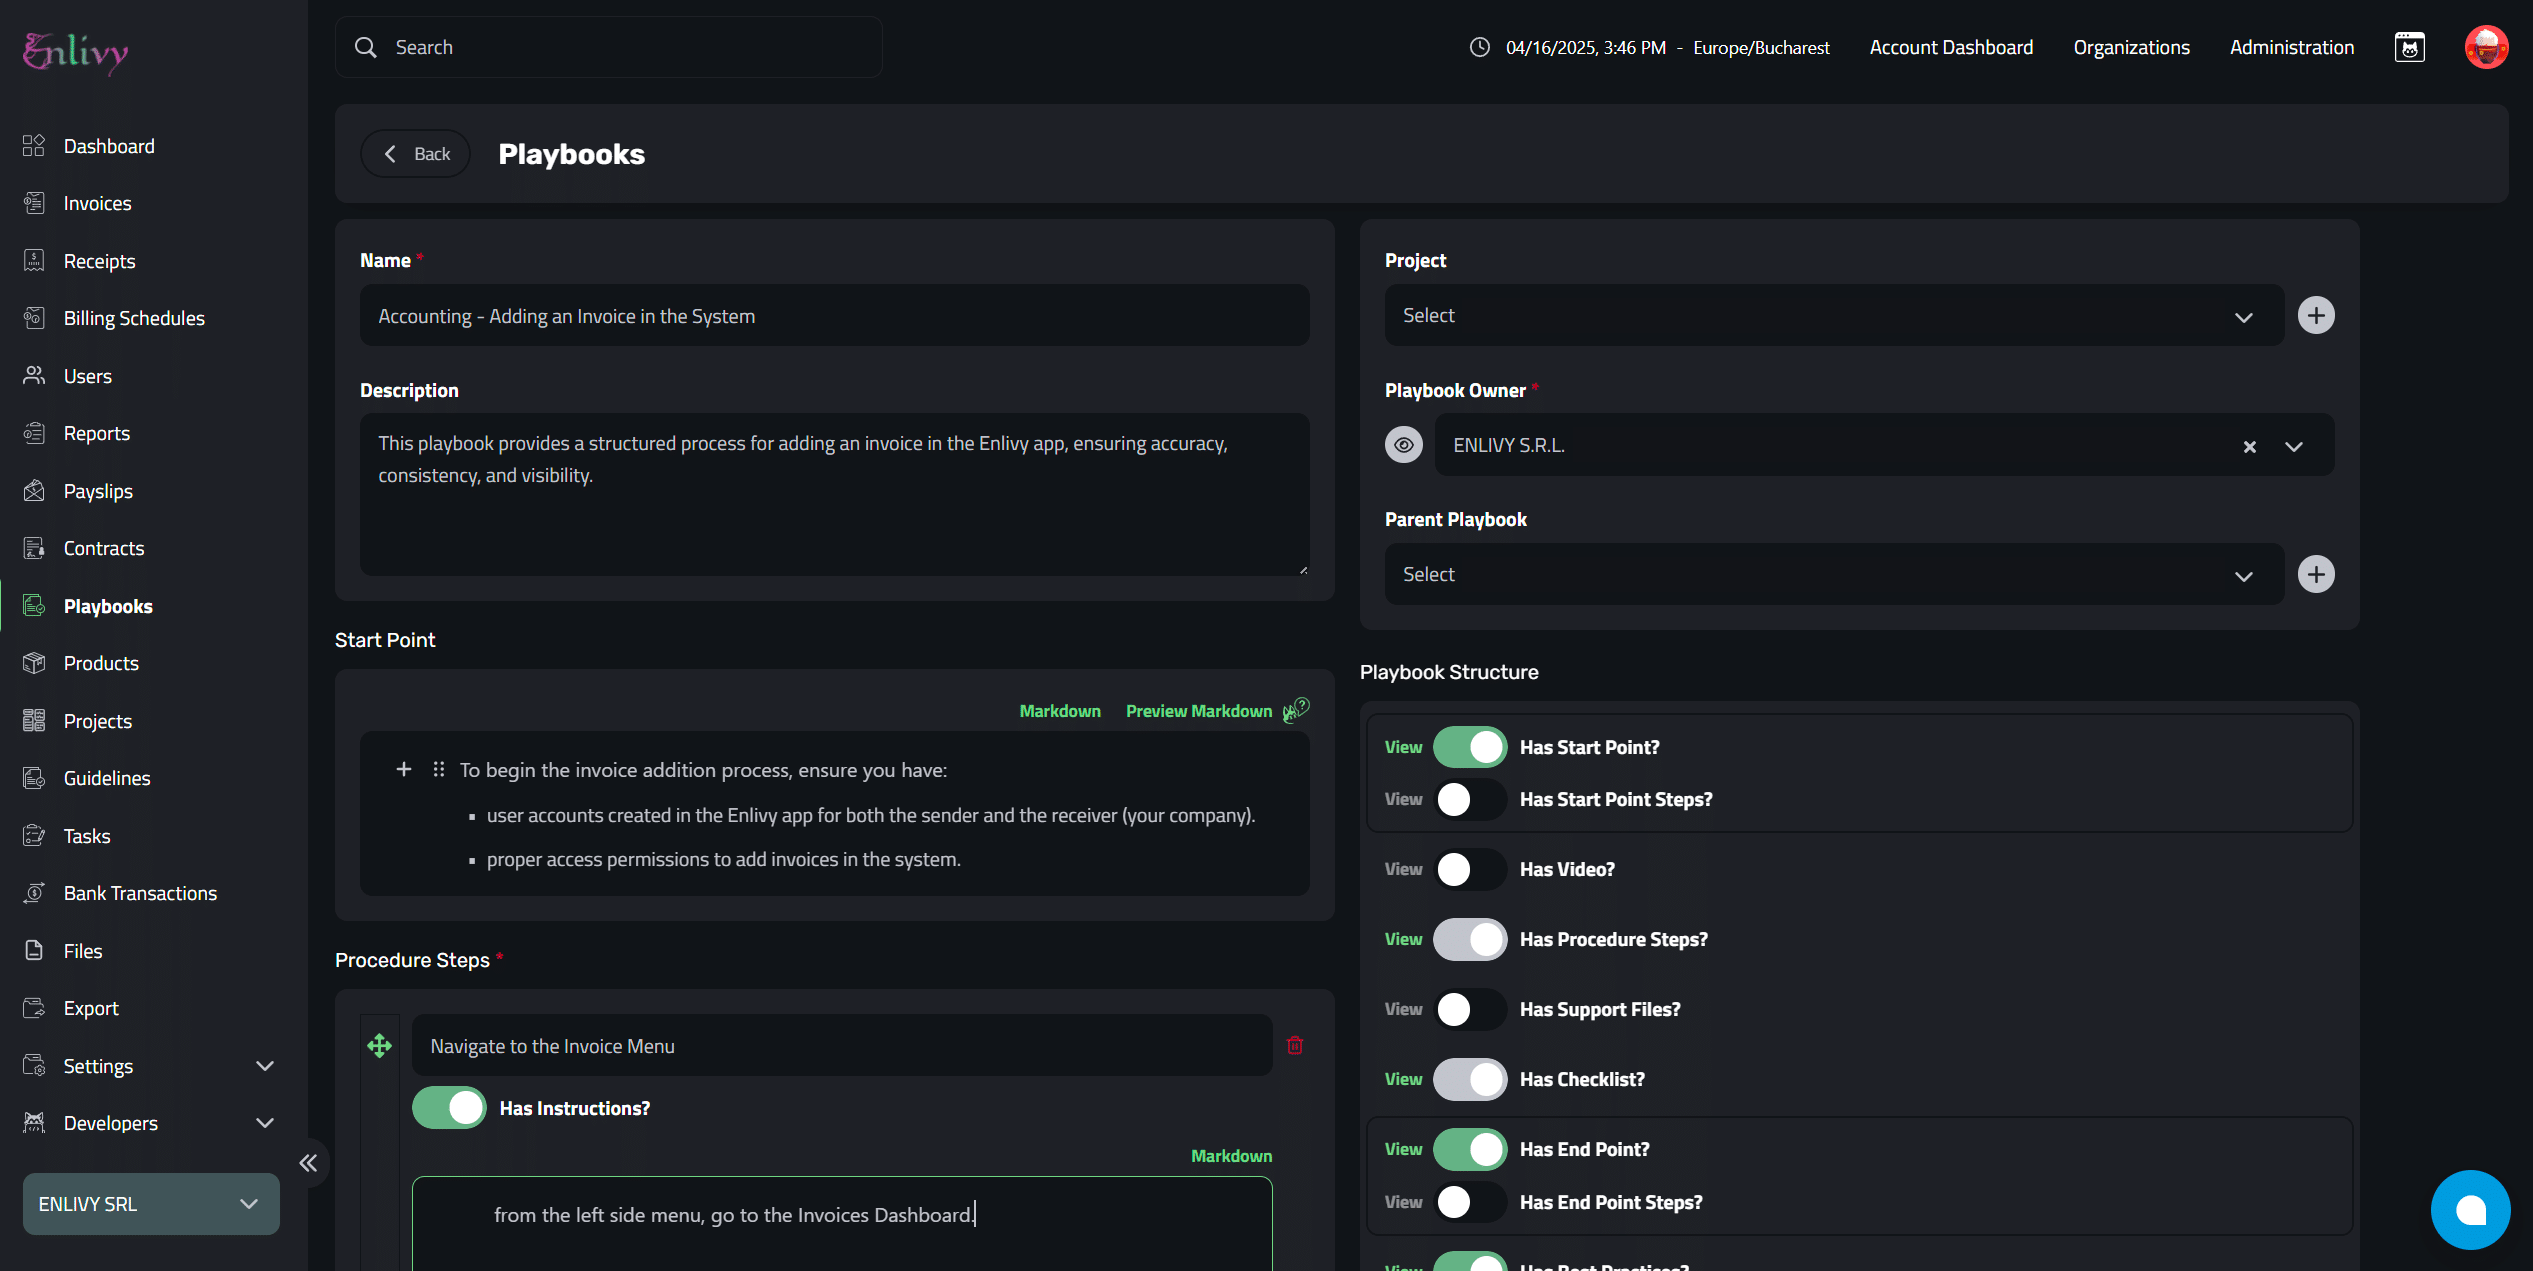
When creating or editing a playbook, you’ll need to fill in the following fields:
- Name: The name of your playbook (e.g., “Invoice Creation Process”).
- Description: A brief description outlining the purpose of the playbook (e.g., “This playbook outlines the steps to create an invoice for a client”).
- Project: Optionally, you can assign the playbook to a project. This helps organize your playbooks around specific projects (e.g., “New Product Launch”).
- Playbook Language: Select the locale (language) for the playbook, such as English or Romanian.
- Playbook Owner: Assign a user responsible for maintaining, creating, and updating the playbook. This ensures accountability for its accuracy.
- Parent Playbook: If this playbook is part of a larger set or hierarchy of procedures, you can select a parent playbook. This helps group similar processes together.
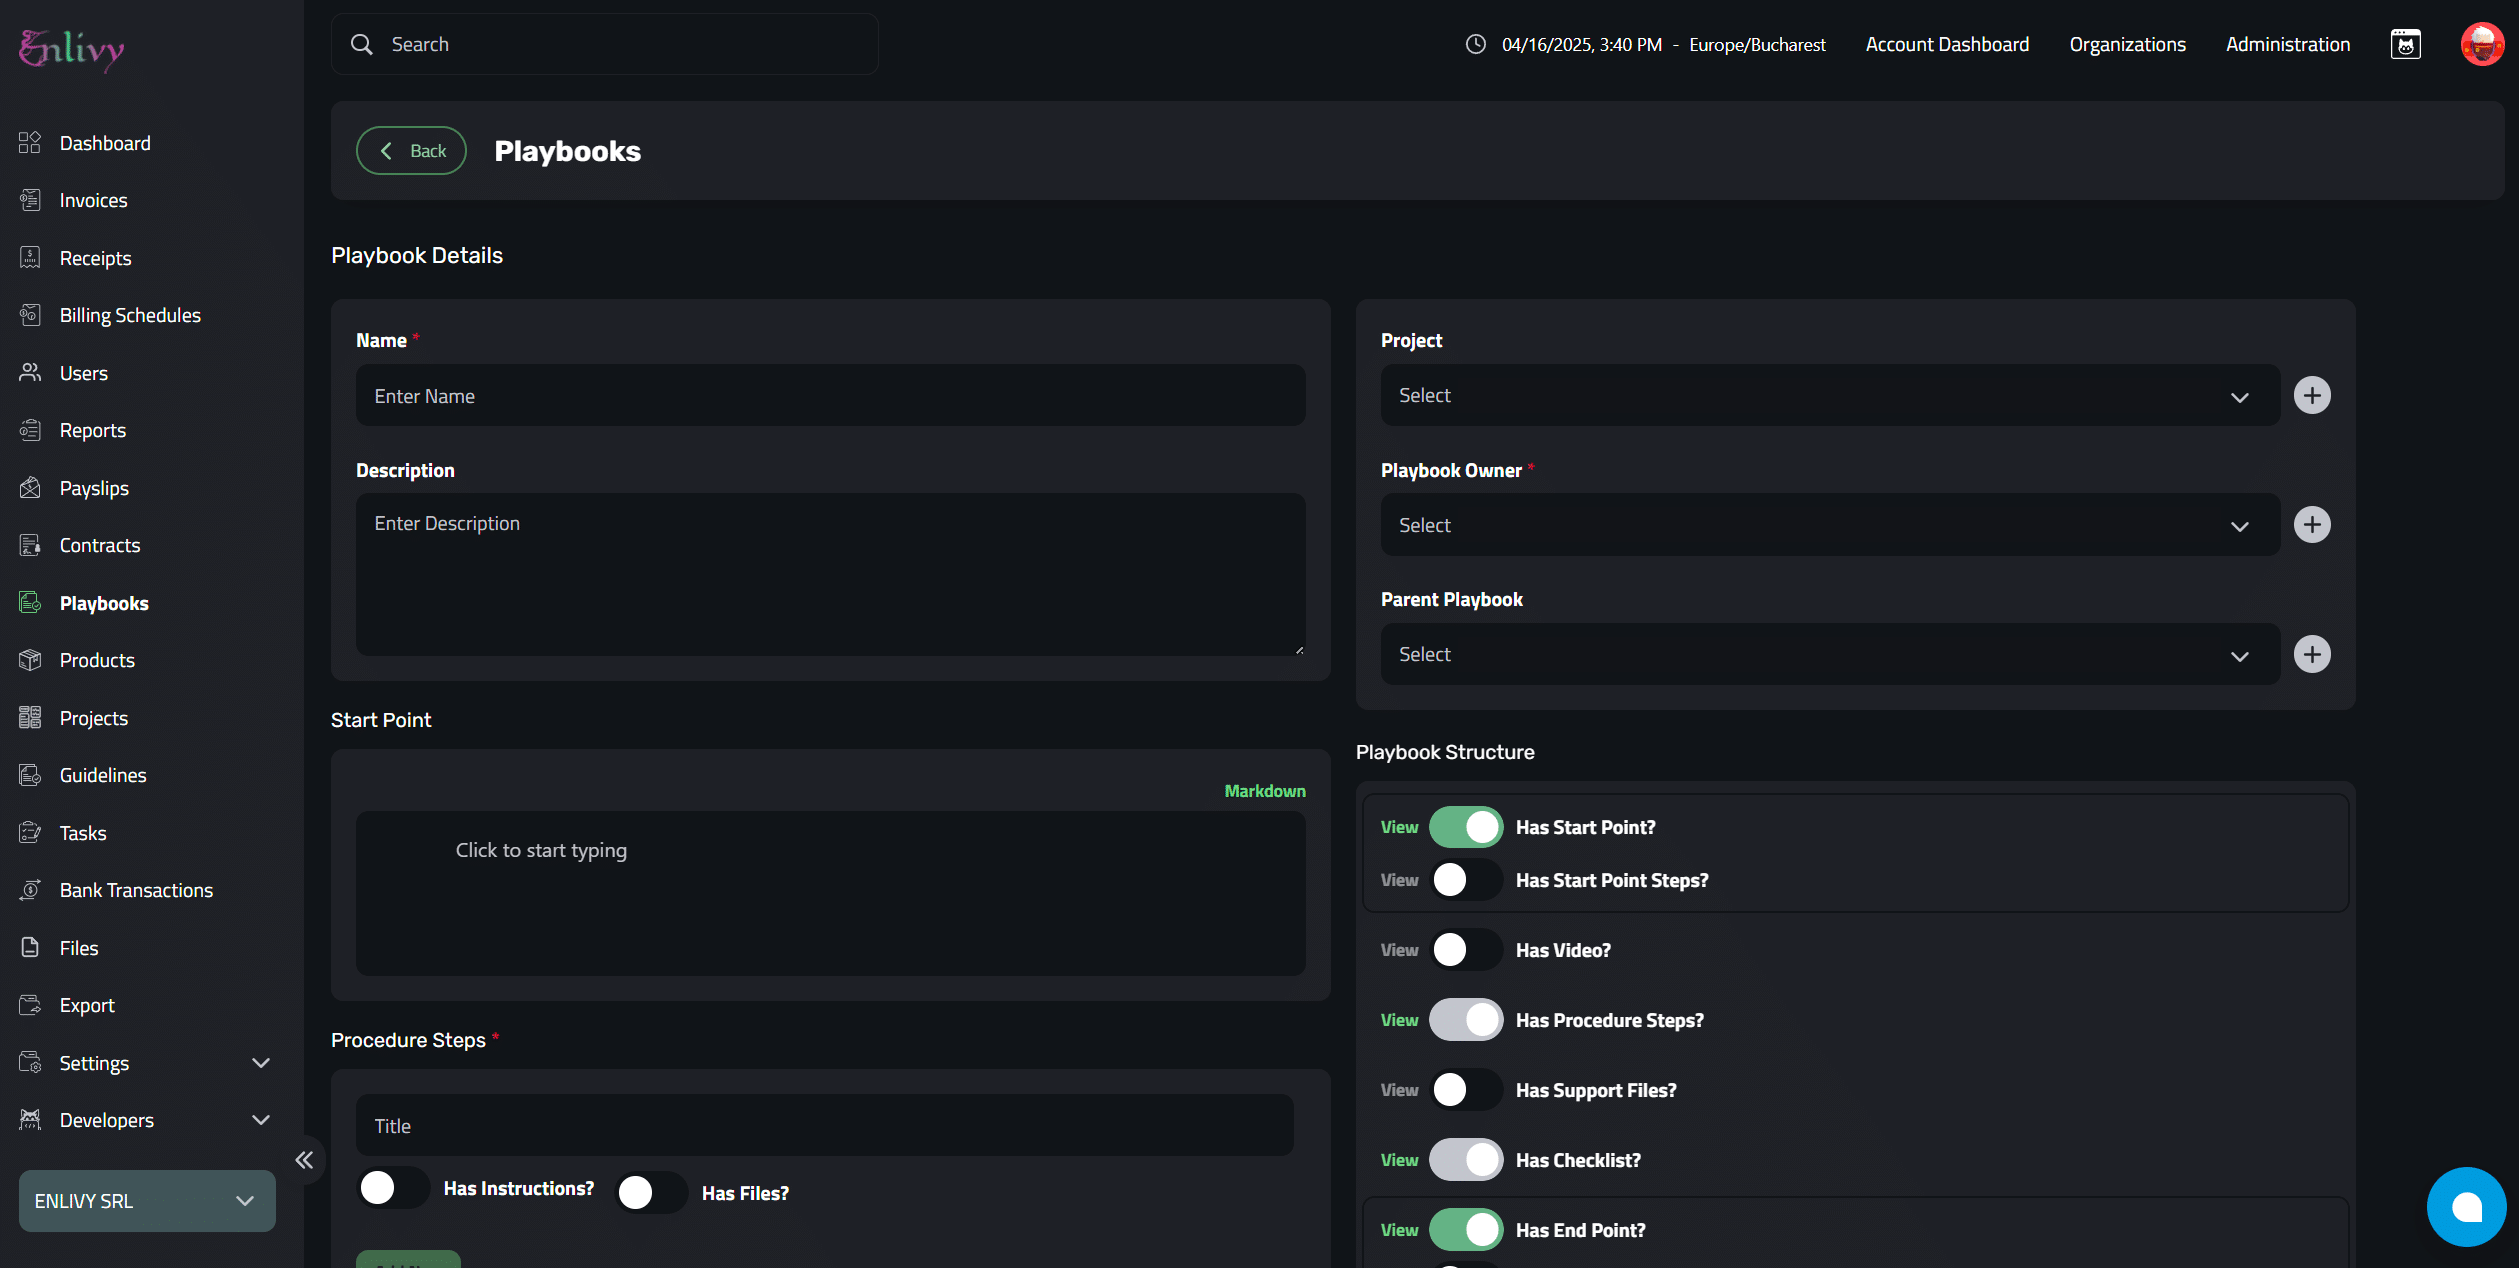
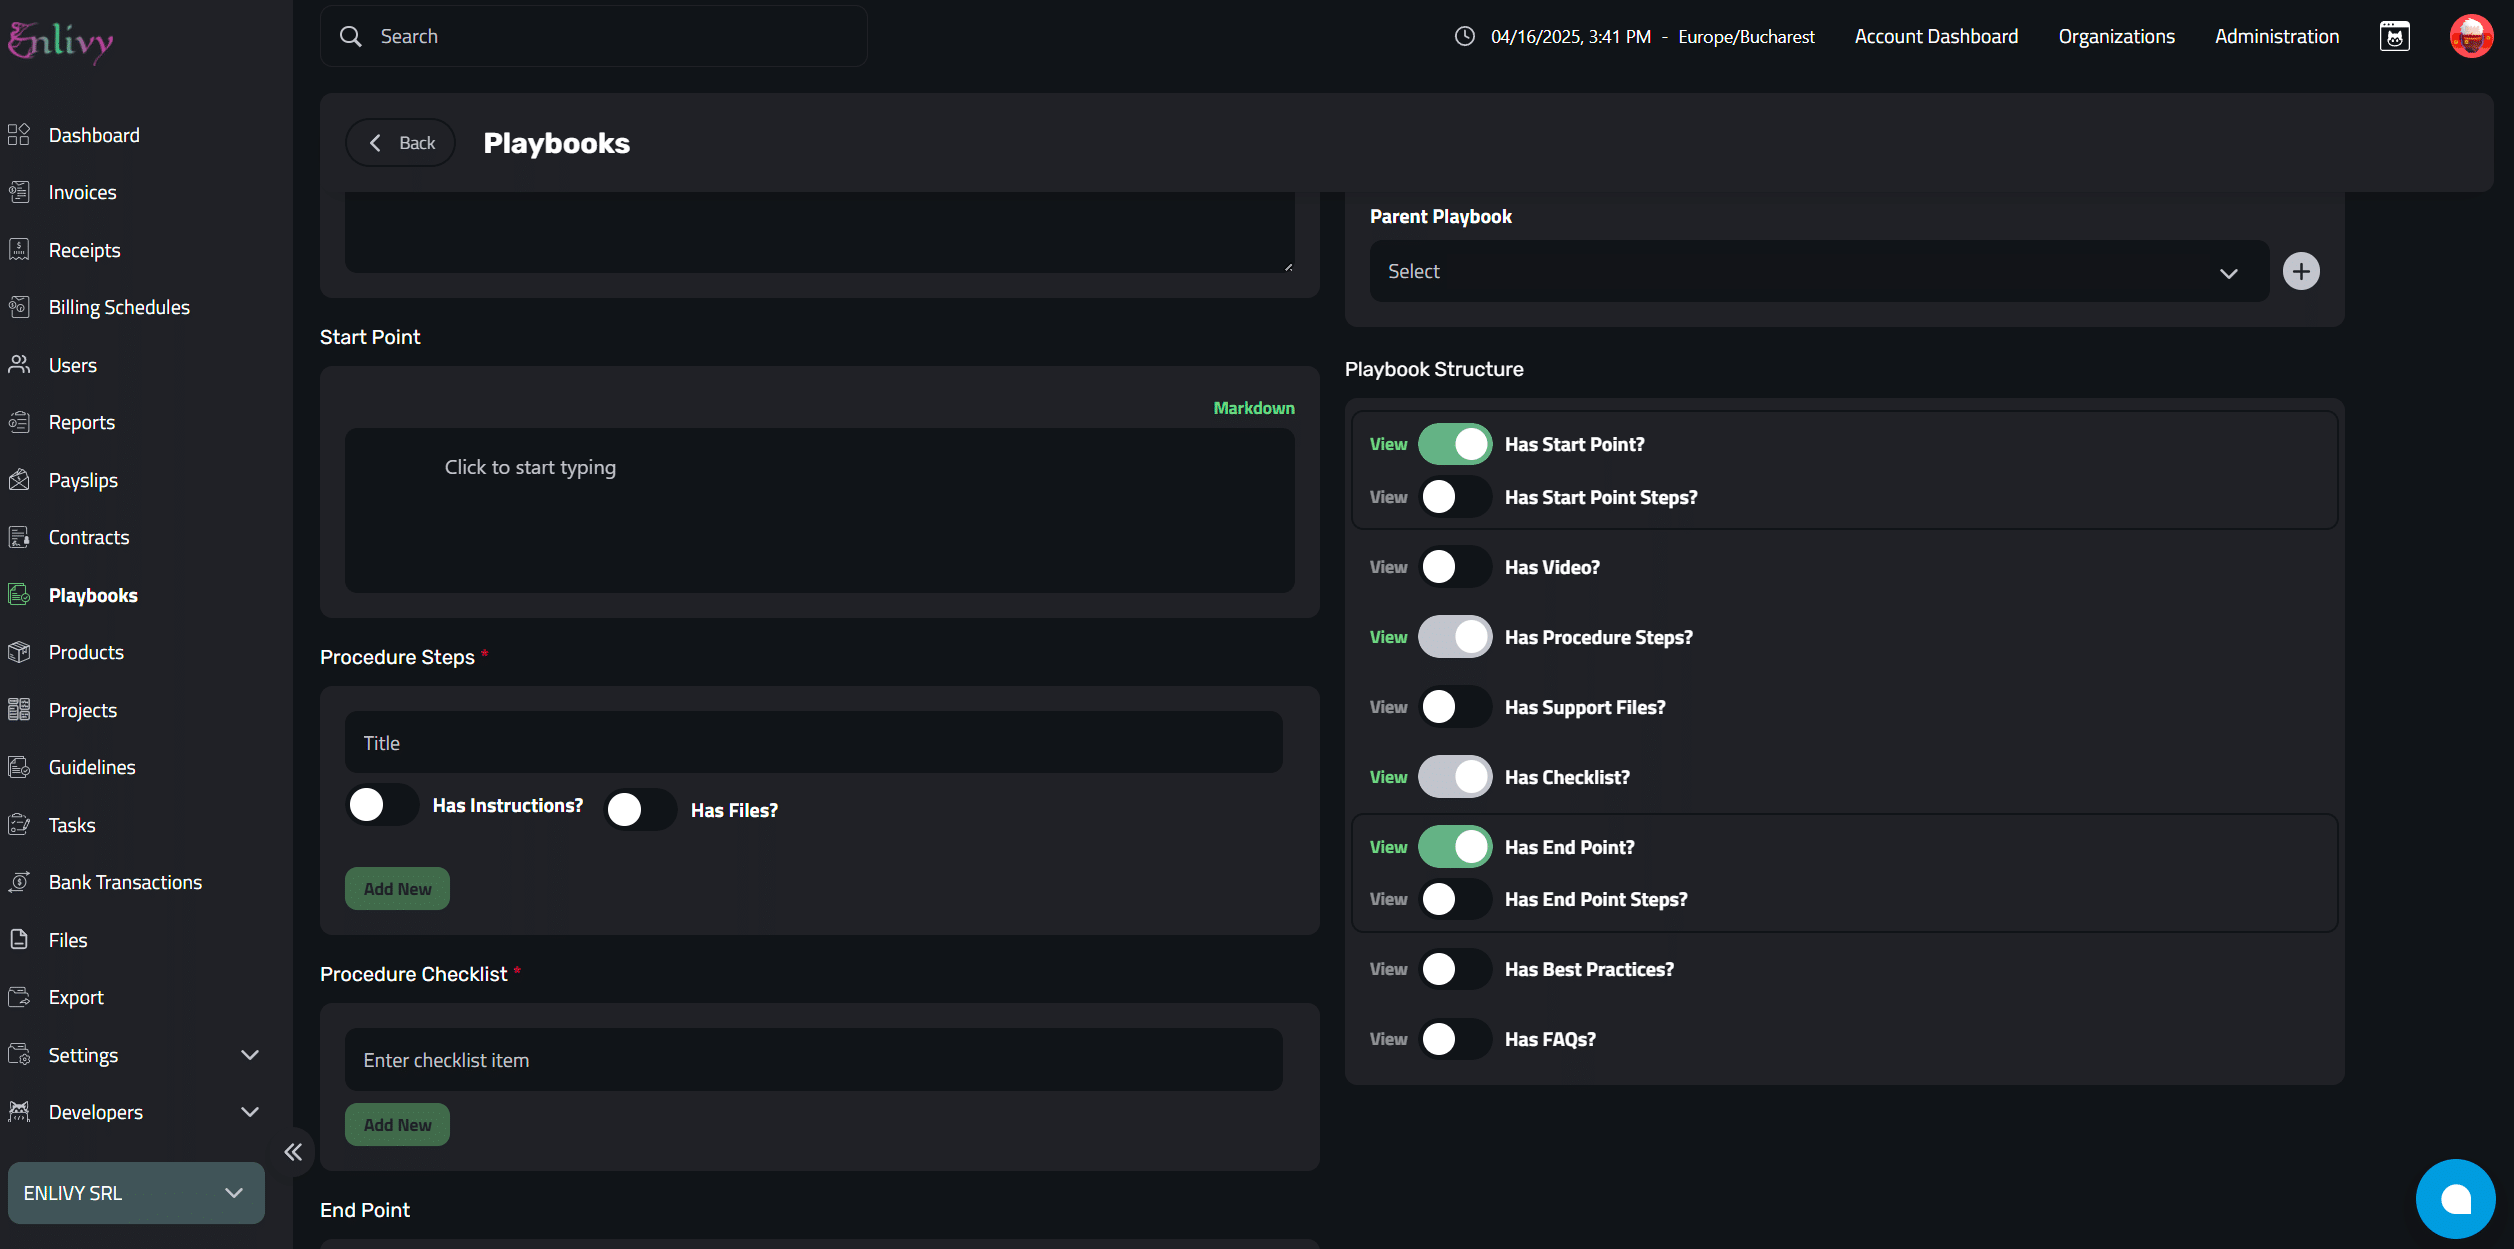
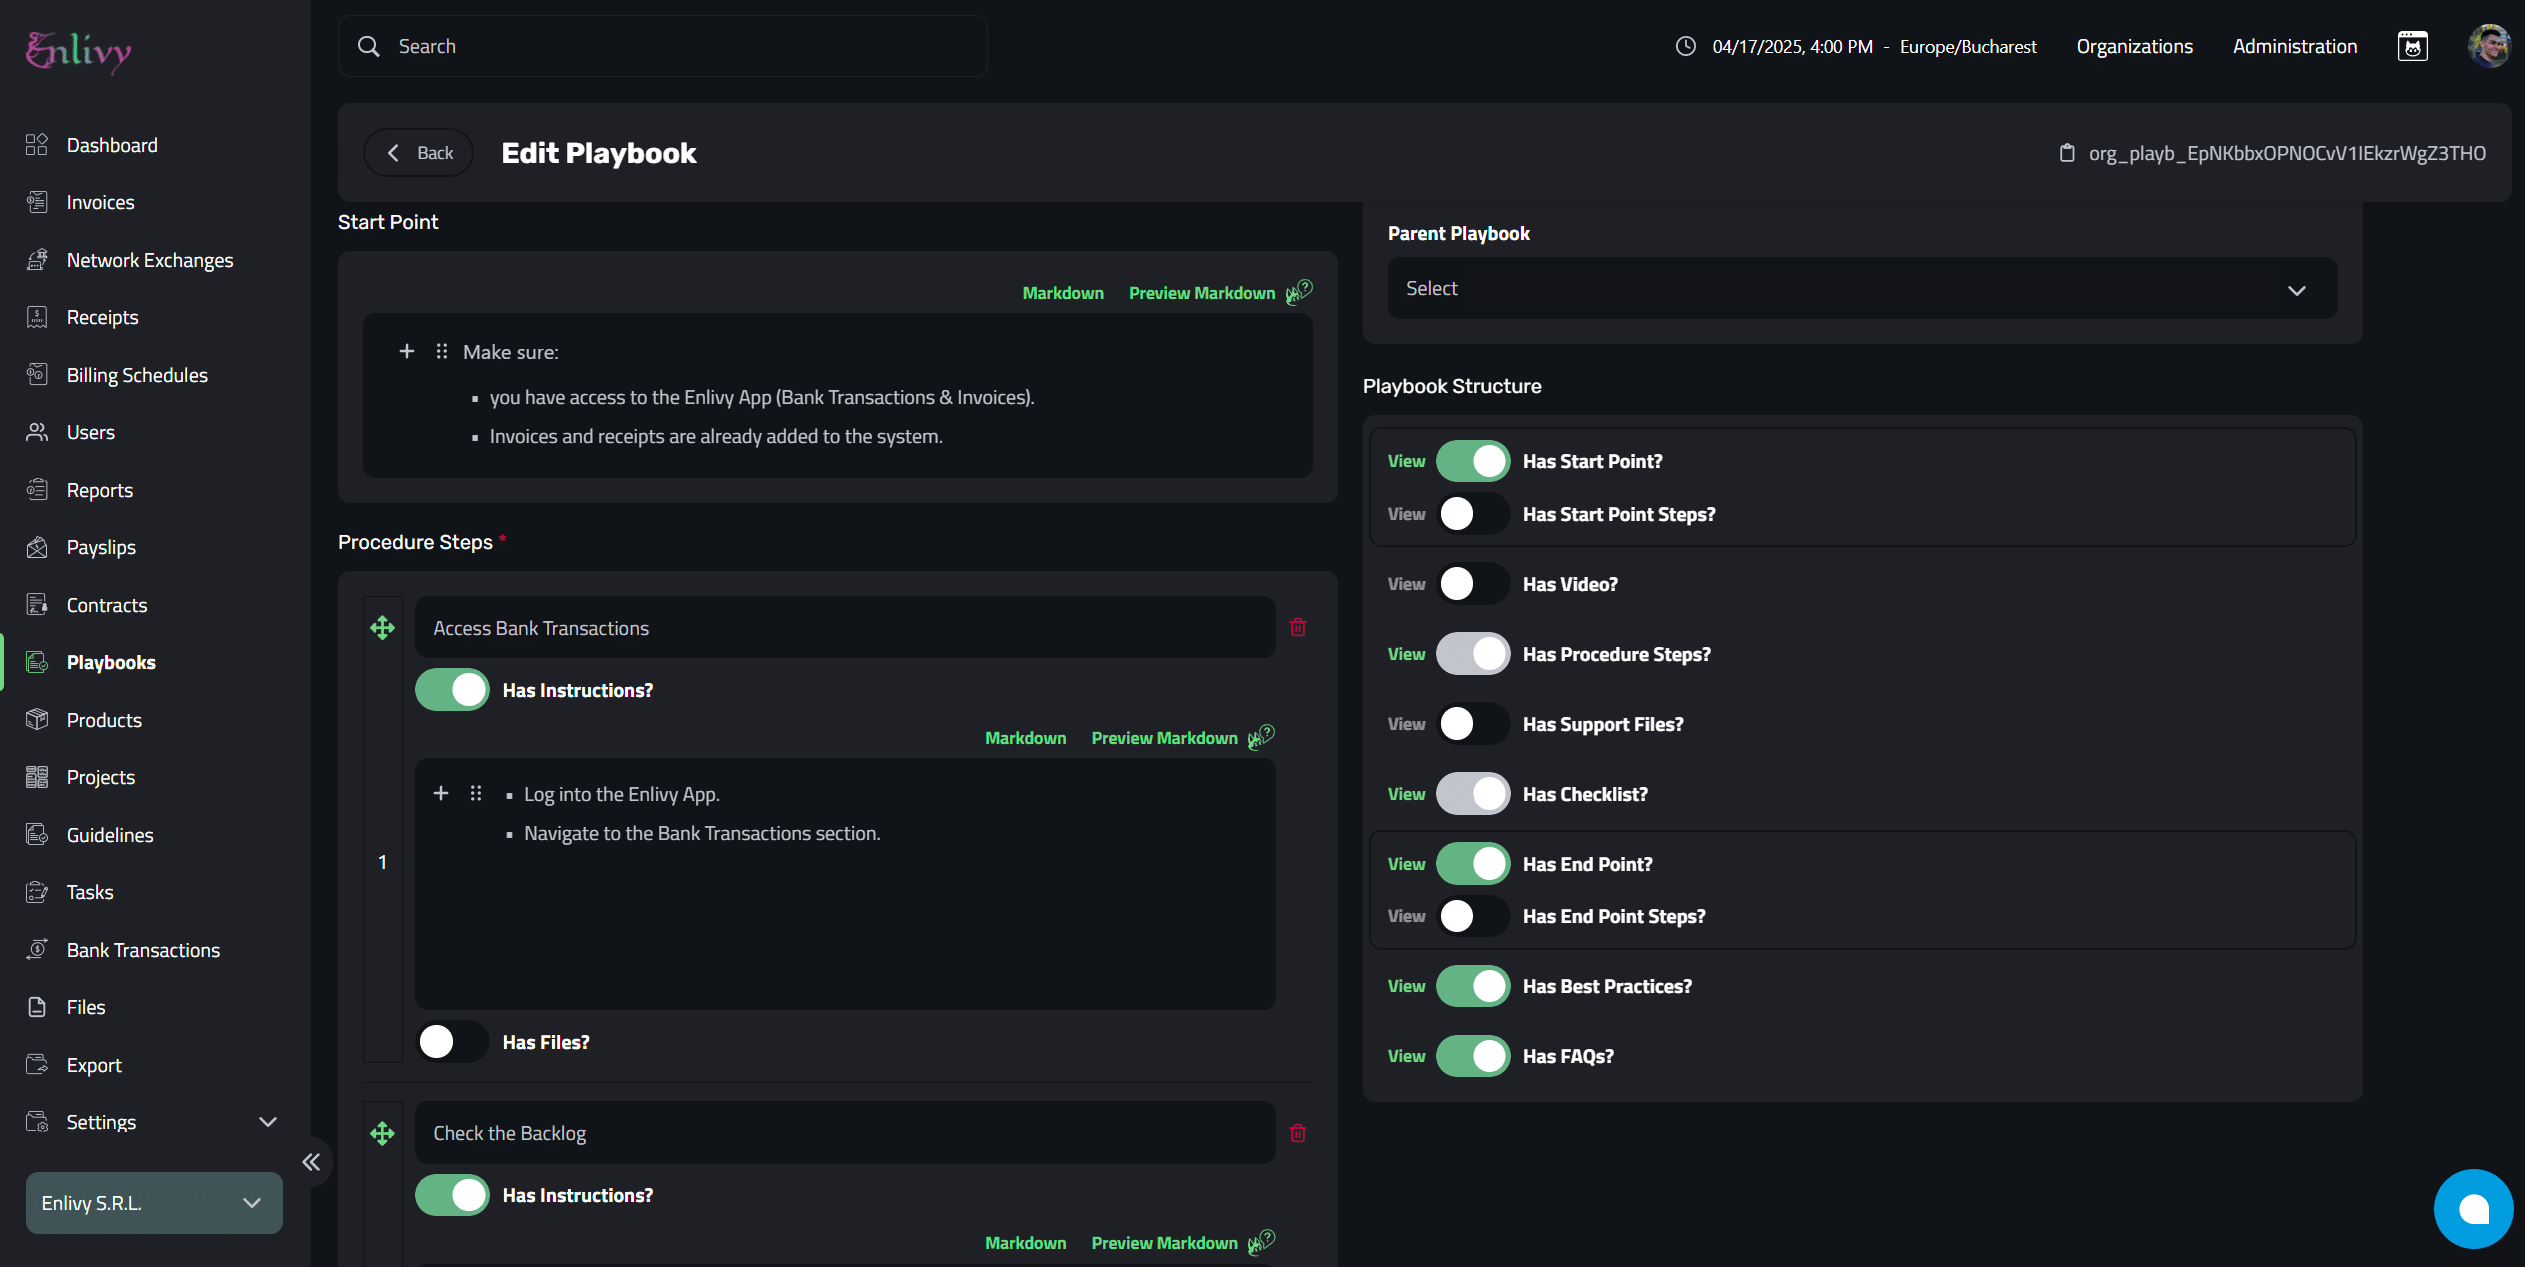
Playbook Structure
The structure of your playbook is essential for organizing the content effectively. Based on your selections, the available fields will change to match the type of playbook you’re creating.
The following boxes can be checked or unchecked to customize the playbook’s structure:
- Has Start Point: Check if the playbook has a starting point.
- Has Start Point Steps: If your playbook has a starting point, check this to define the steps at the beginning of the process.
- Has Video?: Check if the procedure/playbook includes a video that can be attached.
- Has Procedure Steps: Check if the playbook includes detailed procedure steps.
- Has Support Files?: Check if there are any files (documents, images, etc.) that should be included for reference.
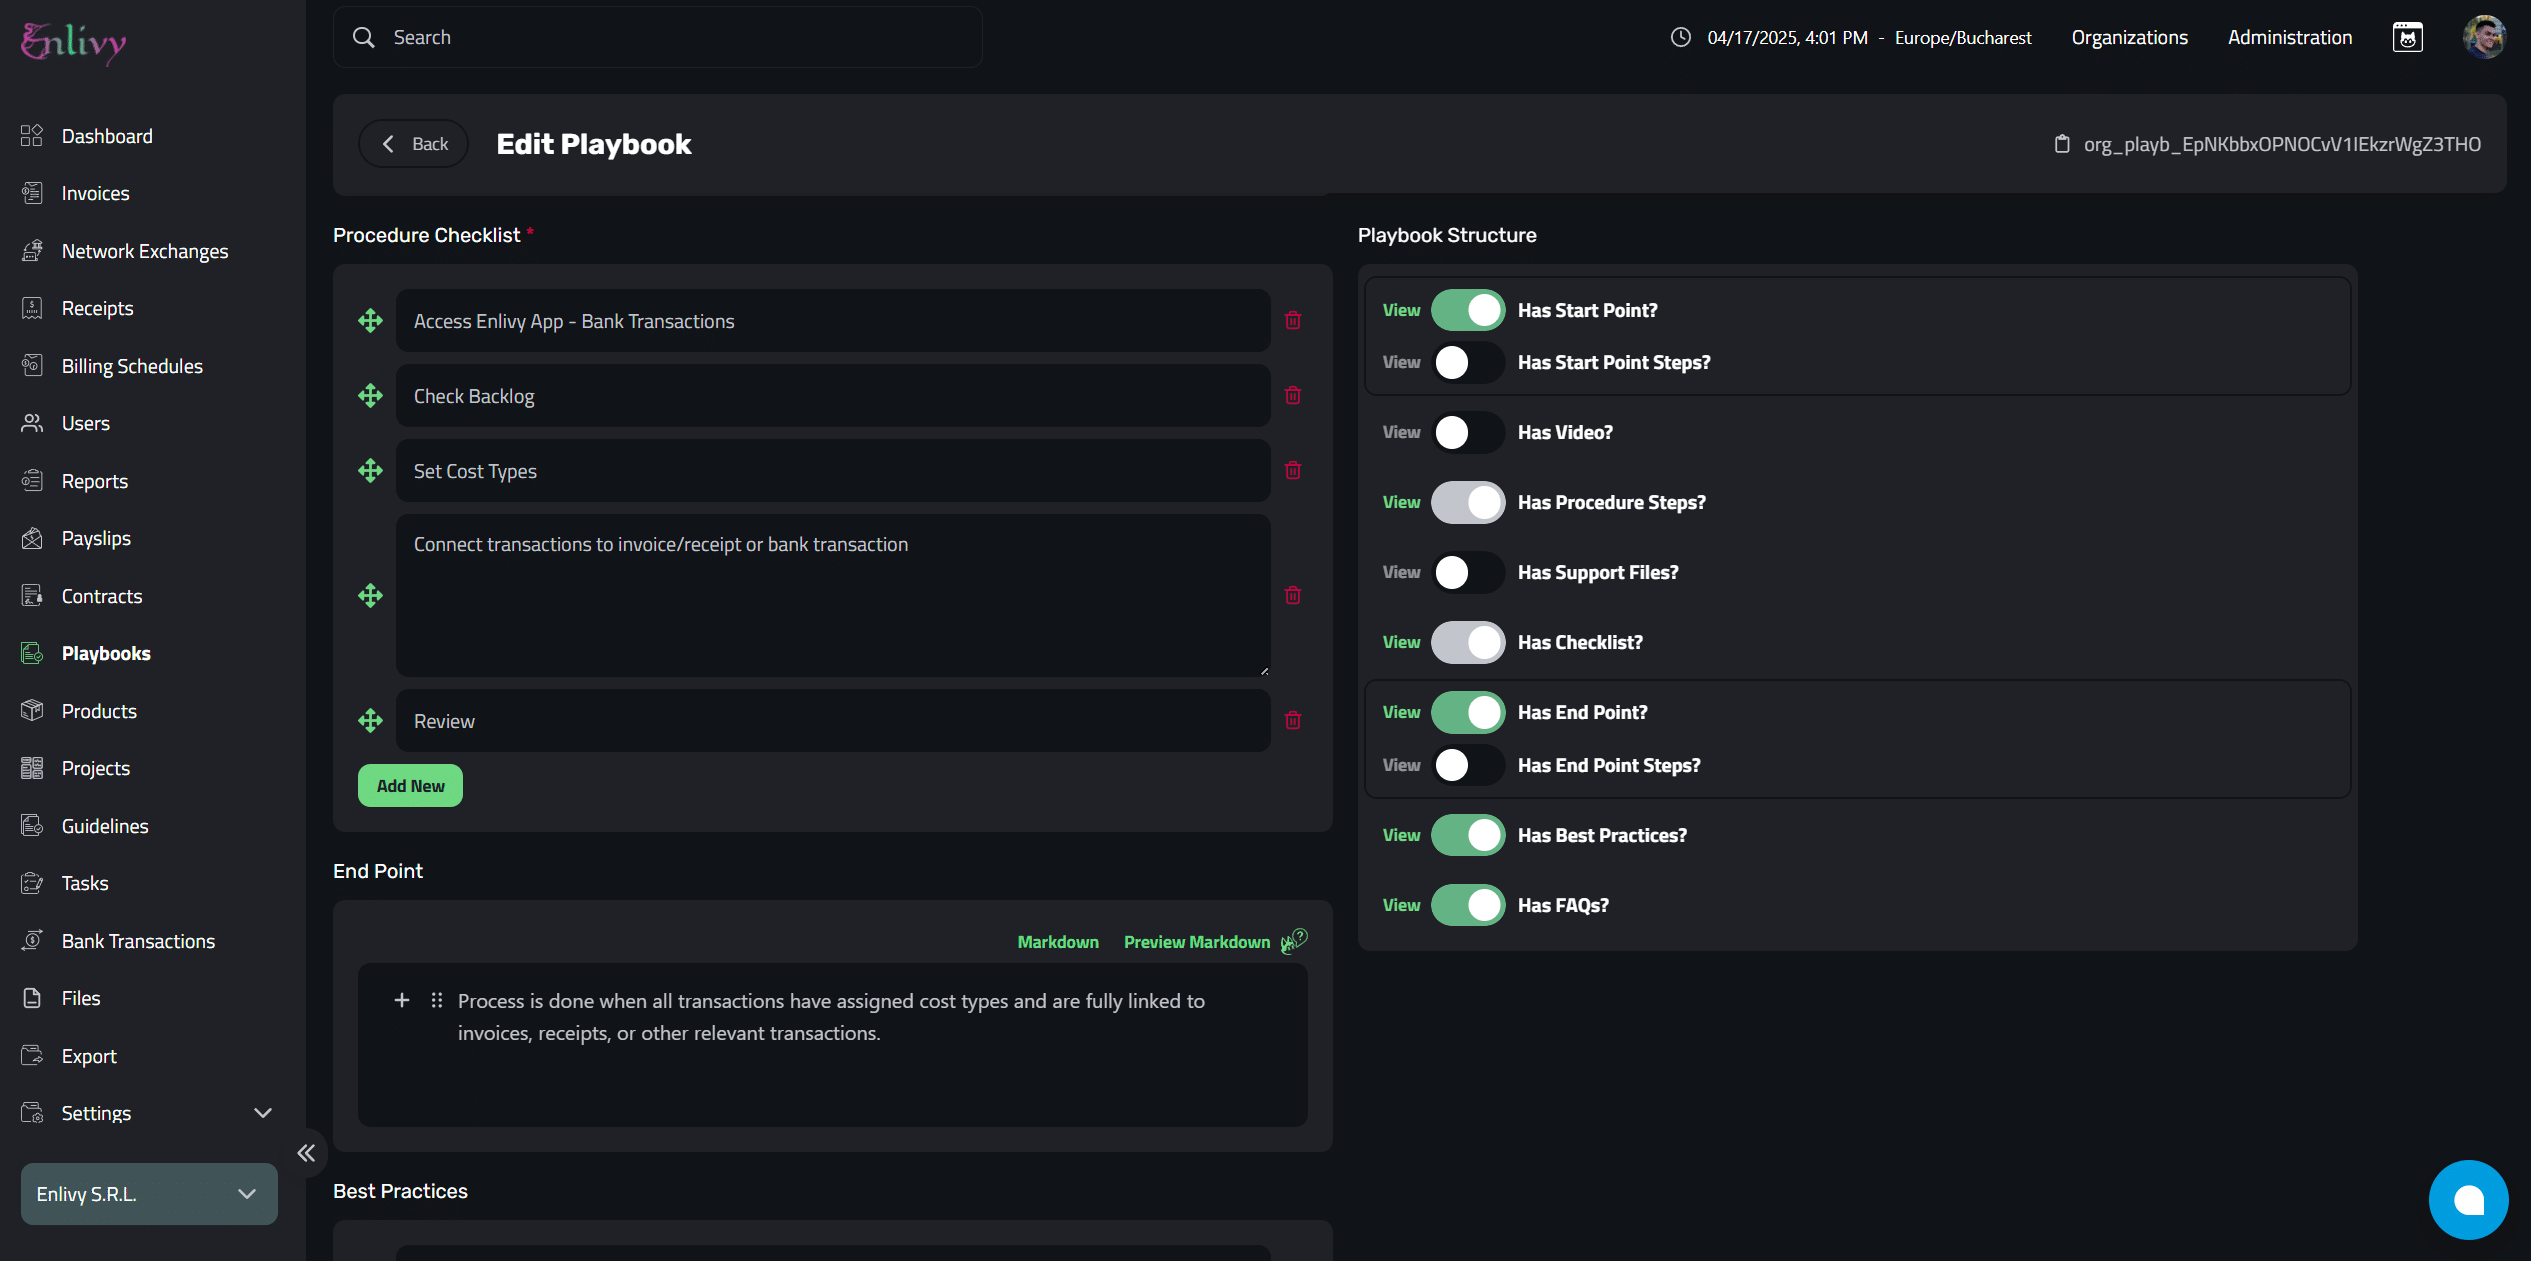
- Has Checklist?: Check if a checklist is required as part of the procedure.
- Has End Point: Check if the playbook has an endpoint that marks the end of the process.
- Has Endpoint Steps: If there is an endpoint, check this to include the steps to close the playbook.
- Has Best Practices: Check if the playbook includes best practices to follow.
- Has FAQ: Check if the playbook includes frequently asked questions (FAQ) to address common queries or concerns.
By using these settings, you can create a highly customized playbook with a clear, structured format. The fields you need to fill in will adjust dynamically based on the options you choose.
Playbook Structure: Customizing Your Playbook
Enlivy provides a customizable structure for creating playbooks. The options you select here will change the fields and the way the playbook is structured. This ensures that each playbook fits its purpose and is structured correctly.
You can choose from the following options when setting up the structure of your playbook:
- Has Start Point:
This box is checked if your playbook starts with a specific starting point or task. For instance, in a playbook about “Hiring New Employees,” the start point could be “Job Posting” or “Candidate Screening.” If the playbook has a clear starting task or process, you’ll want to check this. - Has Start Point Steps:
If you’ve checked “Has Start Point,” this option will allow you to define the specific steps that should be followed at the start of the procedure. These steps could outline the initial actions, such as gathering necessary documentation or initiating specific processes. - Has Video?:
If your playbook includes a training video, demonstration, or visual guide, check this box. Enlivy allows you to add video content, making the procedure more engaging and easier to follow for users who benefit from visual instruction. - Has Procedure Steps:
This is the core of your playbook. If your playbook outlines a series of steps or actions to be taken, check this box. It means your playbook will contain a structured process with actionable tasks that the user should follow in sequence. - Has Support Files?:
If the playbook requires any supporting documents, such as PDFs, templates, or external resources, check this box. This could include things like forms, checklists, legal documents, or any other files that are needed to complete the procedure. - Has Checklist?:
If the playbook requires a checklist to ensure that all tasks or steps are completed, check this box. Checklists help users track their progress and ensure nothing is overlooked. For example, in a playbook about “Setting Up New Software,” a checklist could include tasks like “Install the software,” “Set up the account,” etc. - Has End Point:
This box is checked if your playbook has a defined end point. The end point marks the completion of the procedure. For example, in a playbook about “Processing an Invoice,” the endpoint could be “Invoice Sent to Customer” or “Payment Received.” - Has Endpoint Steps:
If you’ve checked “Has End Point,” you can define the specific actions or steps that need to be taken at the end of the procedure. These steps might involve closing tasks or reporting the completion of the process. - Has Best Practices:
This option is useful if your playbook includes recommendations for best practices or tips that can help users complete the process more efficiently. For example, in a “Sales Process” playbook, you might include best practices for following up with leads or handling customer objections. - Has FAQ:
Check this box if the playbook includes a list of frequently asked questions. FAQs help address common concerns or doubts that users may have while following the procedure. This is useful for clarifying any points of confusion and providing additional context or troubleshooting tips.
How These Settings Affect Your Playbook Fields
By selecting the appropriate options for your playbook’s structure, Enlivy will dynamically adjust the fields that are available for you to fill in.
For example, if you select “Has Procedure Steps,” you’ll be prompted to enter detailed instructions for each step. If you choose “Has Video,” you’ll be able to upload and embed a video within the playbook.
The customizable structure ensures that the playbook meets the needs of your team and provides the relevant information in the most useful format possible.
This flexibility allows you to create highly detailed, interactive playbooks tailored to your organization’s workflows.
Revisions Feature
Every time a playbook is edited, a revision is saved automatically. The Revisions feature keeps a detailed list of all changes, including:
- The user who made each revision
- The date and time of the change
You can click on any revision entry to open the Revisions tab, where you’ll see the full history of edits made to the playbook. This ensures transparency and allows you to track or revert changes when needed.
Example of a Playbook Structure and Content
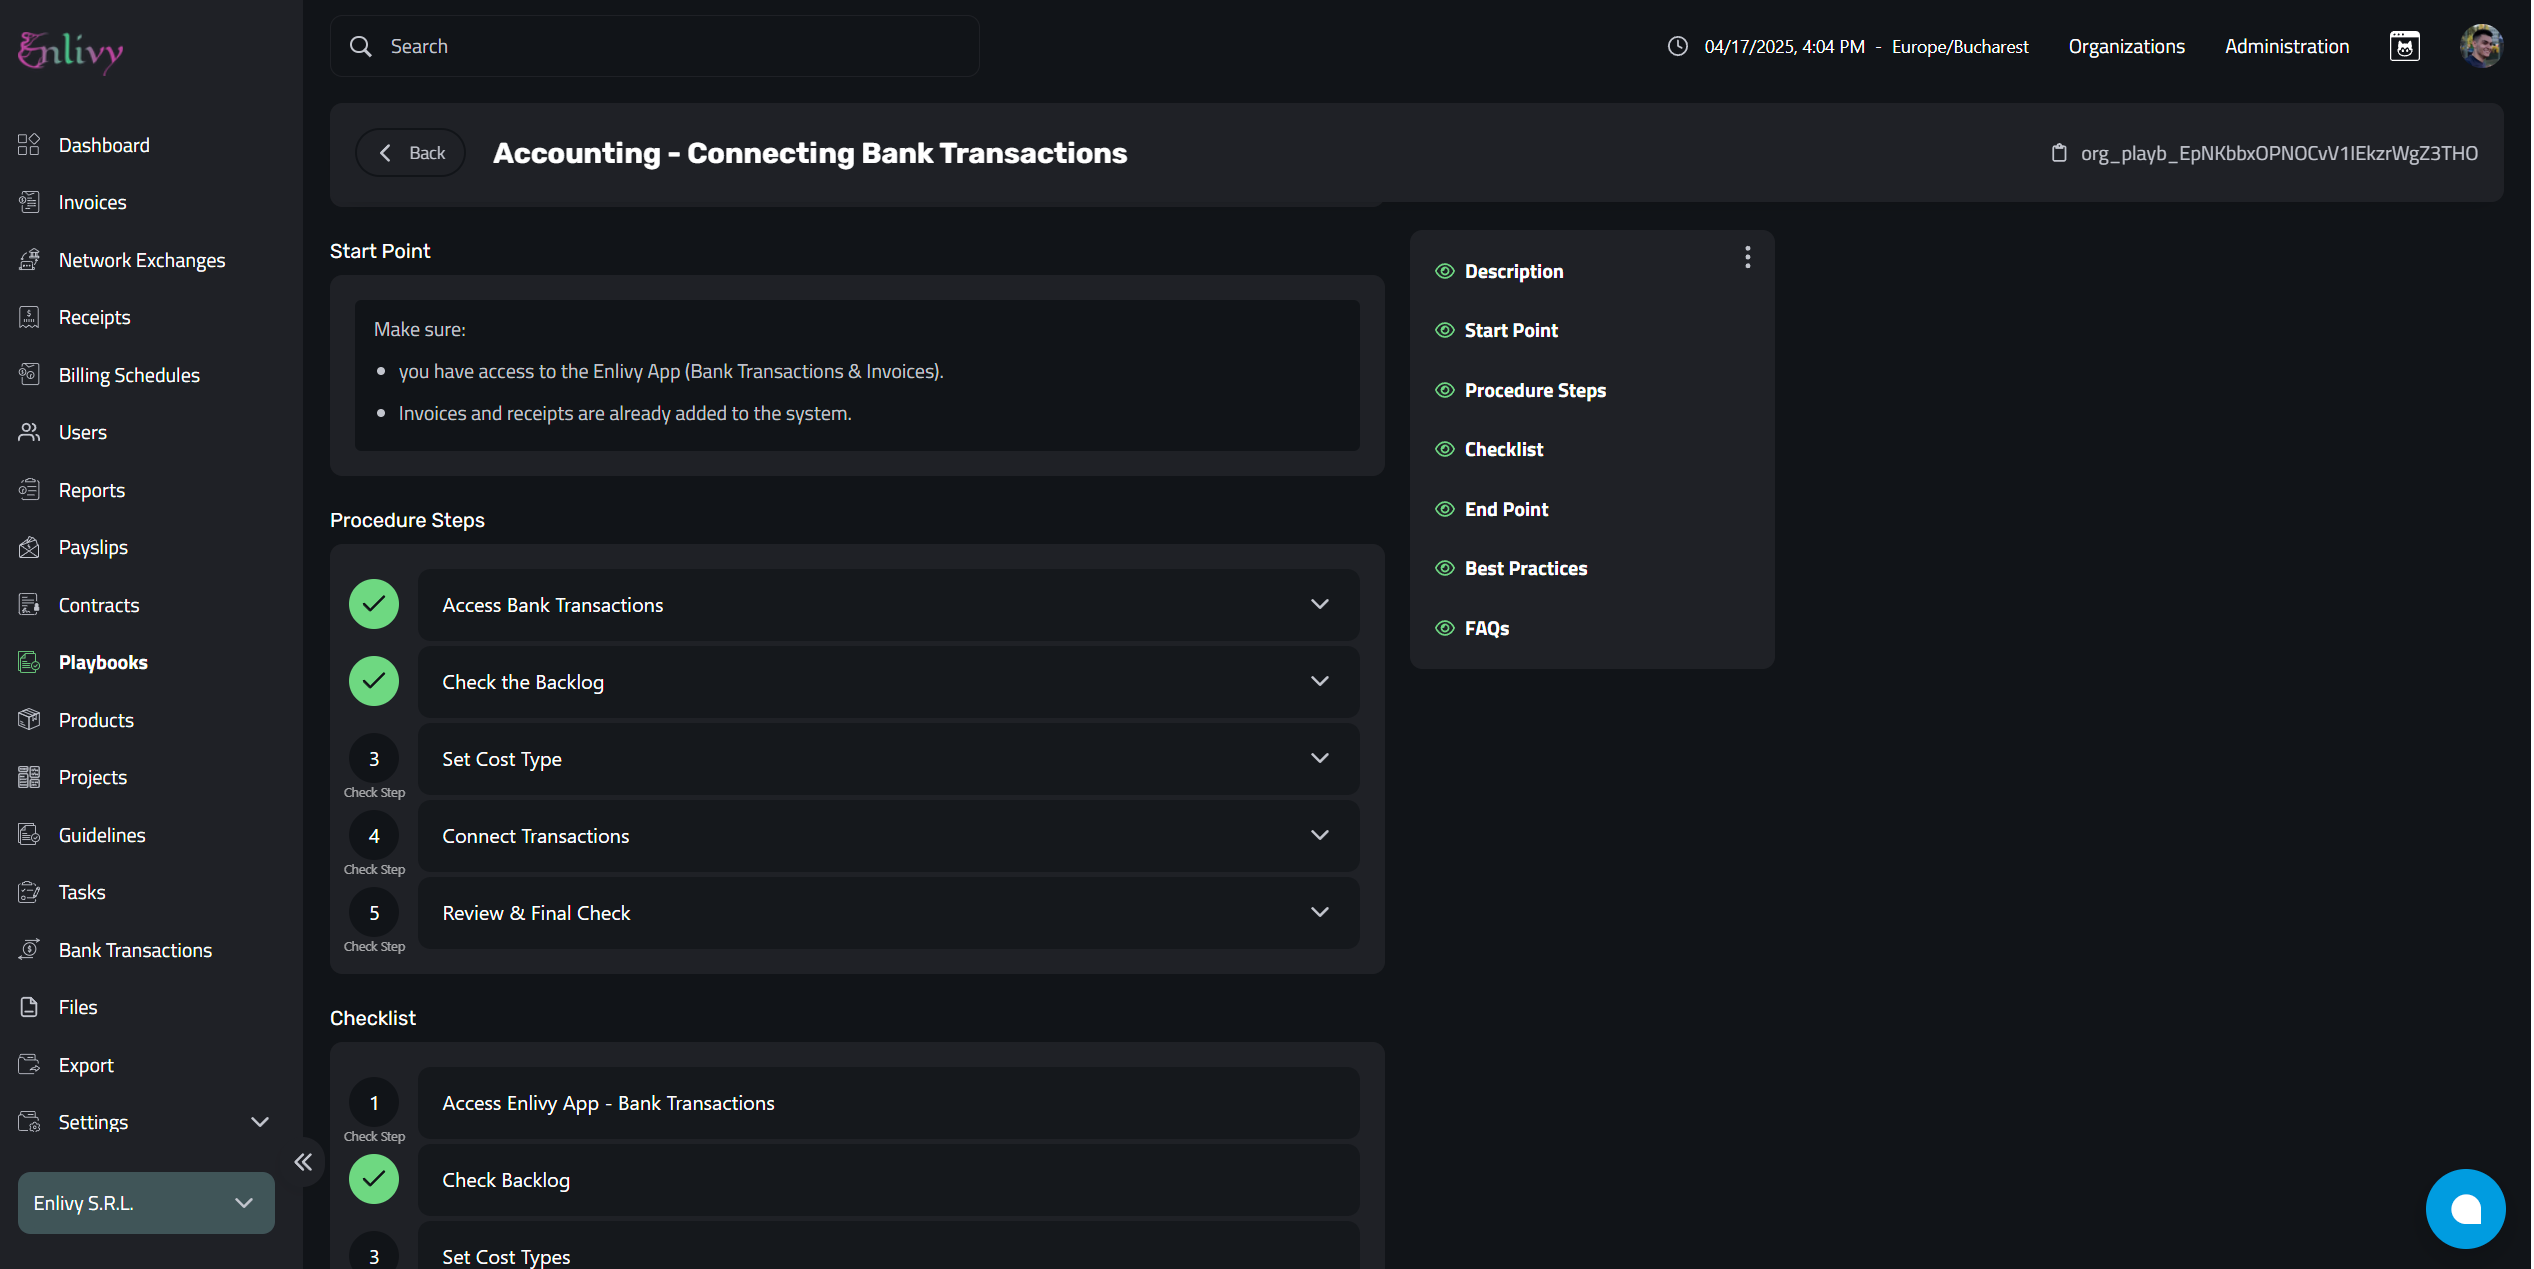
In the upcoming screenshots, we’ll walk you through an example of a playbook, showcasing its structure and content. After that, we’ll show you how the playbook looks in view mode, giving you a complete understanding of how it appears once it’s finalized.
In the next screenshot, you’ll see how the playbook I created appears in view mode. This is how your colleagues will see the procedure and begin following it.
Additionally, checklist and step items are clickable, making it easy to track progress as they complete each task.