Creating an Internal Invoice
In this guide, we’ll walk you through how quick and easy it is to create an invoice for one of your products or services already added in Enlivy.
We’ll demonstrate the full process of invoicing a customer, step by step, so you can confidently generate and send professional invoices in just a few clicks.
Navigating to the Invoice Dashboard
To begin, log into your Enlivy account. From the left-hand menu, navigate to Invoices. This will take you to the Invoices Dashboard, where you can manage all your invoicing activities.
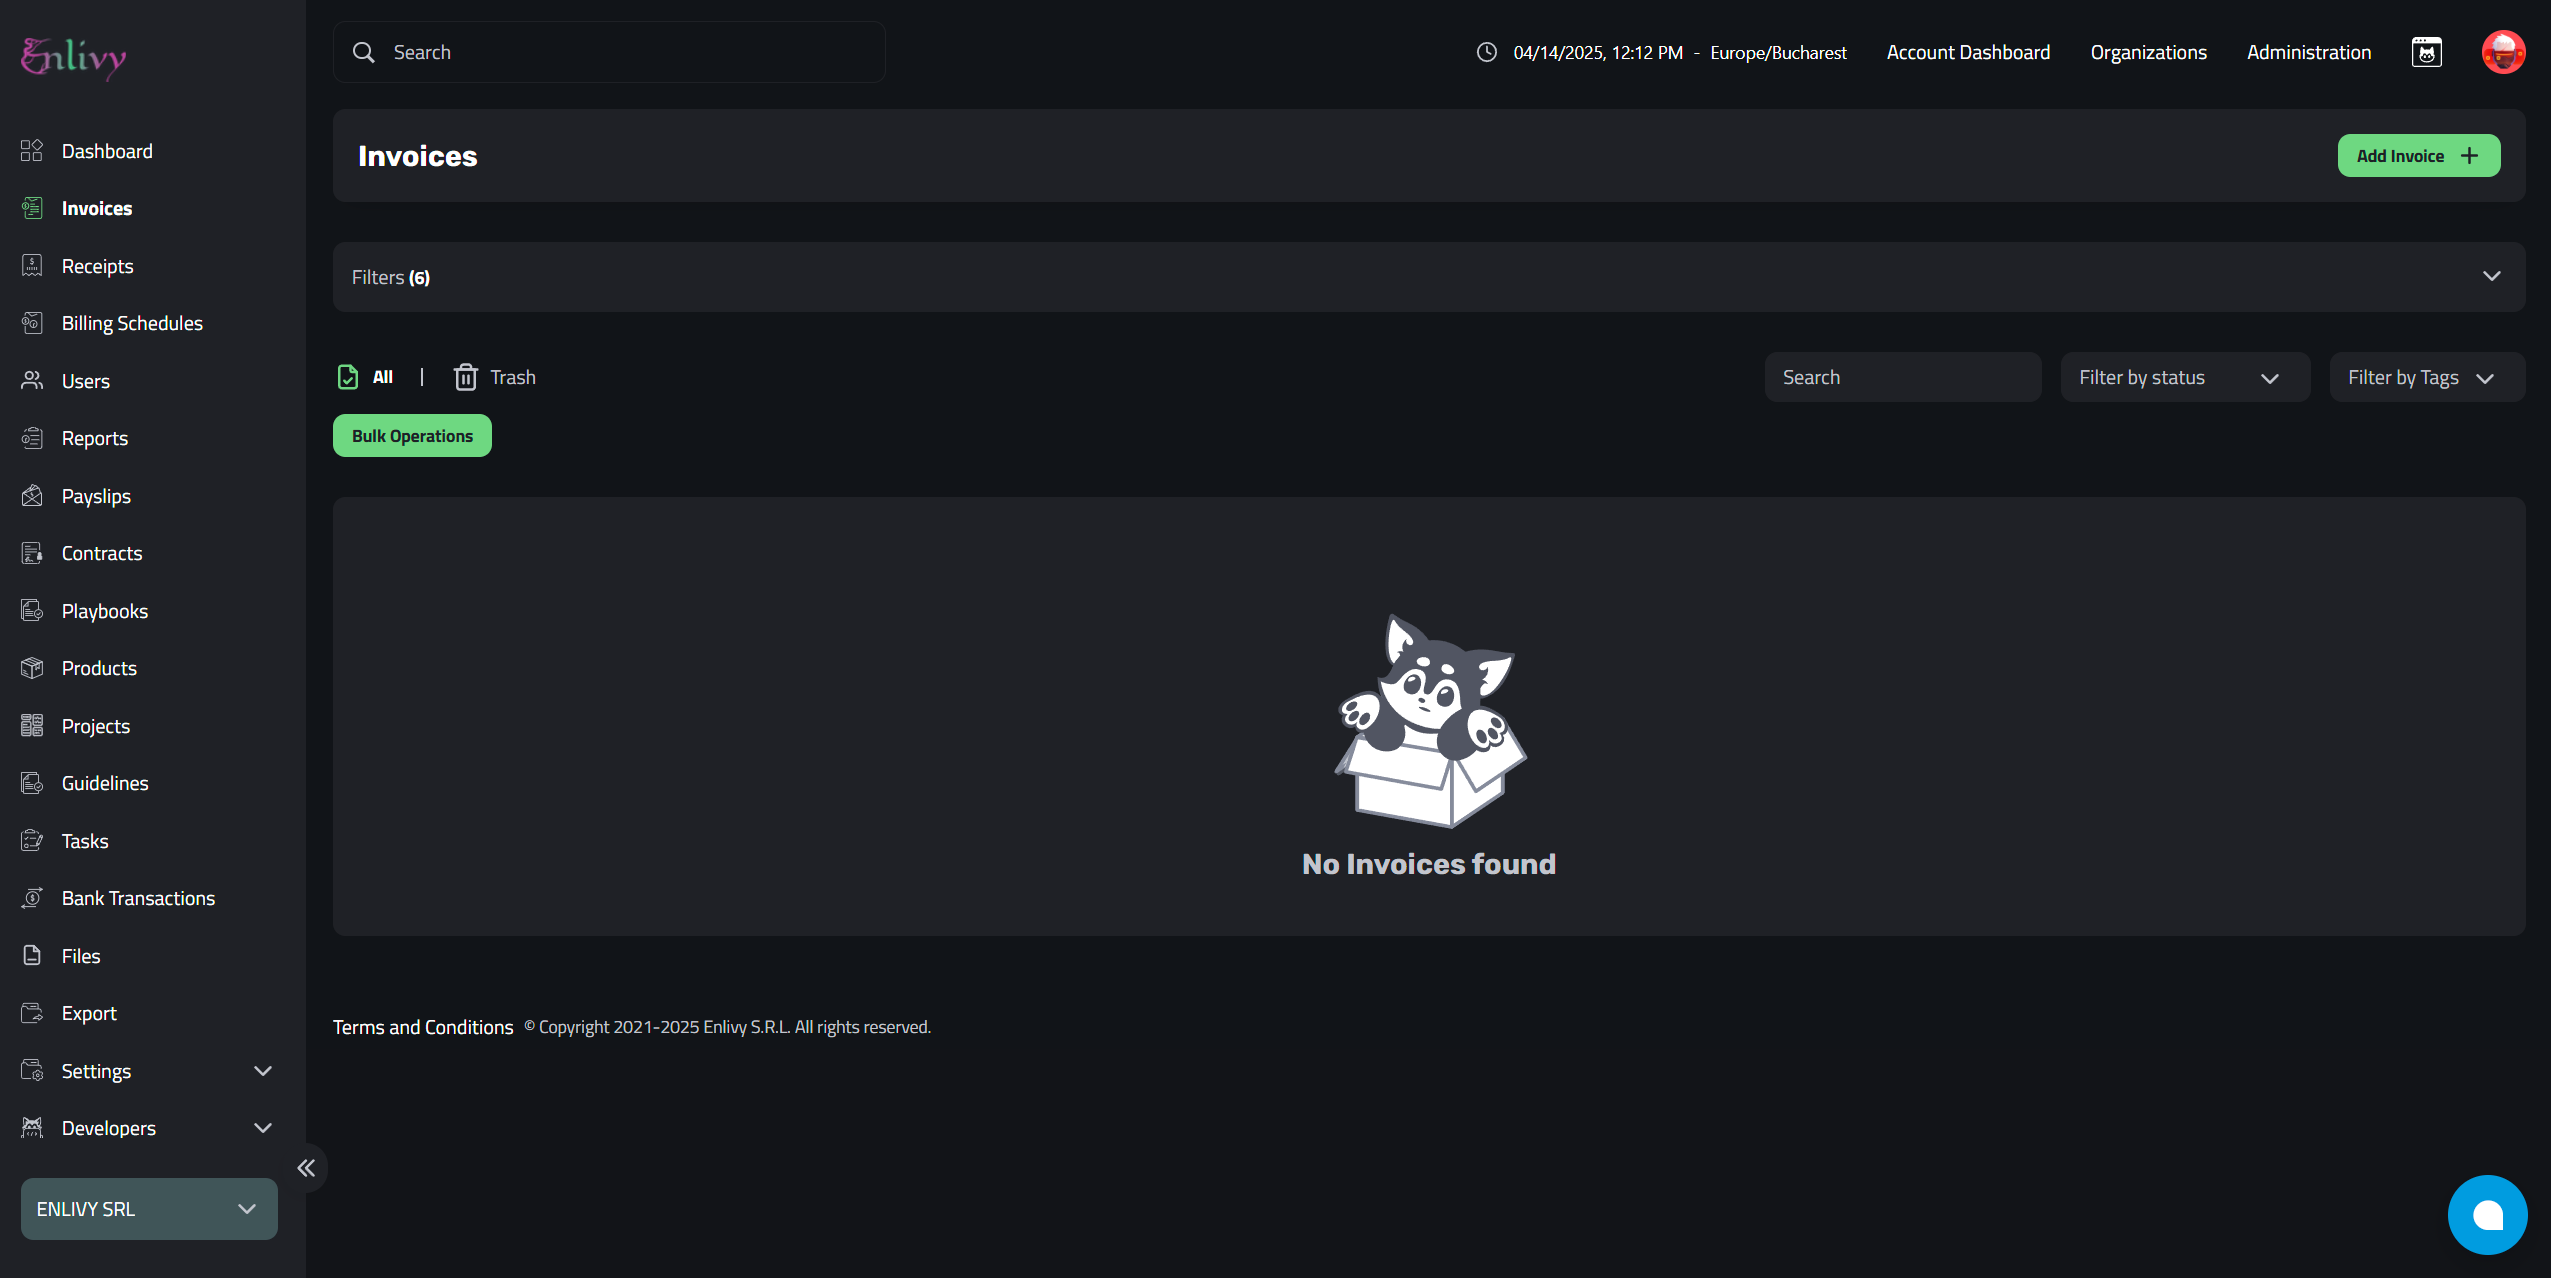
Invoice Dashboard – Quick Explanation

At the top of the dashboard, you’ll find a set of filters that allow you to refine your invoice list based on several criteria:
- Source: Filter by Internal or External invoices.
- Direction: Choose between Outbound (invoices you issued) or Inbound (invoices received).
- Date Filters: Use the Issued At or Paid At fields to narrow results within a specific date range.
You’ll also find options to edit, reuse, tag, and download invoices directly from the list.
On the right side, there’s a search bar that allows you to quickly find specific invoices by keyword or number.
Creating a New Internal Invoice
To create a new invoice, simply click the Add Invoice + button located in the upper-right corner of the Invoices Dashboard. This will open a new window where you can start entering the details for your invoice.

Invoice Details – Field Breakdown
When creating an internal invoice in Enlivy, you’ll need to fill in several important fields to properly define the invoice details and context. Here’s a breakdown of each field:
-
Bank Account
Select the bank account from which the payment will be made. This helps track where the funds are coming from.
-
Sending User
This is the user issuing the invoice. In this case, it should be your organization (the sender).
-
Receiver User
This is the user receiving the invoice, usually your supplier or client, depending on the scenario.
-
Currency
Choose the currency in which the invoice is issued. You can select from the available options in the dropdown.
-
Status
Set the current status of the invoice. Options include Draft, Pending, Sent by Email, and more, useful for tracking the invoice’s lifecycle.
-
Prefix
Select a predefined prefix that will appear in the invoice number (e.g., INV, SERV, etc.).
-
Number
Enter or auto-generate the actual invoice number. This will be appended to the selected prefix to form a complete invoice ID.
-
Issued Date
The official date the invoice is issued.
-
Due Date
The date by which the payment should be made.
-
Delivery Method
Choose how the invoice will be delivered to the recipient. Options include Bank Transfer, PayPal, Cash, or Stripe.
-
Has Contract
Indicates there’s a contract linked to the invoice.
-
Has Refferal Invoice
Flags if this invoice is linked to another (e.g., for reference or commissions).
-
Has Tax
Shows that tax is applied to the invoice. This will open additional fields when setting up the price for the items that are invoiced.
-
Has Reference Invoice
Check this if the invoice is linked to a government or public project. This value will also be added to the exported Peppol XML.
-
Has Purchase Order Reference
Use this to reference a purchase order from your client (typically a public institution). This is a key requirement in many Peppol-enabled countries and will appear in the Peppol XML.
-
Has Sales Order Reference
Optional reference to a sales order associated with this invoice. It’s also included in the Peppol XML and may be required in structured procurement systems.
Adding Invoice Items: Product Line Details Explained
Once you’ve selected both the sending and receiving users for your invoice, the system will allow you to begin adding invoice items.
Each item is filled in on a new line with the following fields:
-
Product
Choose a product from the dropdown list of those you’ve previously added to your organization.
-
Product Type
Select whether it’s a digital product, physical product, service, or bonus.
-
PEPPOL Unit Code
Select the unit of measurement, such as piece, from the dropdown.
-
Name Locale
Choose the language for the product name (e.g., EN, RO).
-
Name
Enter or confirm the name of the product as it should appear on the invoice.
-
Quantity
Specify how many units of the product are being invoiced.
-
Discount
Enter any discount applied to this product (if applicable).
-
Tax Class
Choose the tax class relevant to the product (e.g., VAT 19%, 9%, 5%, from the Tax classes that you’ve already added to your organization).
-
Tax Rate
elect the applicable tax rate from the dropdown. (from the tax rates that you’ve already added to your organization).
-
Has CPV Classification
Check this box if the product includes a CPV code, and you’ll be able to enter it.
-
Has Billing Period
If the item is billed over a period, check this to input the start date and end date.
Automatic Calculations & Finalizing Your Invoice
As you fill in the product details, such as price, quantity, discount (if applicable), and tax rate, Enlivy will automatically calculate the subtotal, discount amount, tax, and total for each line item.
Need to invoice multiple products or services? Simply add more lines and enter the details.
The system will take care of all the calculations, ensuring your totals are accurate and up to date. Once you’re done, make sure to click Save Changes to generate and store your invoice.
Example of adding an Invoice
Invoicing Details
In the following example, we’ll walk you through the process of filling out all the required fields to create an invoice, using screenshots to guide you visually.
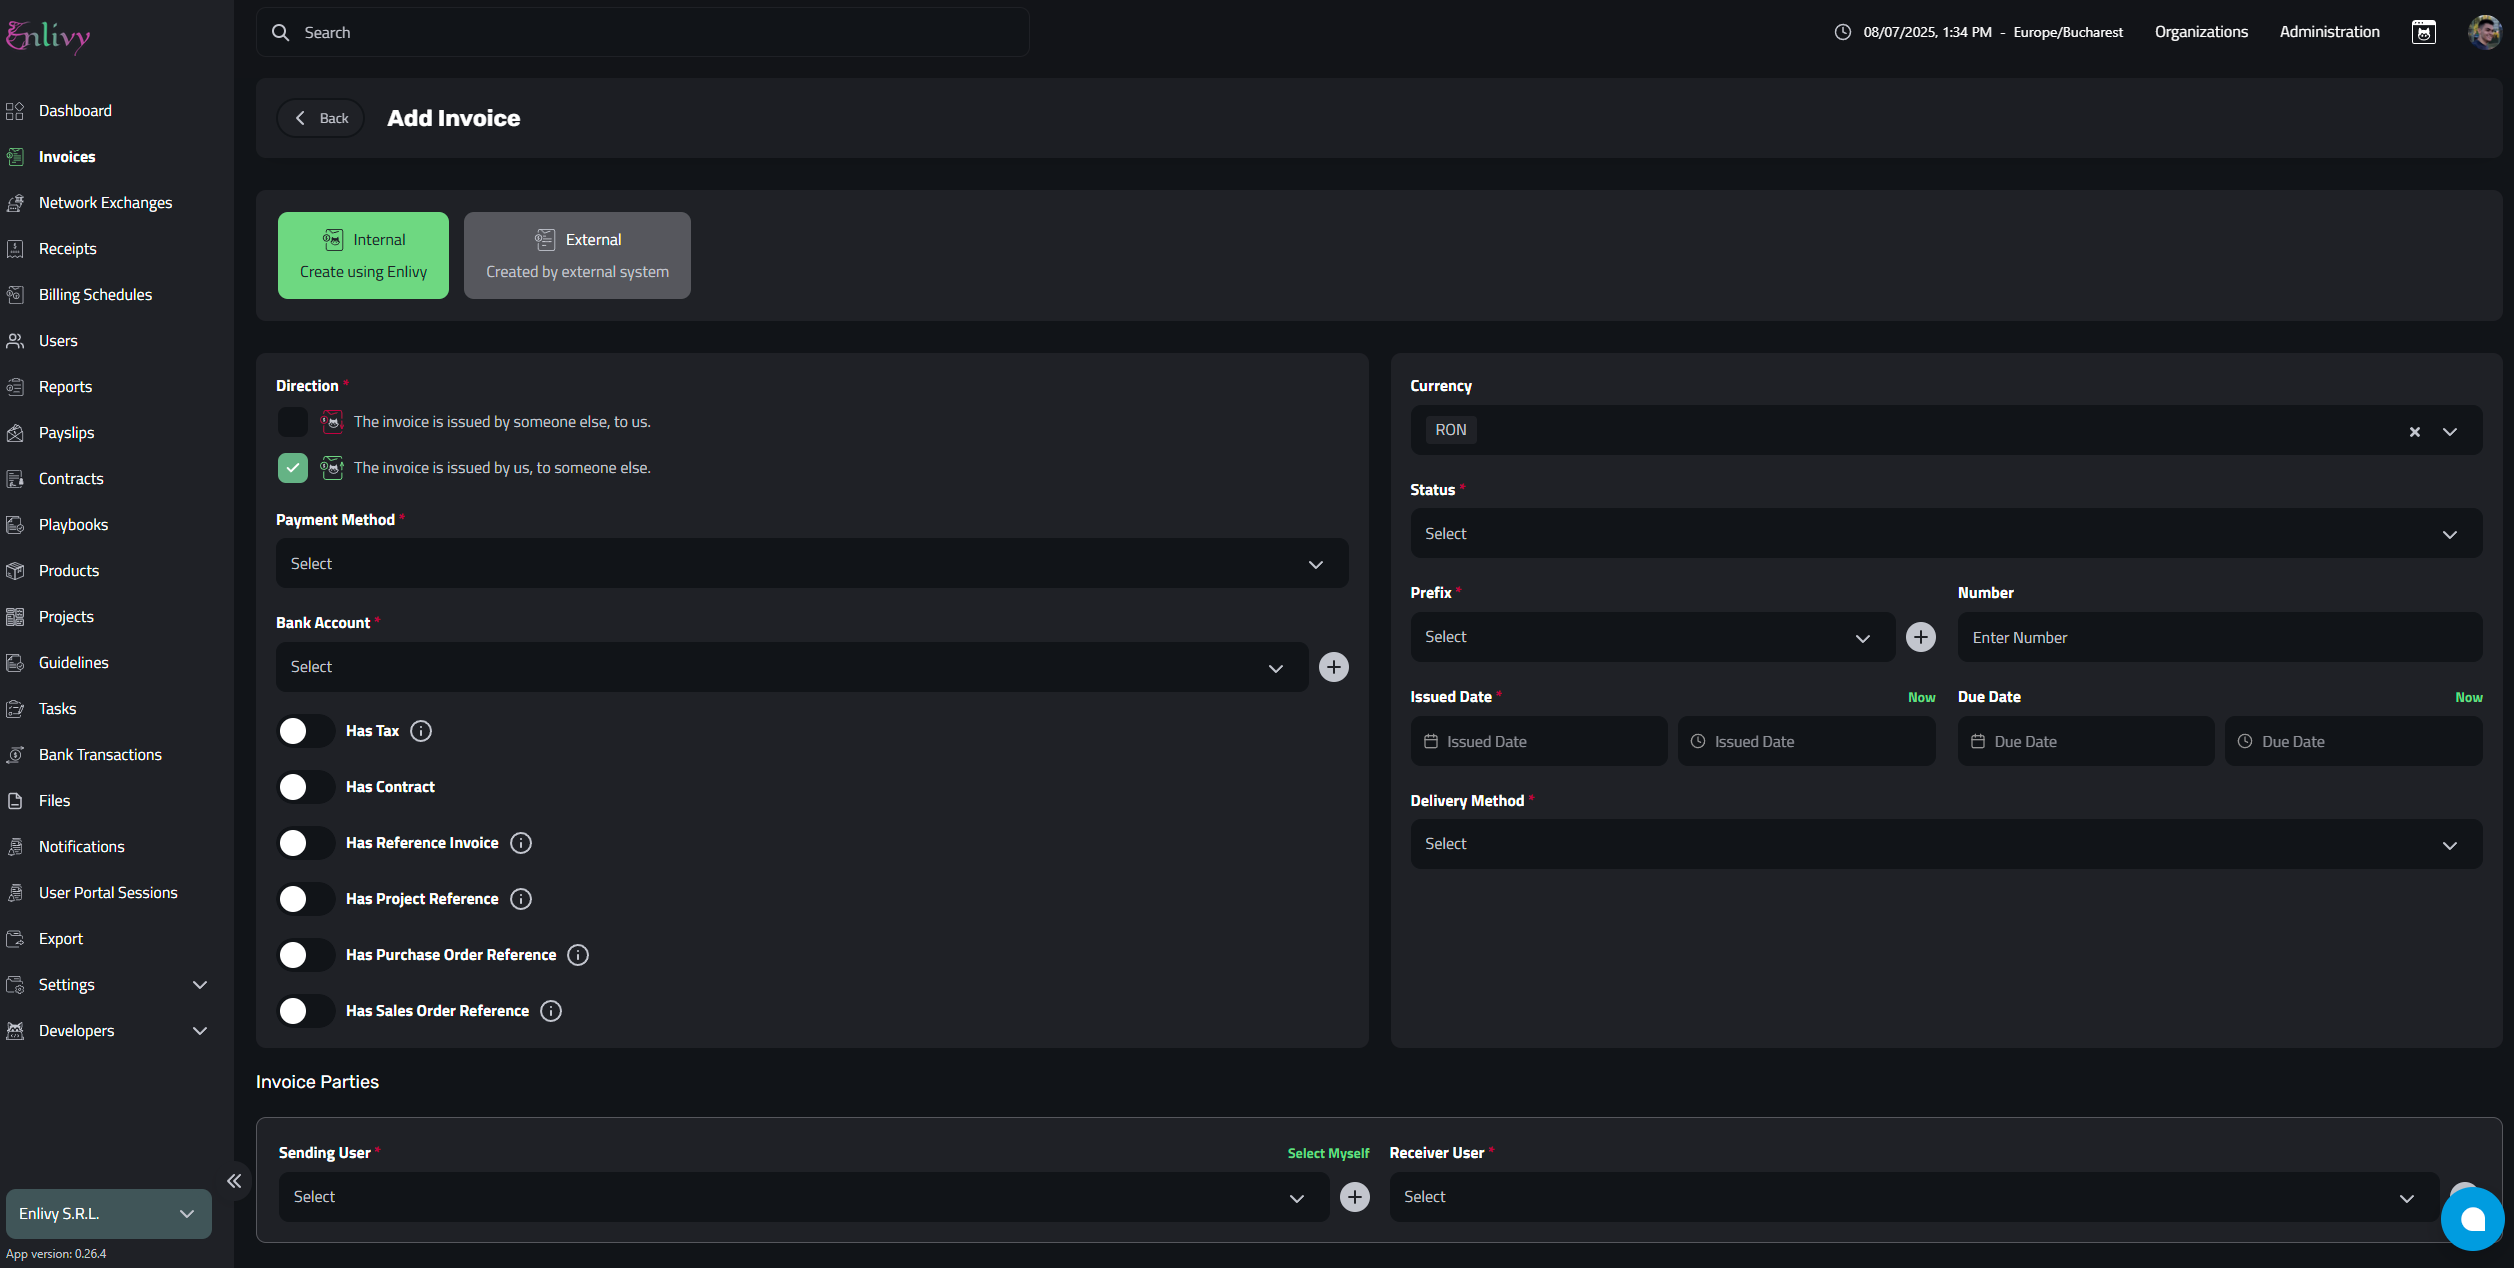
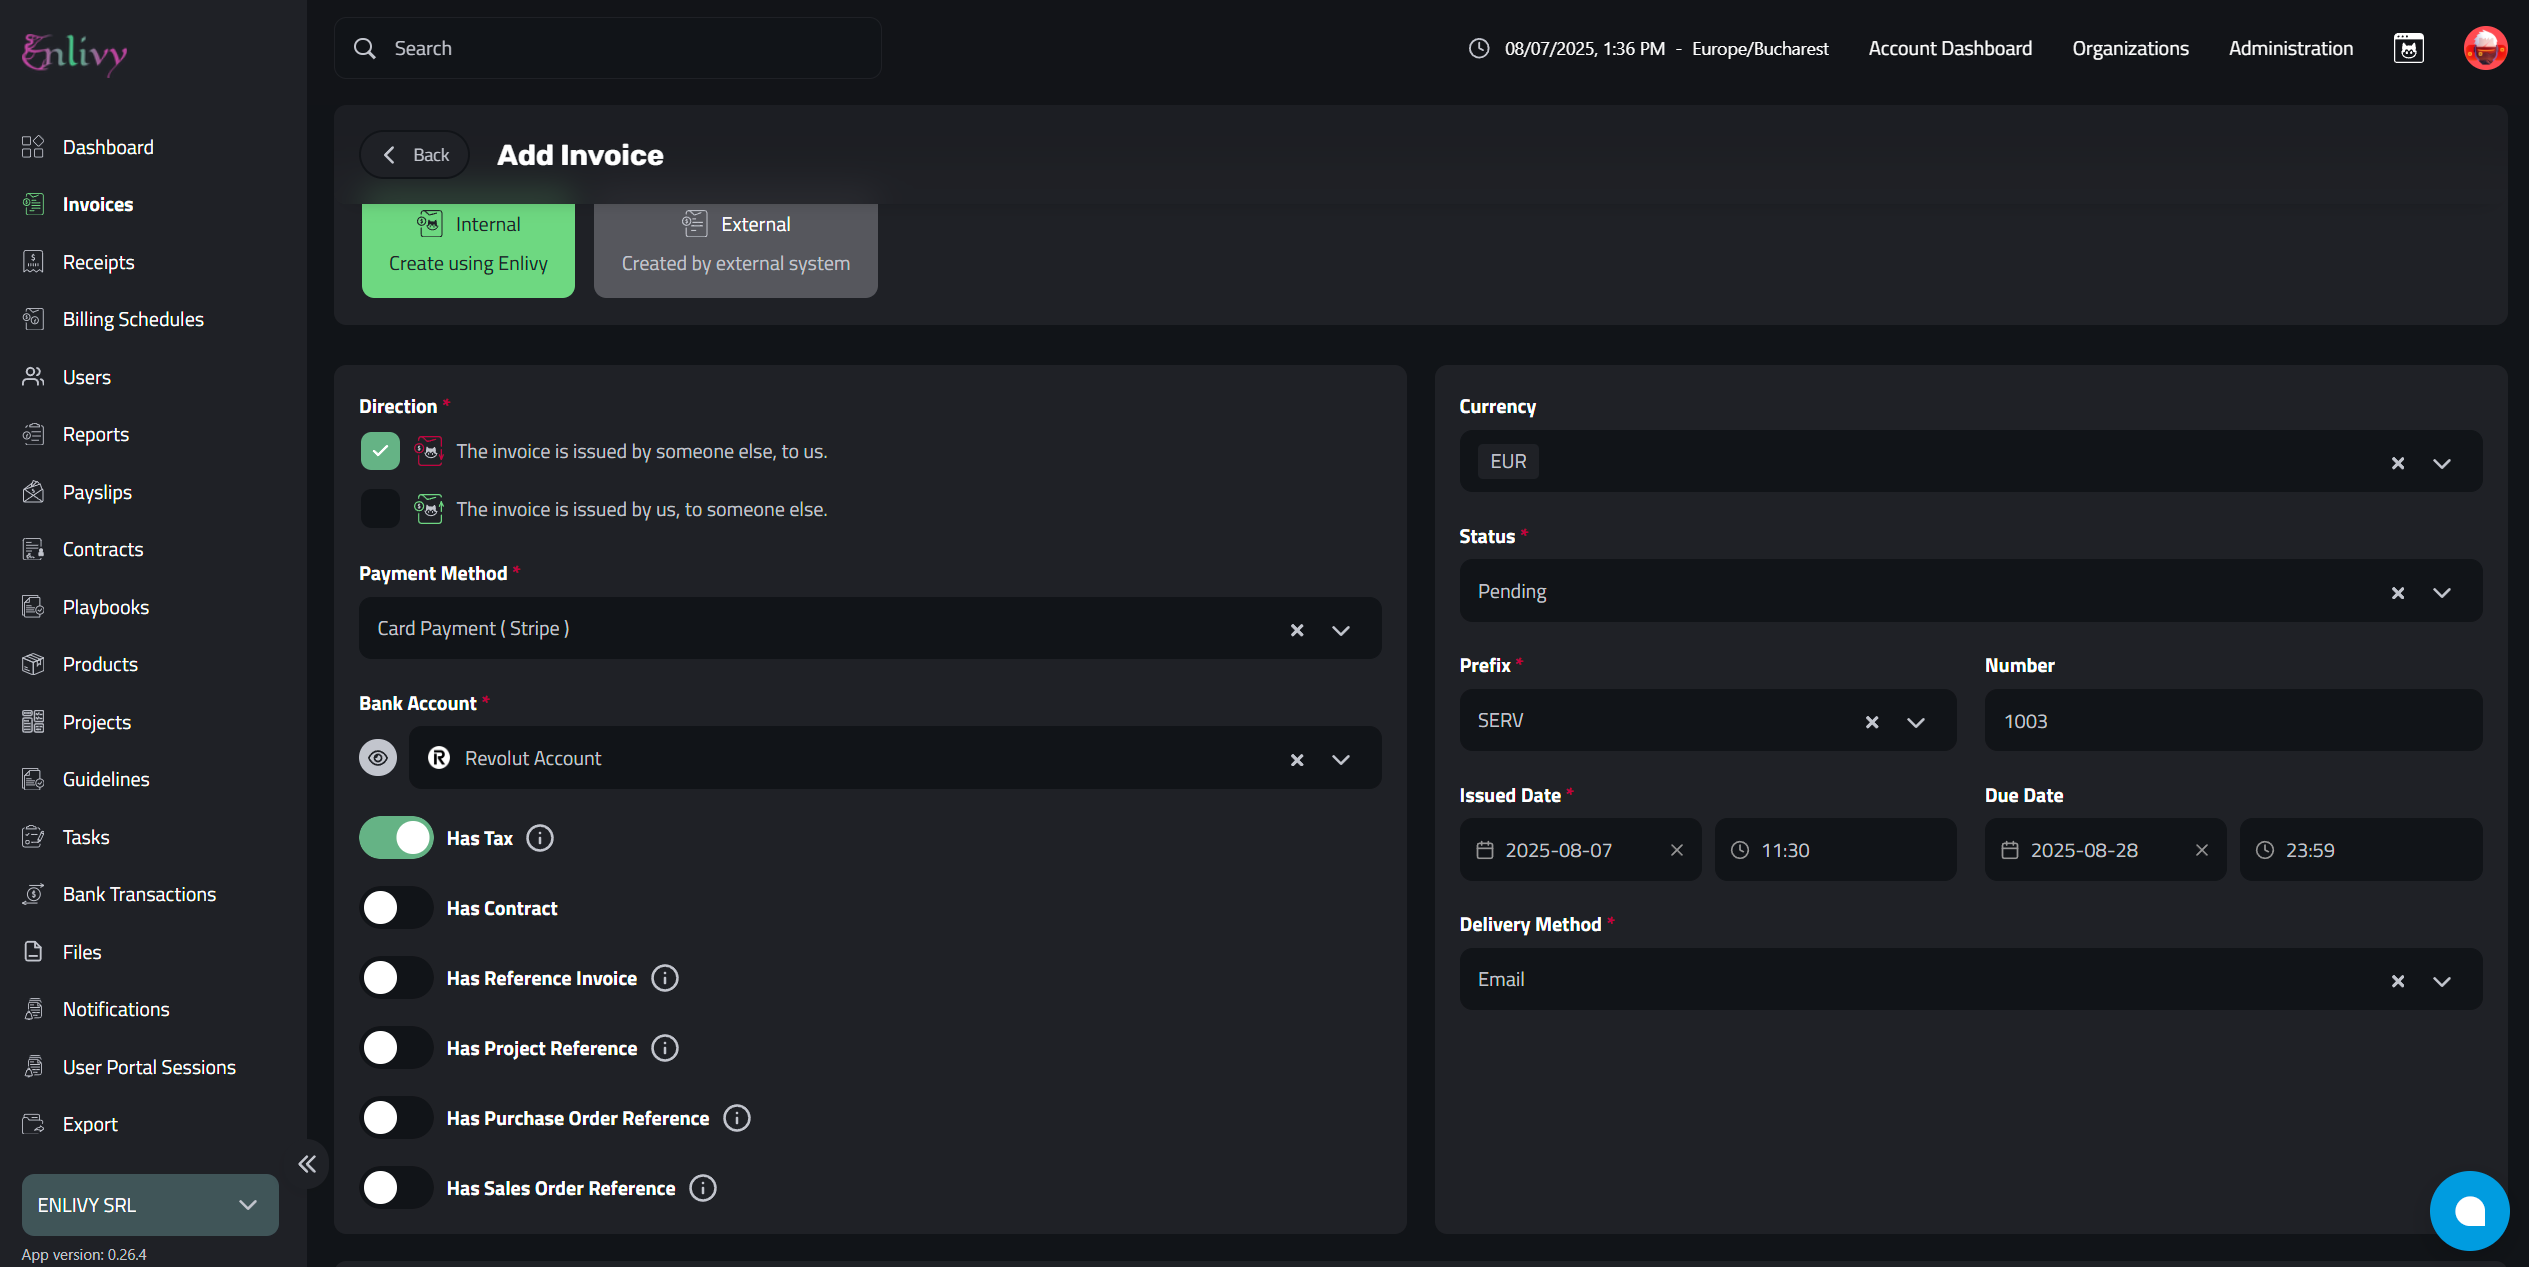
In the two screenshots above, we’ve filled in all the necessary details for an internal invoice.
The sending user is our own company, while the receiving user is a personal client.
We selected the appropriate payment method, chose the invoice prefix and number, marked the invoice as paid, and indicated that the invoice should include tax.
Details for Line Items
In the next screenshots, we’ll show you the completed final section of the invoice, which includes the invoiced item(s) along with the automatically calculated subtotals, tax amounts, and the final total.

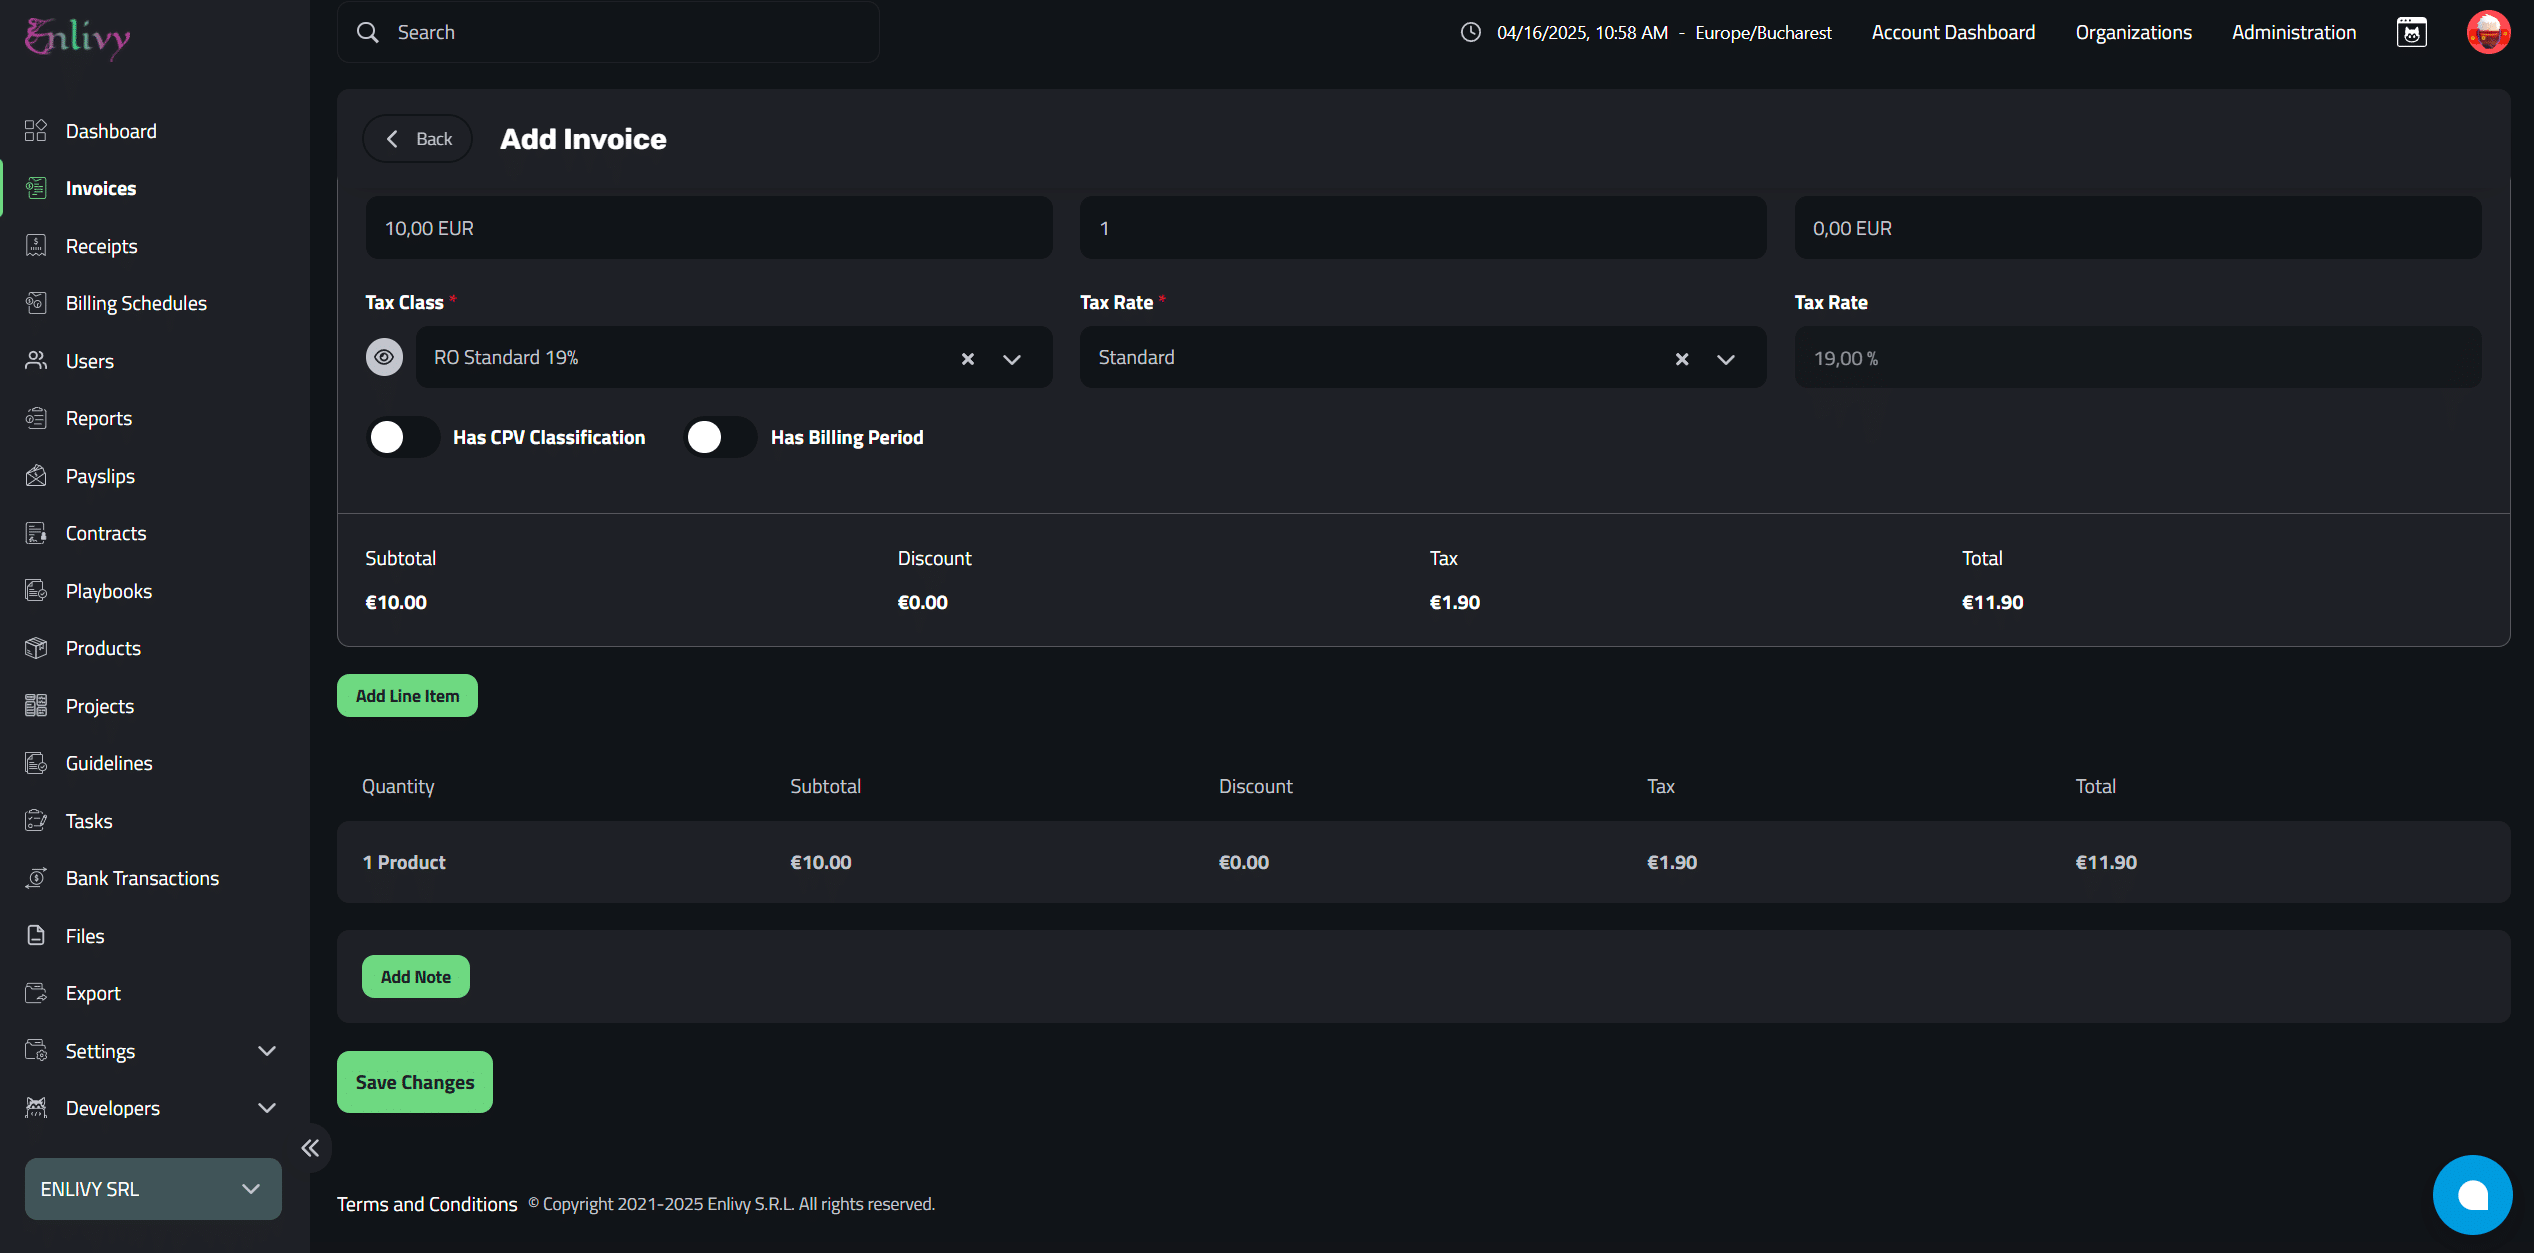
After verifying that the invoiced product and all calculations are correct, don’t forget to click Save Changes to finalize your invoice.
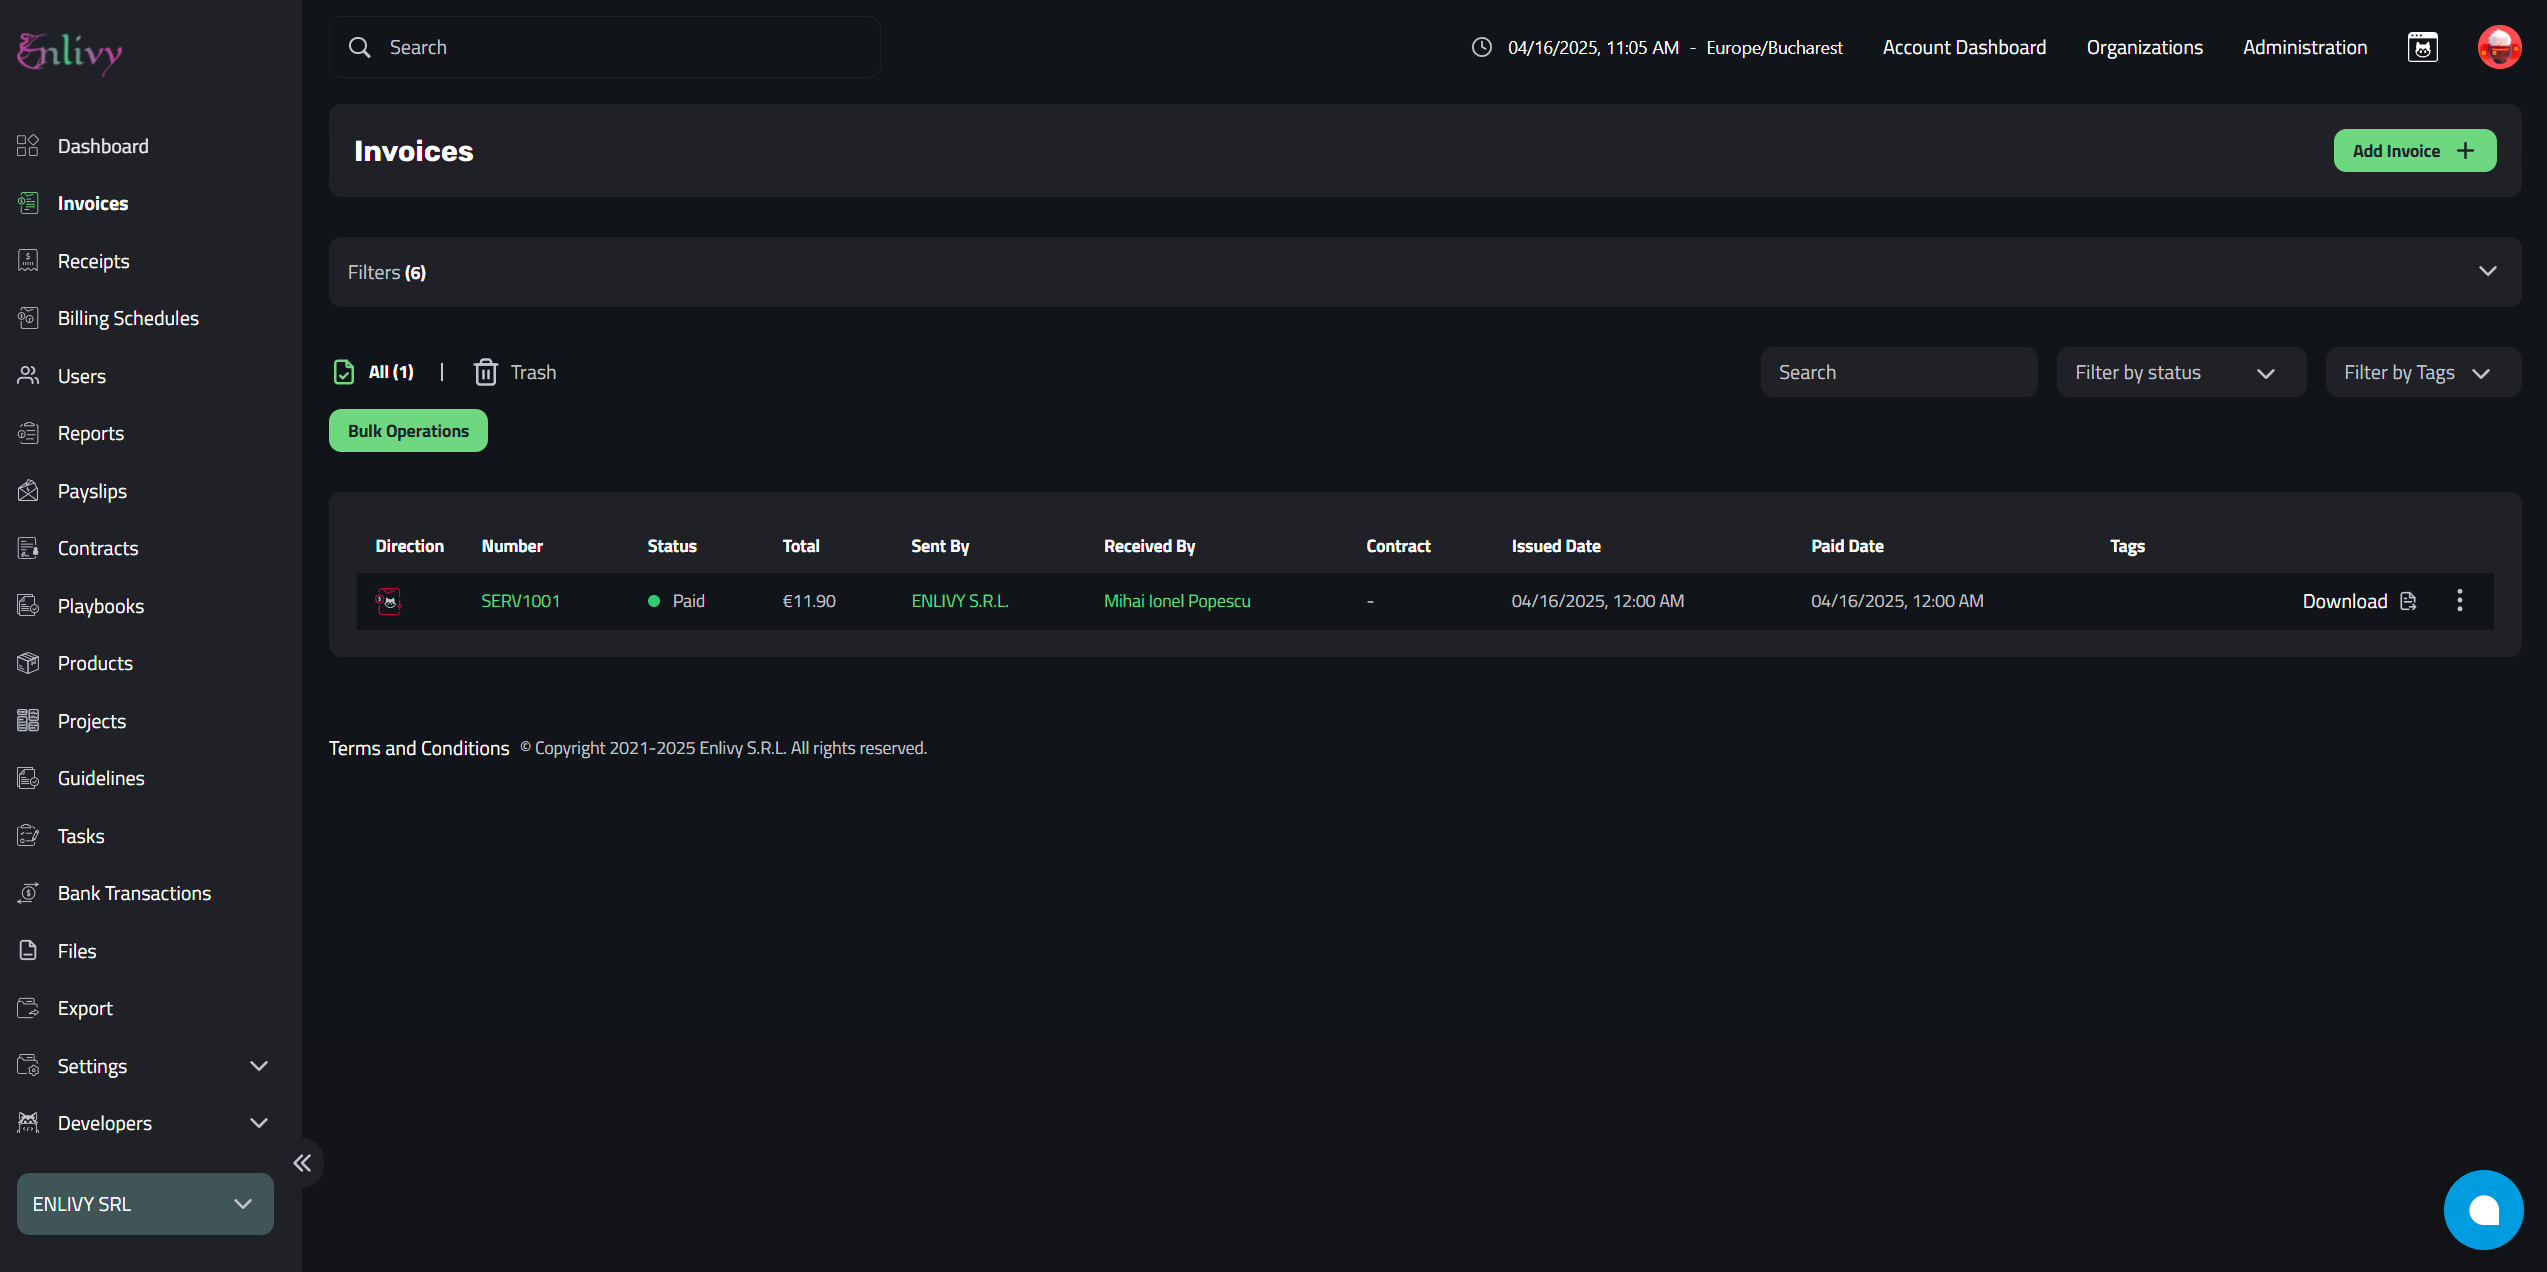
Viewing and Managing the Invoice in the Dashboard
After saving, our newly created invoice will appear in the Invoice Dashboard in Enlivy.
From here, you can reuse, edit, tag, delete, download, etc.