Timezones & Time
Understanding how timezones work in the Enlivy platform is essential for maintaining clarity across user actions, bookings, and invoices, especially when working with clients in different regions.
Our system is fully timezone-aware, ensuring all time-related data is accurately displayed and recorded according to each user’s settings.
Setting the Timezone
Each user and client in the platform has an individual timezone setting. This ensures that all timestamps, are shown correctly in their local time.
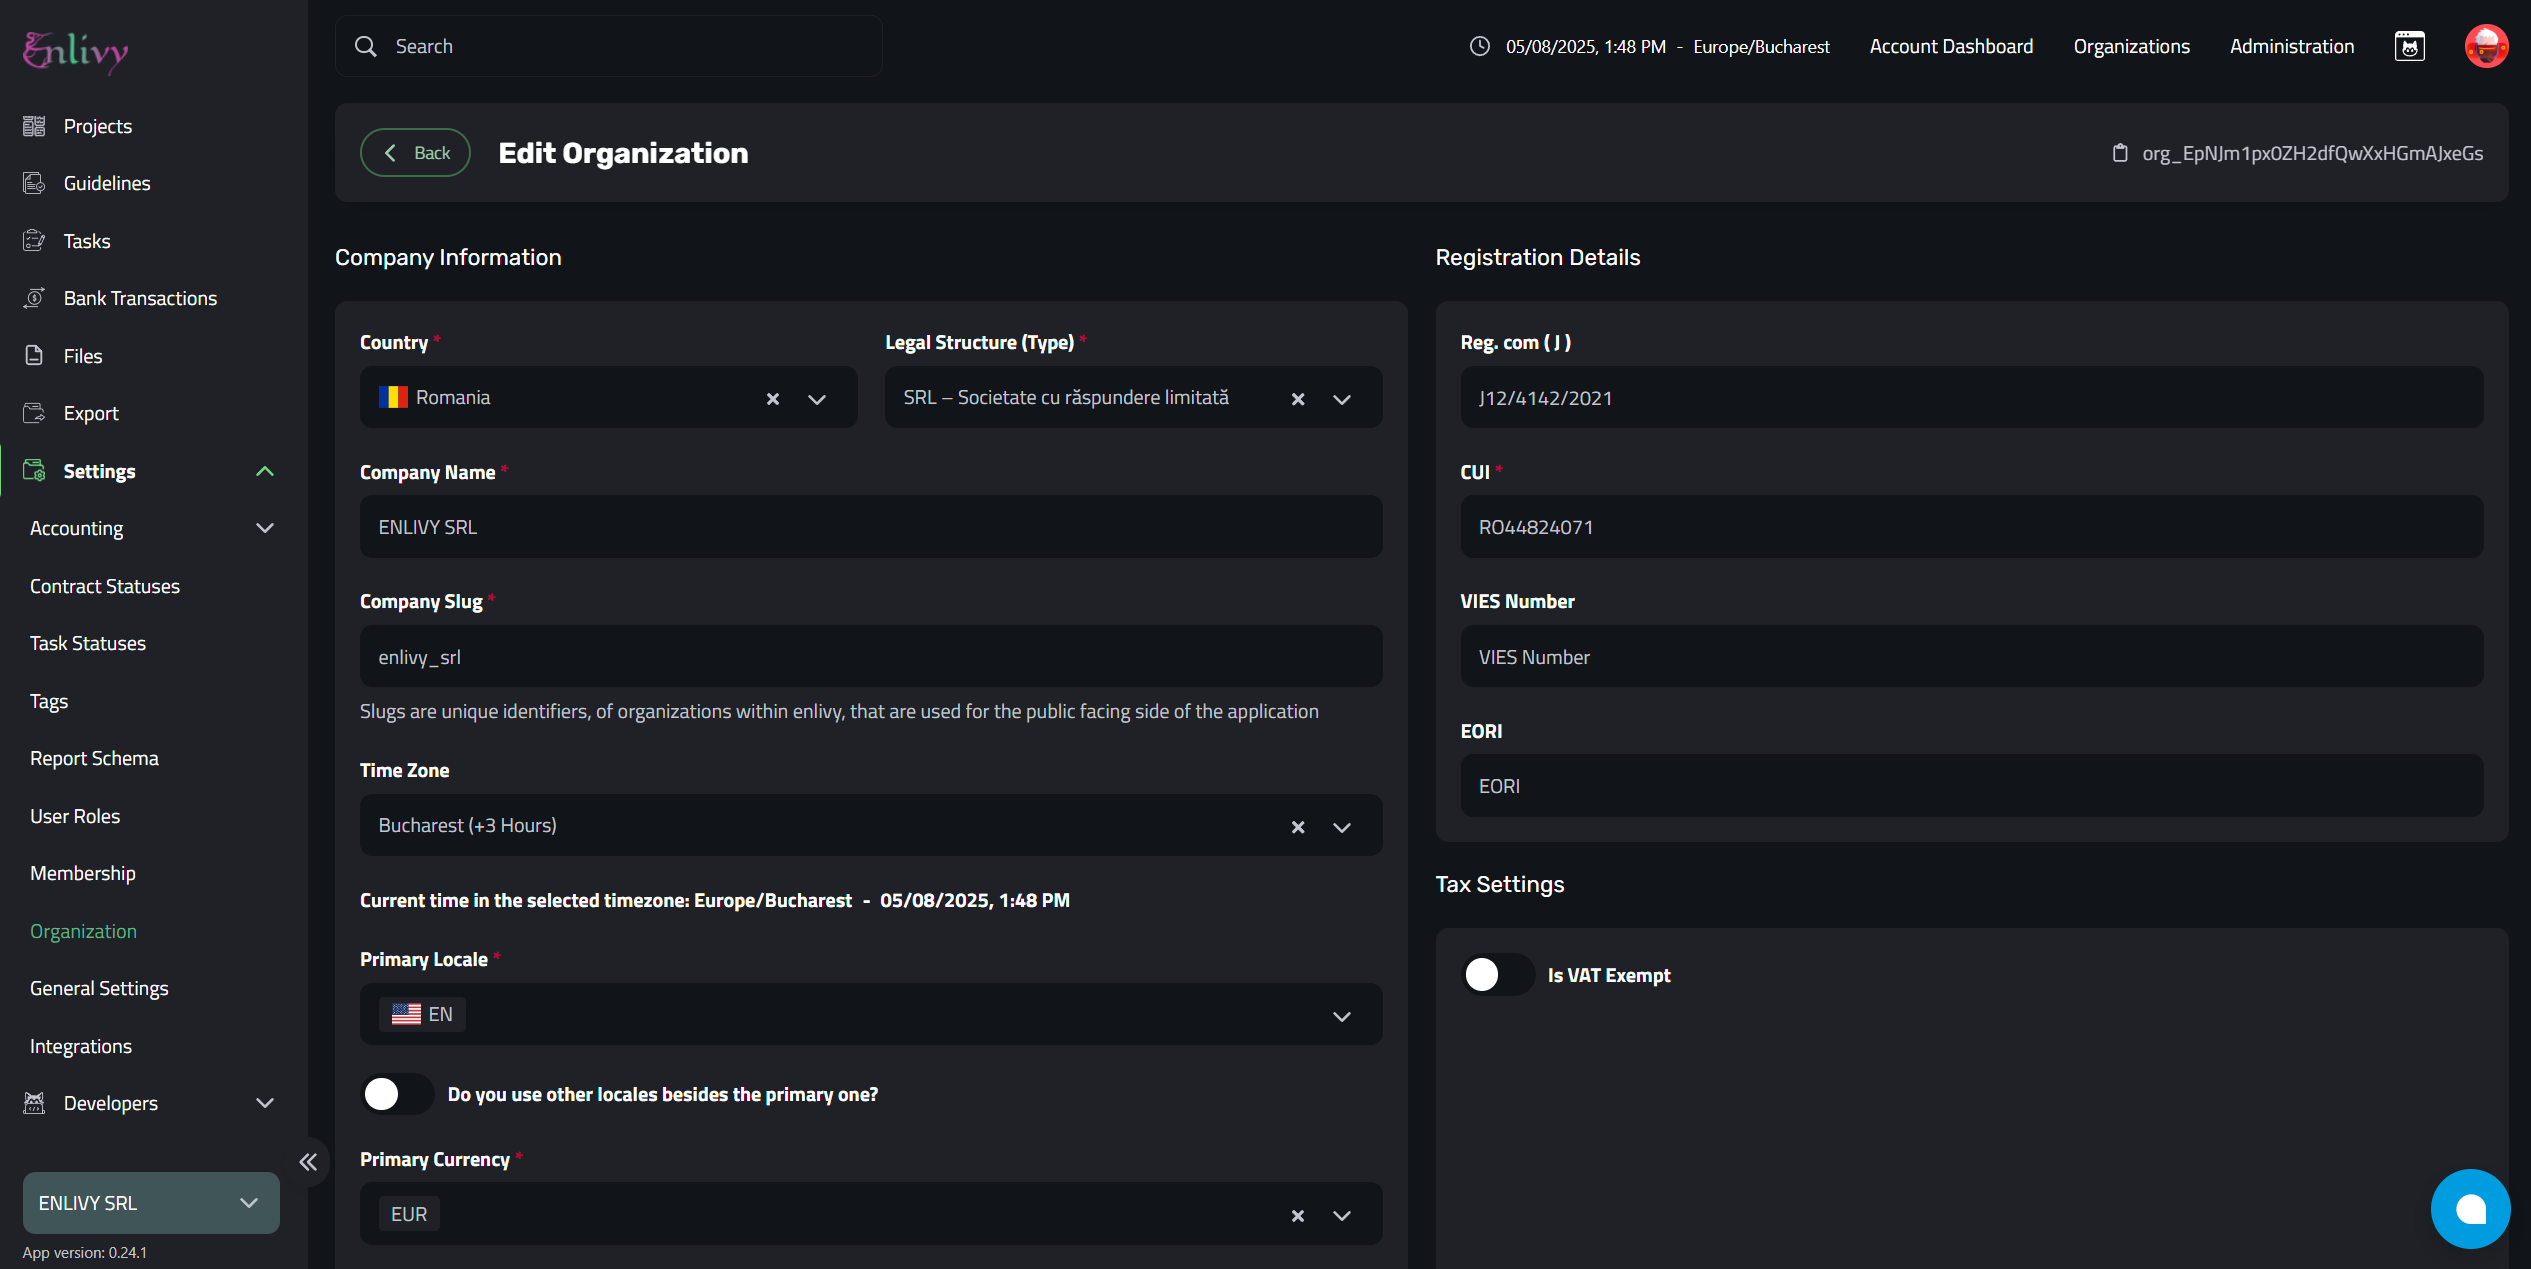
Your Company’s Timezone
When you first create your organization in Enlivy, you’re asked to set a default Company Timezone. This timezone determines how timestamps are displayed in your company-level activities, such as invoice generation, project bookings, and logs.
Your company’s timezone determines how times are displayed across the entire workspace, including bookings and invoice timestamps. You can set this timezone when you first add your company to Enlivy.
To update it later, go to the left-side menu → Settings → Organization. Here, you can edit your organization’s details, including the default timezone used for all company-related activities. Check the screenshot below for more details:
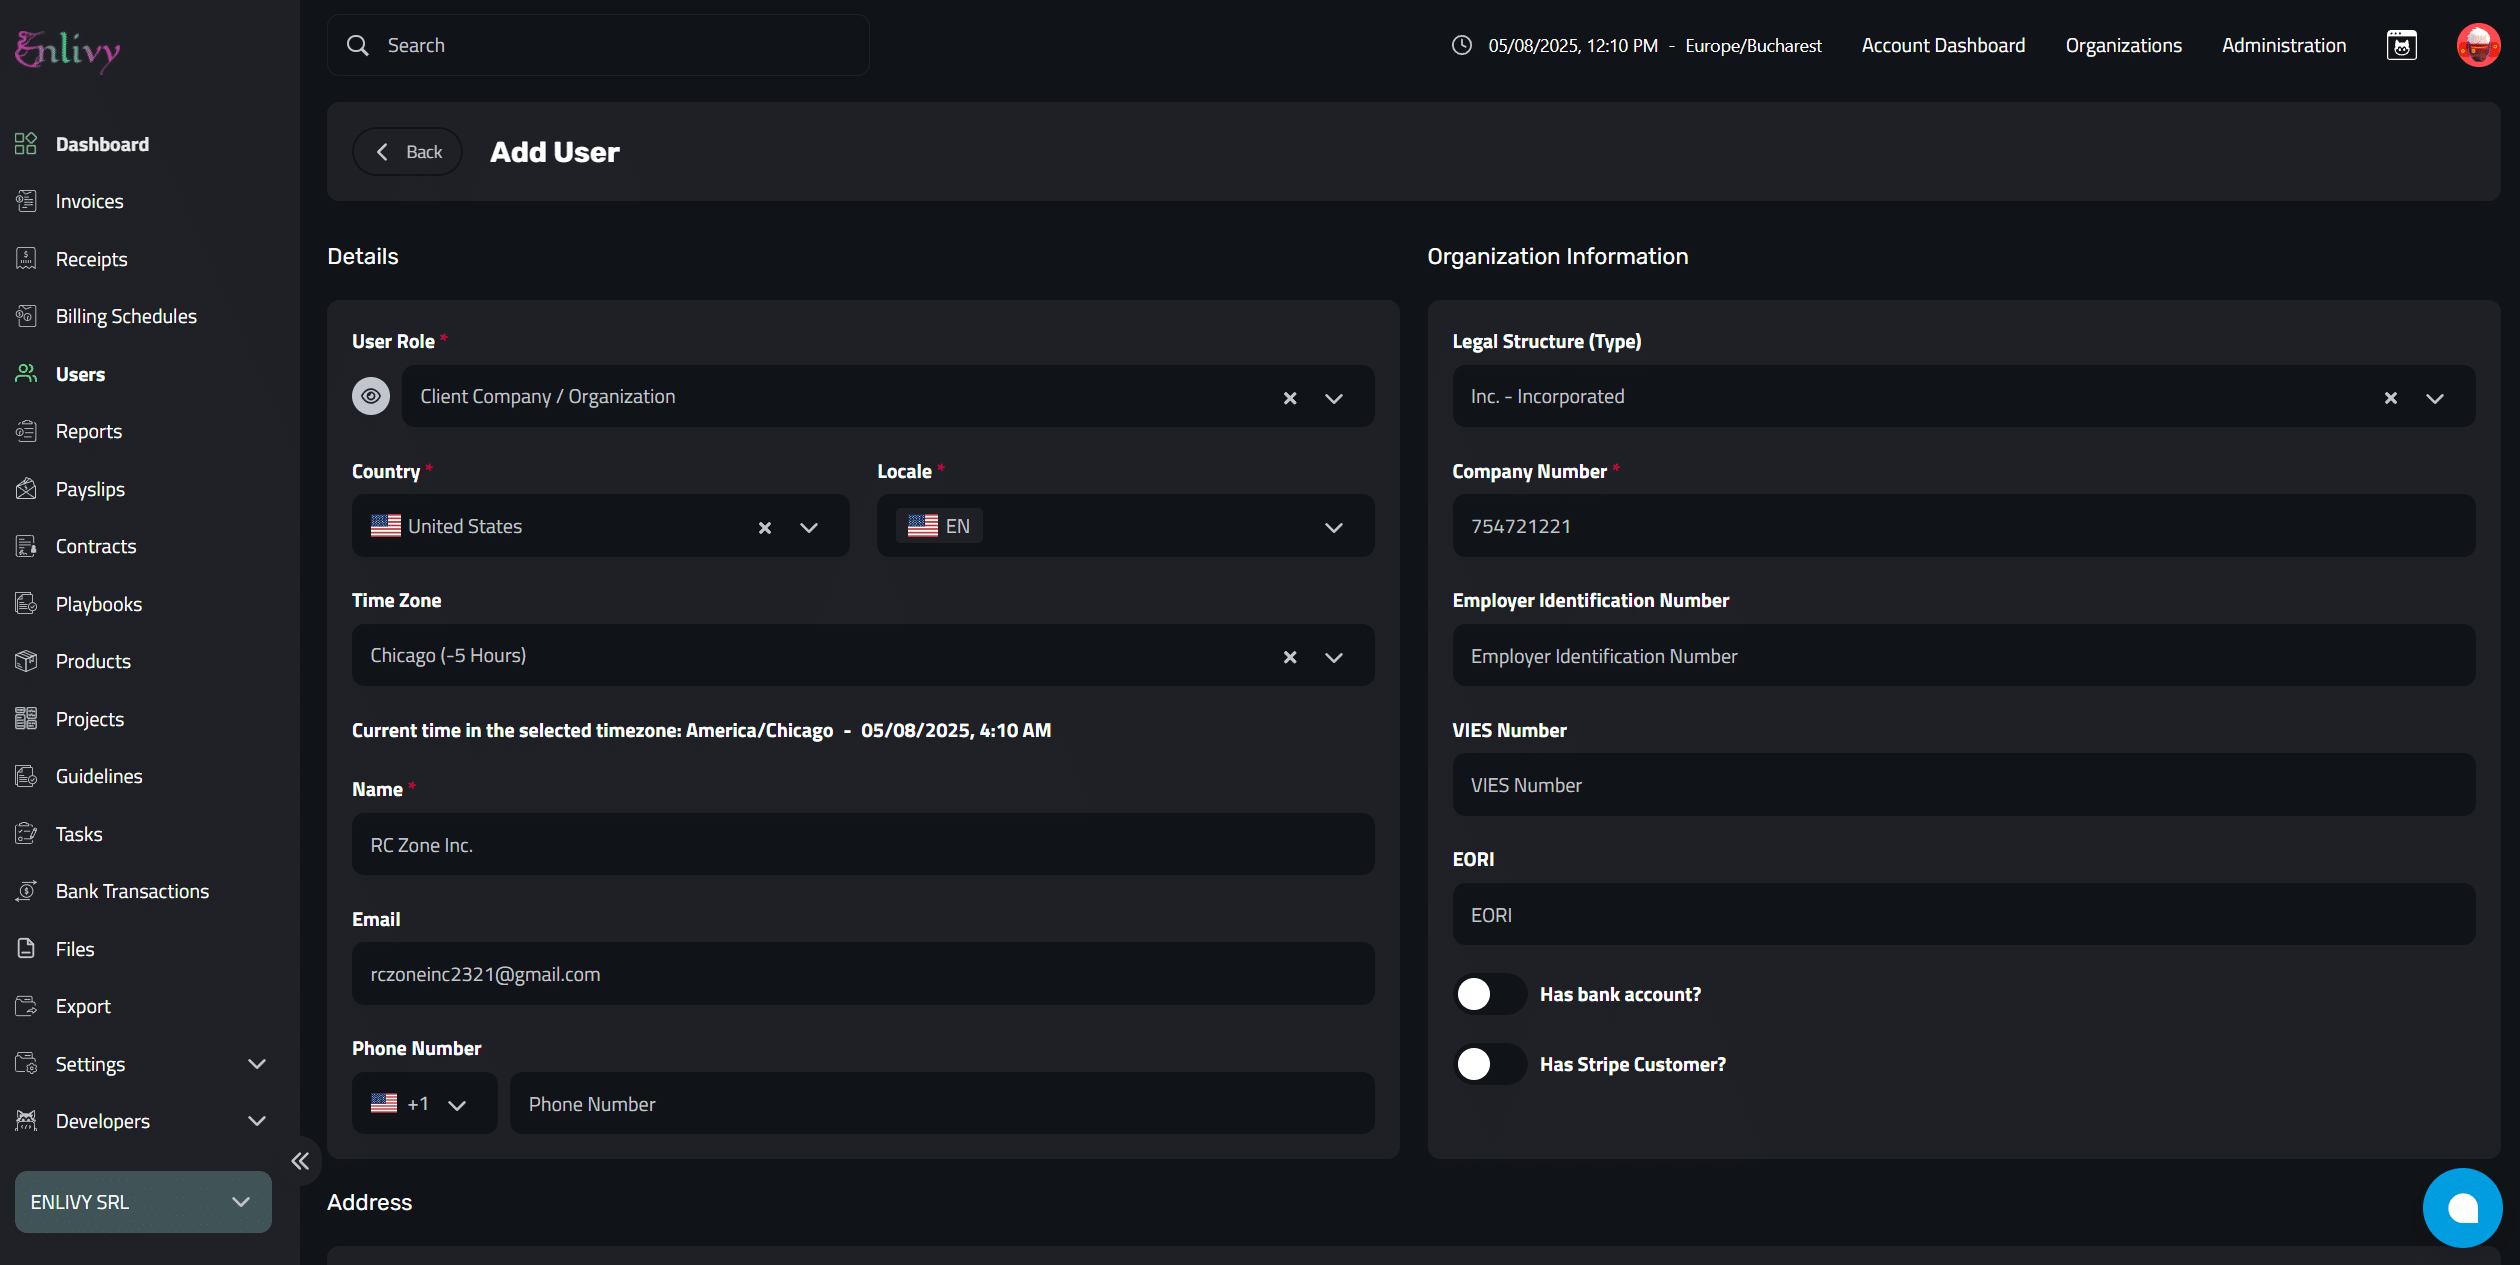
User Timezone
When adding a new user to your company, you can assign them a specific User Timezone based on their physical location or working hours. This setting ensures that all relevant time displays—such as bookings, due dates, and activity logs—are accurate from the user’s perspective.
User timezones can be edited at any time. If a user relocates or begins working from a different region, simply update their profile to reflect the new timezone.
In the screenshot below, you’ll see a user whose timezone is set to America/Chicago (Chicago, Illinois).
Example of Timezones when Invoicing
To illustrate how timezone management affects invoicing, we created a test invoice for the above user. Our organization is based in Europe/Bucharest (Romania), and the user is in Chicago, Illinois.
As shown in the invoice screenshot below, both timezones are clearly displayed. The issue date and time are shown in both the company’s timezone and the recipient’s timezone, ensuring full transparency and avoiding confusion when working across different regions.
This dual-time display improves clarity for both parties and is especially useful for contracts, deadlines, and legal compliance where exact timing is critical.

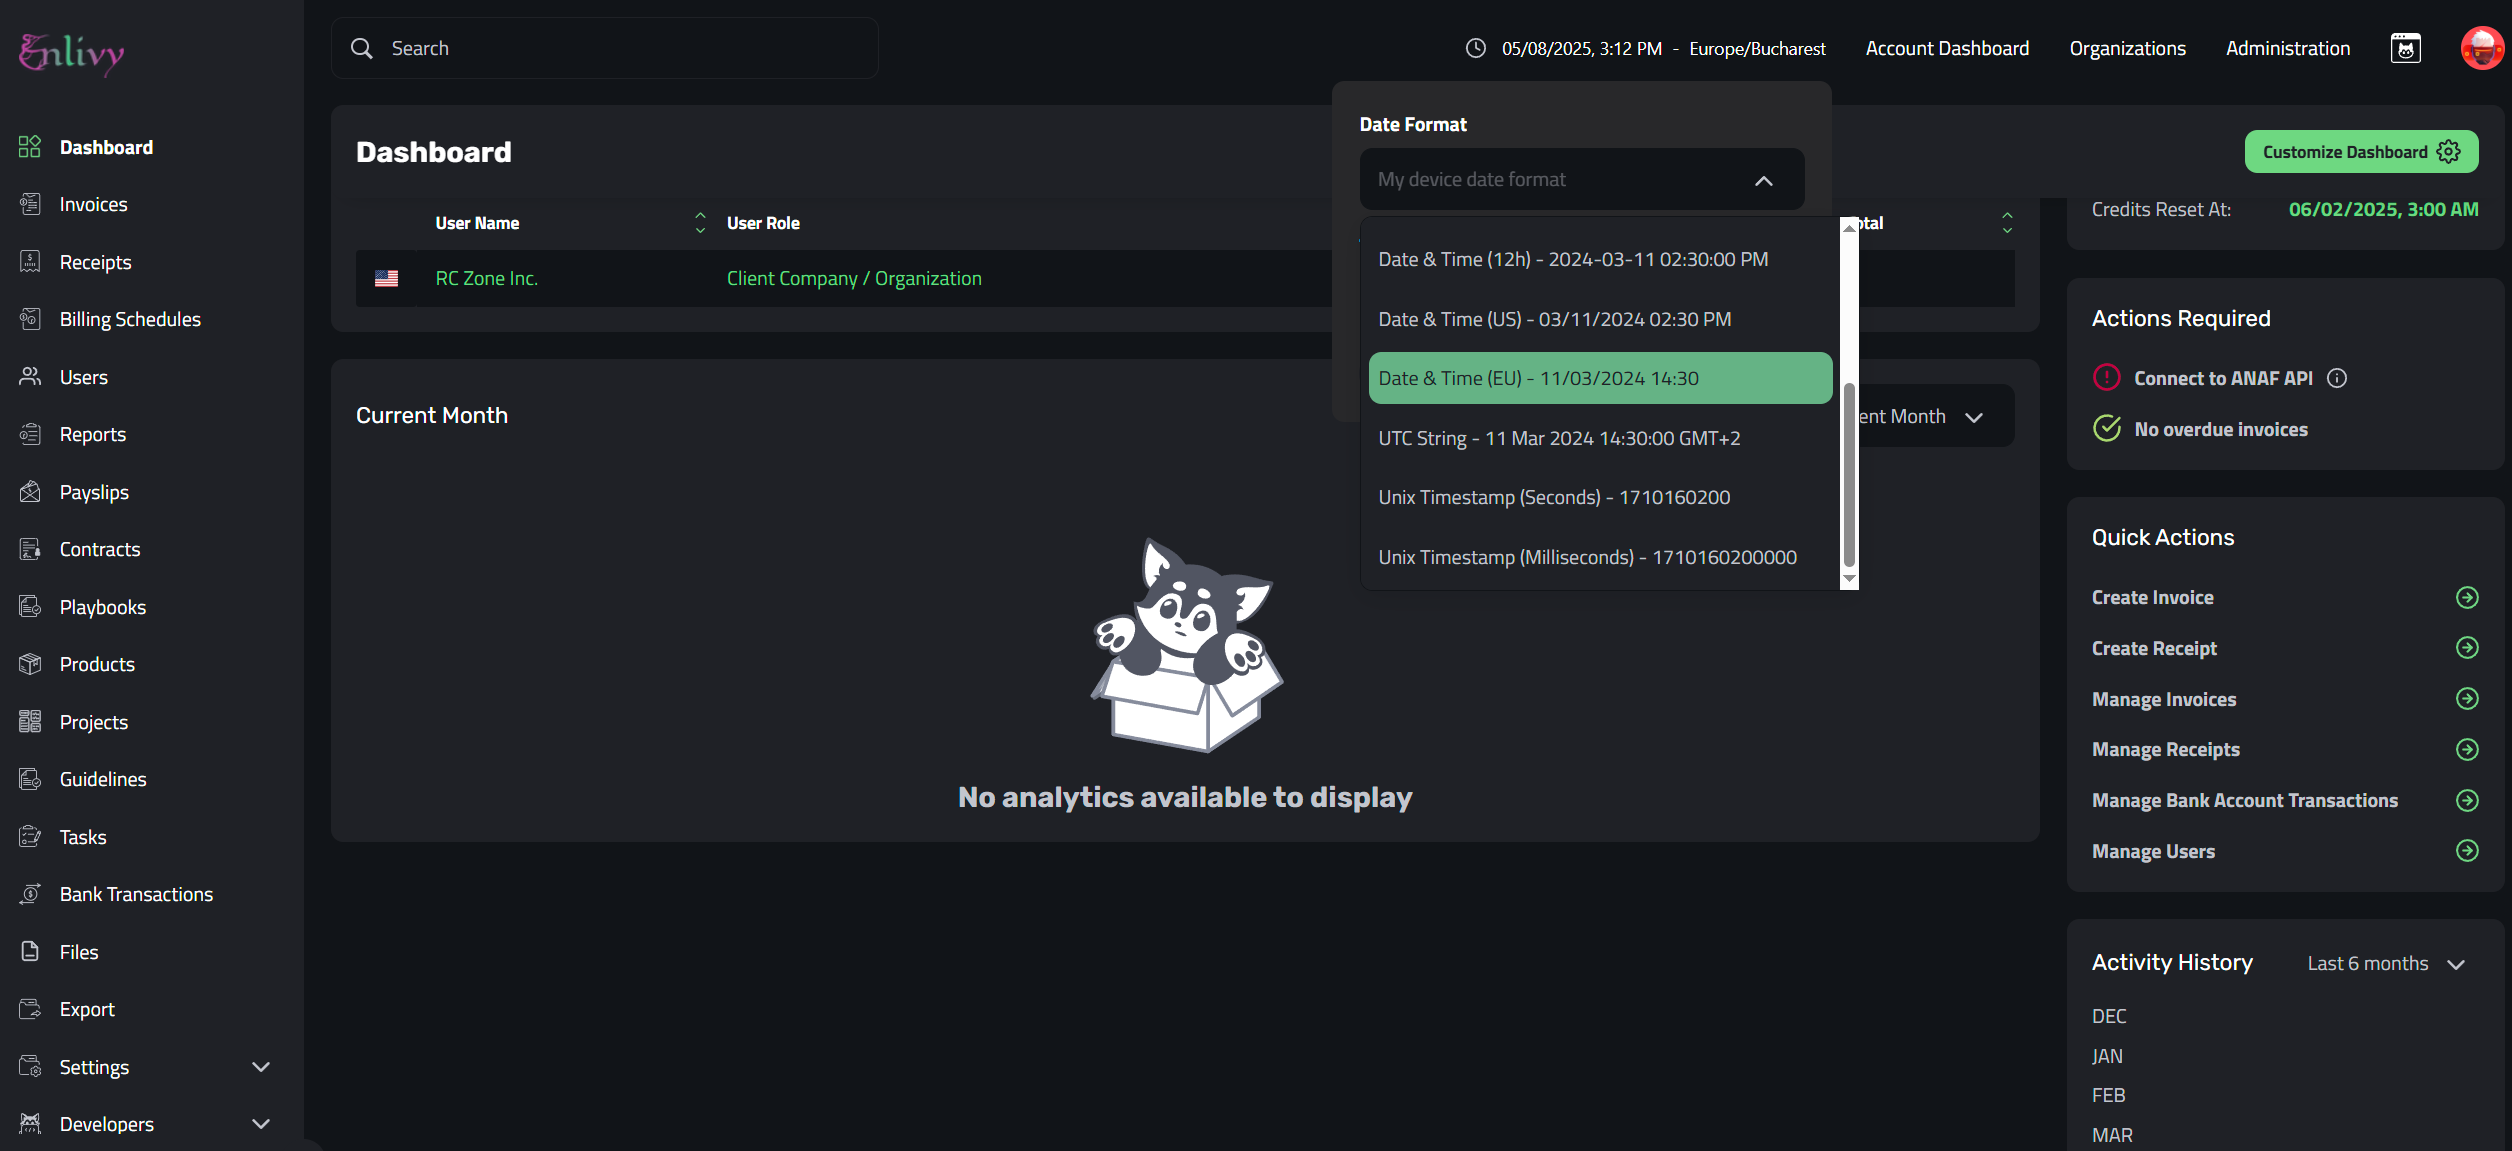
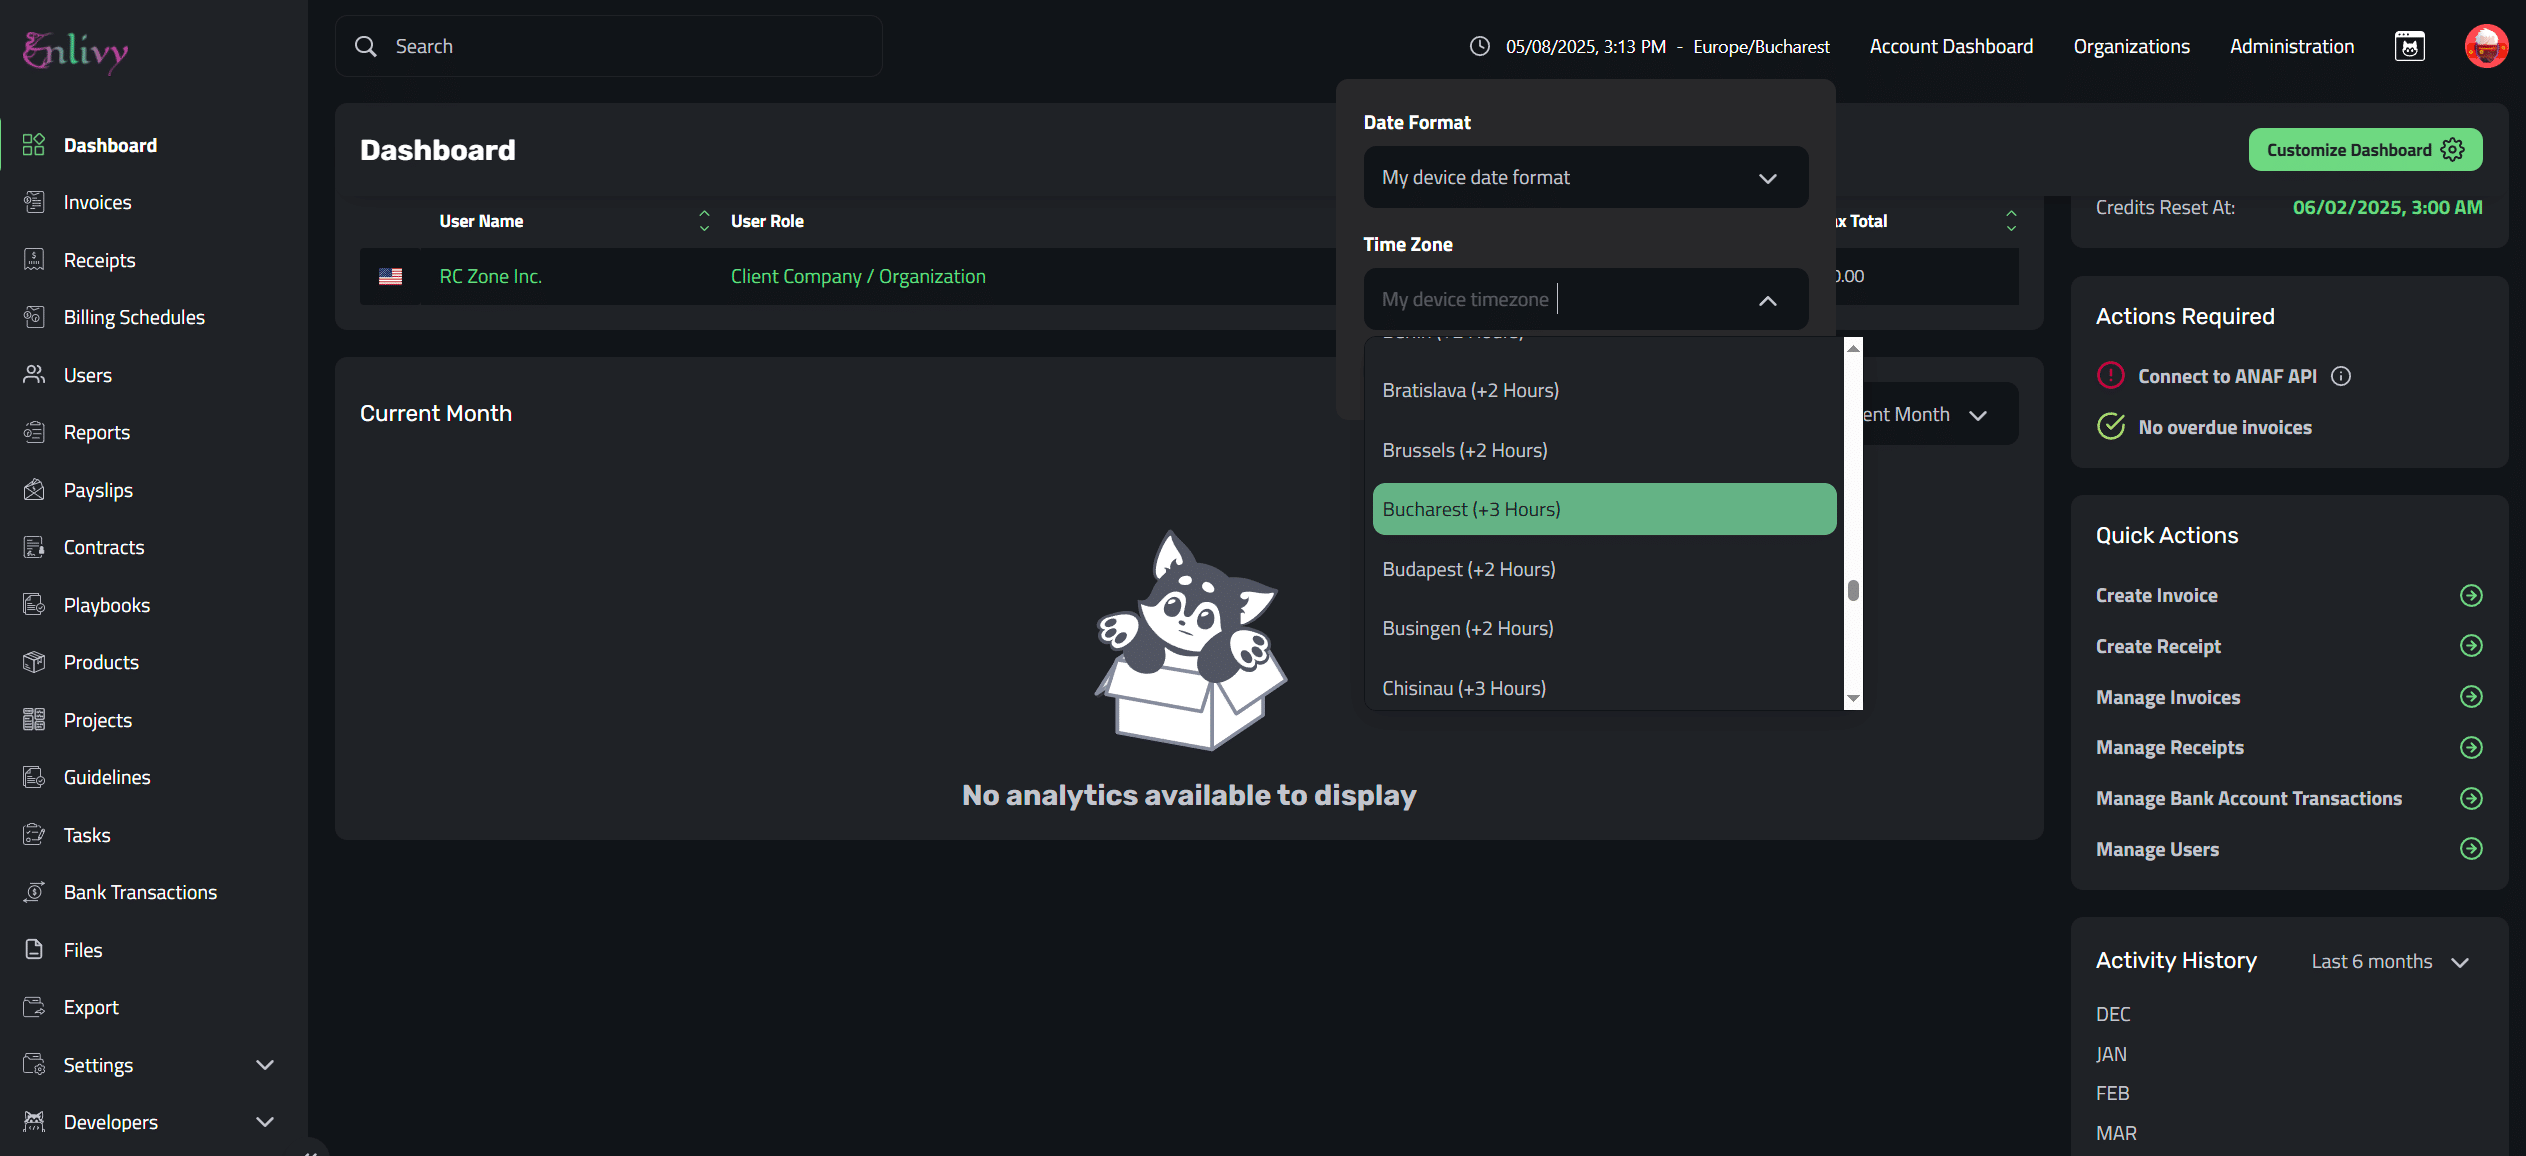
Timezone Settings in the App
In addition to setting the timezone when creating your company or editing user profiles, you can also adjust timezone settings directly from the app interface.
To do so, simply click the Timezone label in the upper-right corner of the screen. This will open a quick settings panel where you can configure:
- Date Format: Choose from a list of available formats. You can also select “My device date format” to automatically match your device’s regional settings.
- Timezone: Select your preferred timezone from the list. Examples include:
- Europe/Budapest (GMT+2)
- Europe/Bucharest (GMT+3)
- Europe/Chisinau (GMT+3)
These settings control how dates and times are displayed across the interface, ensuring consistency with your local preferences.
How Timezones Work
Backend (Server-Side)
On the server, all date and time values are stored in UTC (Coordinated Universal Time) to ensure consistency across all time zones. This is the standard practice, as UTC does not account for daylight saving time or regional differences. When a date or time is recorded, it is stored as UTC, with the time format typically shown in ISO 8601 format, for example:
2025-05-08T13:00:00ZHere, 2025-05-08 represents the date (May 8, 2025), T separates the date from the time, 13:00:00 represents the time (1:00 PM), and the Z indicates that this time is in UTC.
This approach ensures that the system is time zone-agnostic on the server side, avoiding confusion or errors when dealing with users across different regions.
Frontend (User-Side)
When this date is retrieved by the frontend, the system dynamically adjusts the time displayed based on the user’s device timezone or the timezone settings selected in the app. This means the server-stored UTC time is converted to the local time of the user.
For example, if the user is located in Romania (Bucharest), which is in the UTC+3 timezone, the system will convert the UTC time into the local time, adding 3 hours to the UTC timestamp. So, when the server returns:
2025-05-08T13:00:00ZIt will be displayed as:
2025-05-08T16:00:00This ensures that the user sees the time according to their local time zone. If the user is in Bucharest, the time displayed will reflect the +3 hours difference.
Timezone Conversion Example
For a user in New York (which is in UTC-4 during standard time, or UTC-5 during daylight saving time), the system will subtract 4 or 5 hours from the UTC timestamp. For instance, the same server time of 2025-05-08T13:00:00Z will be displayed as:
- 2025-05-08T09:00:00 (for UTC-4, during standard time)
- 2025-05-08T08:00:00 (for UTC-5, during daylight saving time)
Dynamic Adjustments Based on Device or App Settings
The system also allows users to select their timezone manually in the app, either through device settings or by choosing from a list of timezones provided in the app settings. This ensures that users can always view times in a way that matches their local environment.
If the user is traveling or if they change the timezone settings in their app, the times on the app will automatically adjust based on their new selected timezone.