Adding an Invoice from eFactura System
This guide will walk you through the process of adding an invoice from the eFactura system to your Enlivy account.
Access the Network Exchanges Dashboard
In the Enlivy app, navigate to the Network Exchanges menu and check for new invoices with a Success status that do not have an invoice attached.
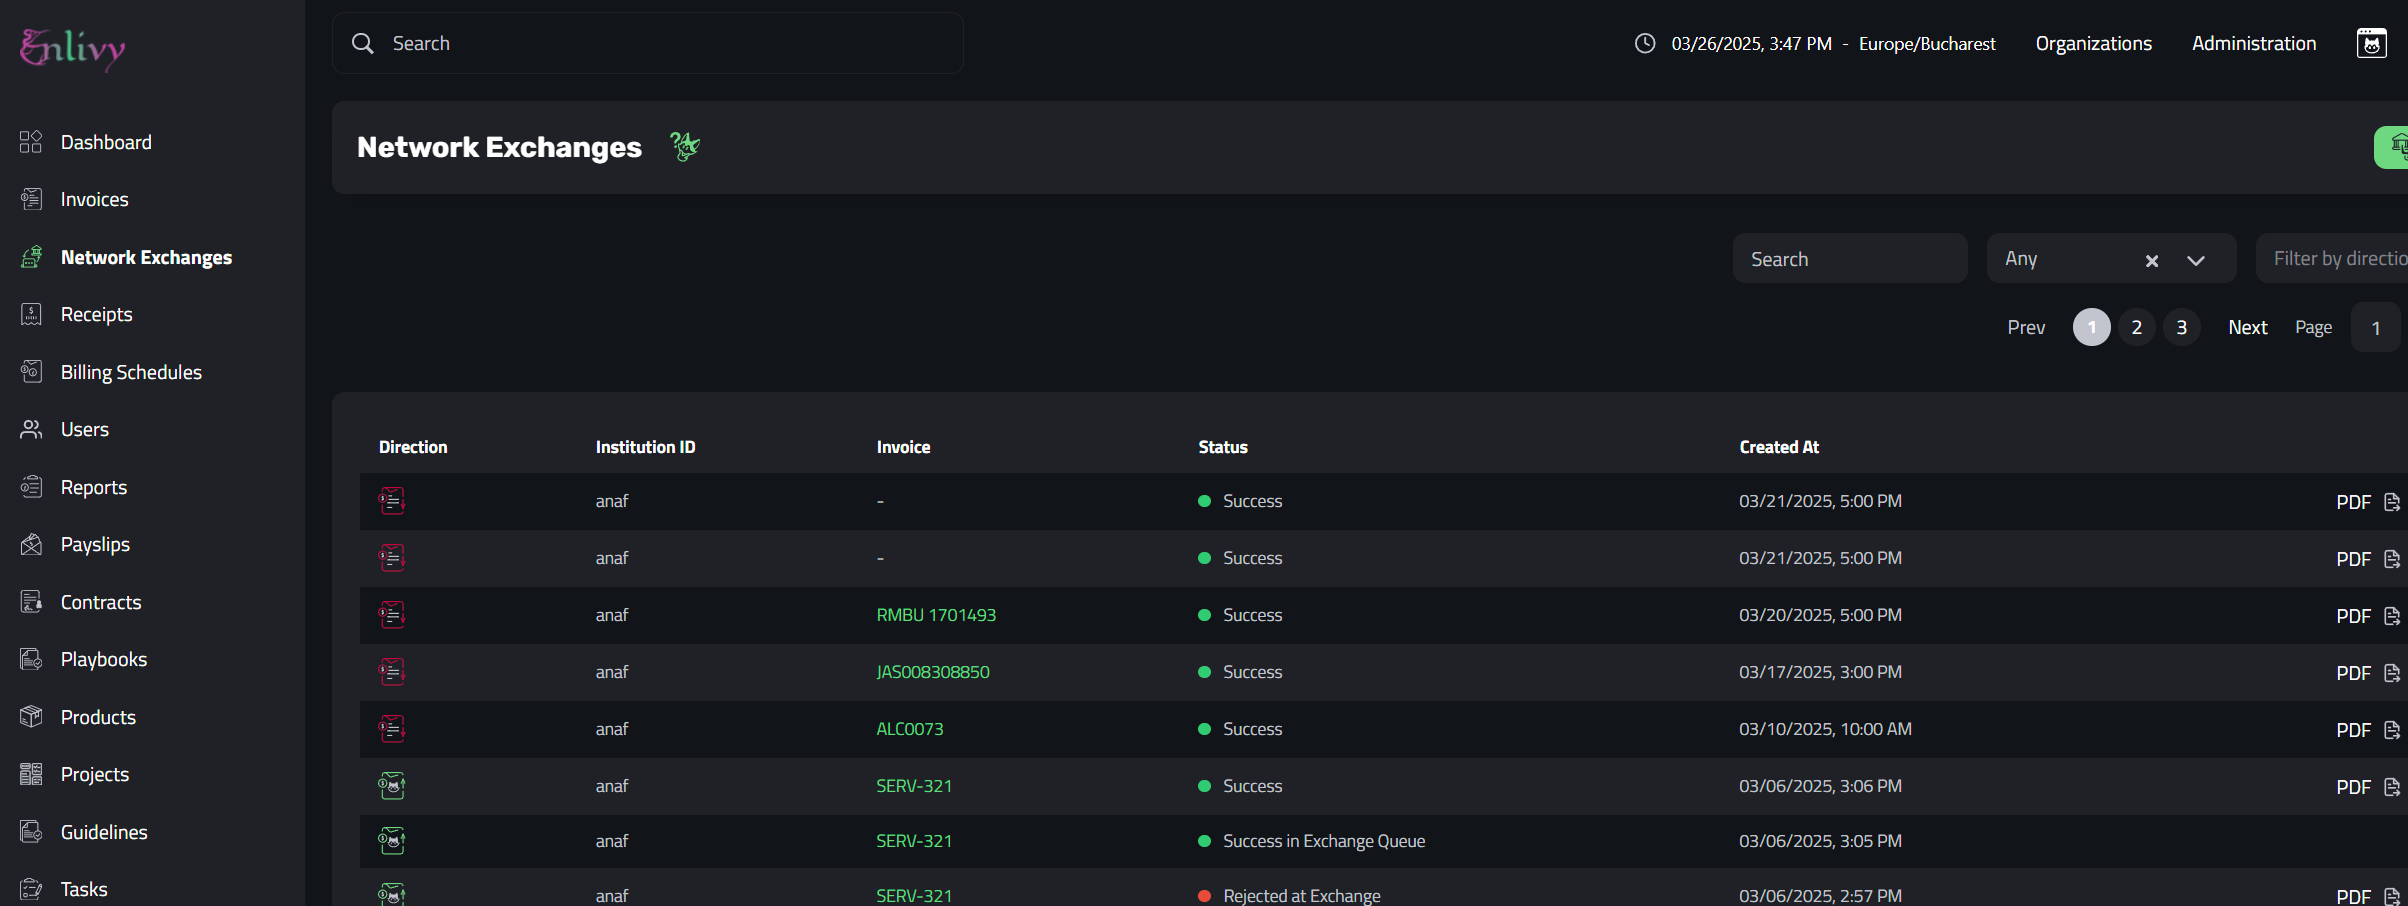
Identify the Invoice Without a Document
Click on one of these invoices to open a new menu with multiple options.
You can either link an existing invoice from Enlivy to this eFactura invoice or, if the invoice hasn’t been added yet, create a new one.
In this case, click the Create New Invoice button to add it directly from eFactura.
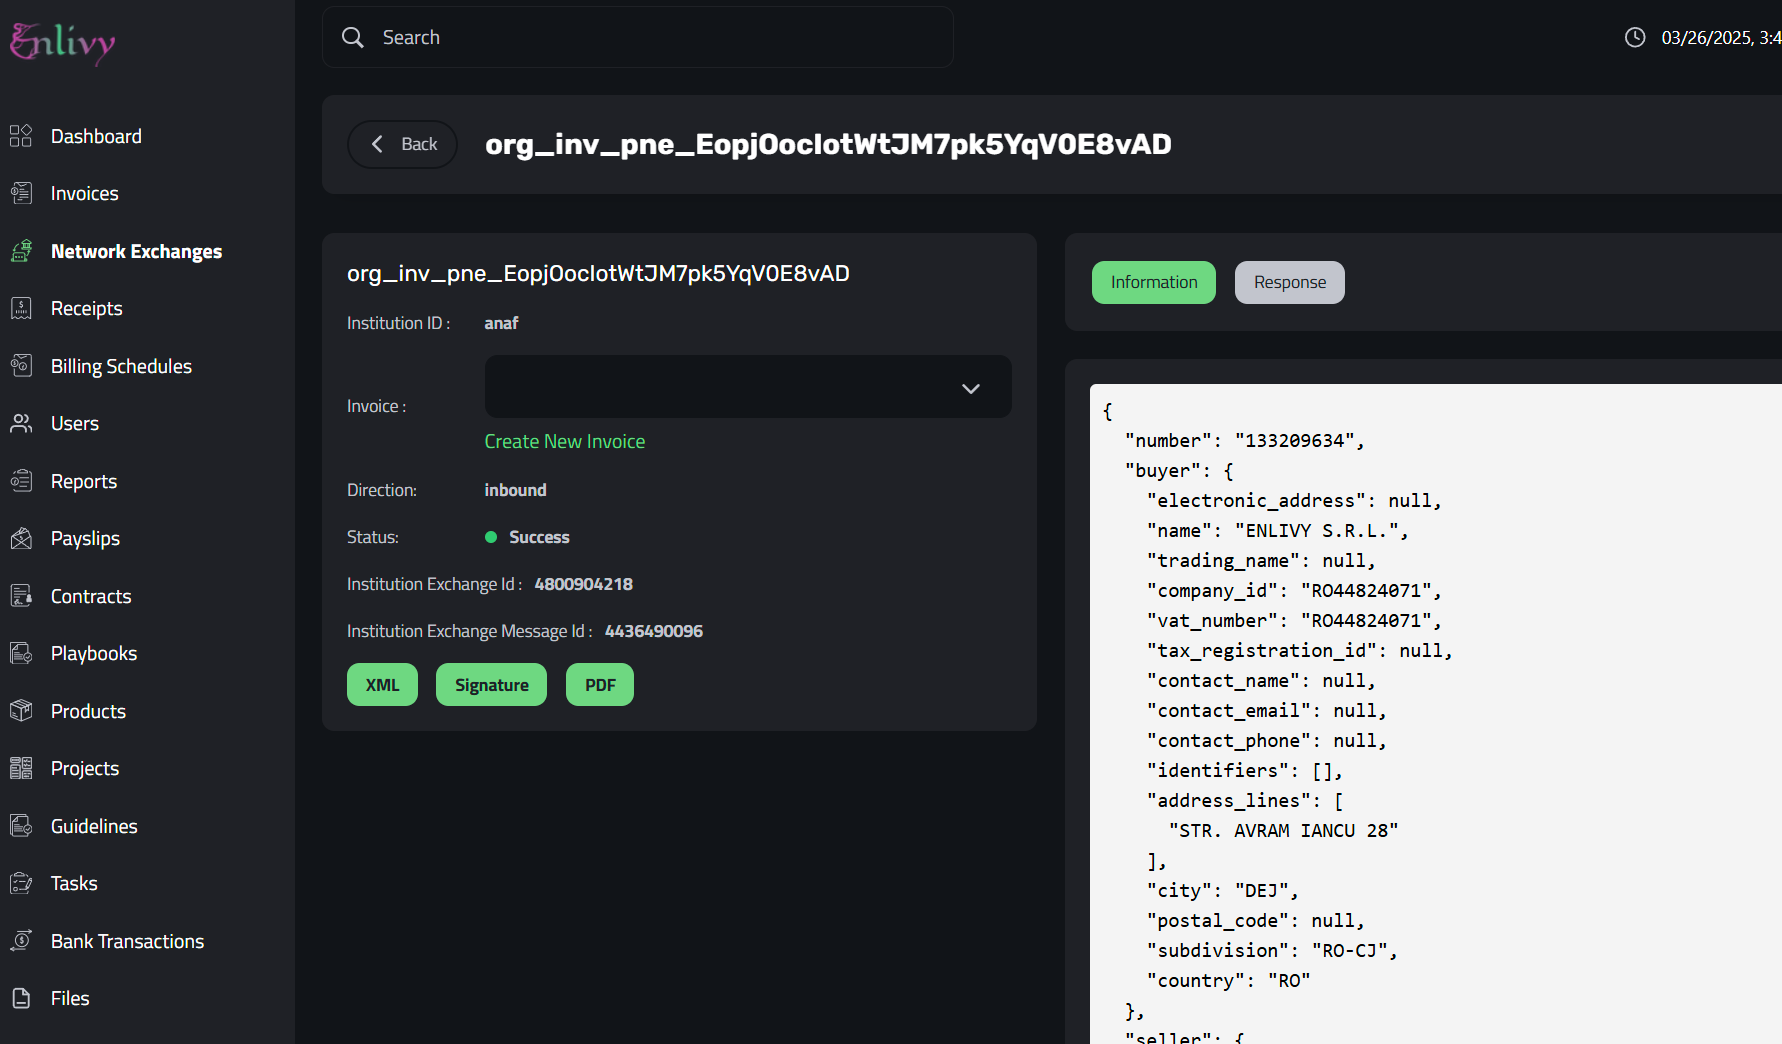
Create a New Invoice from eFactura
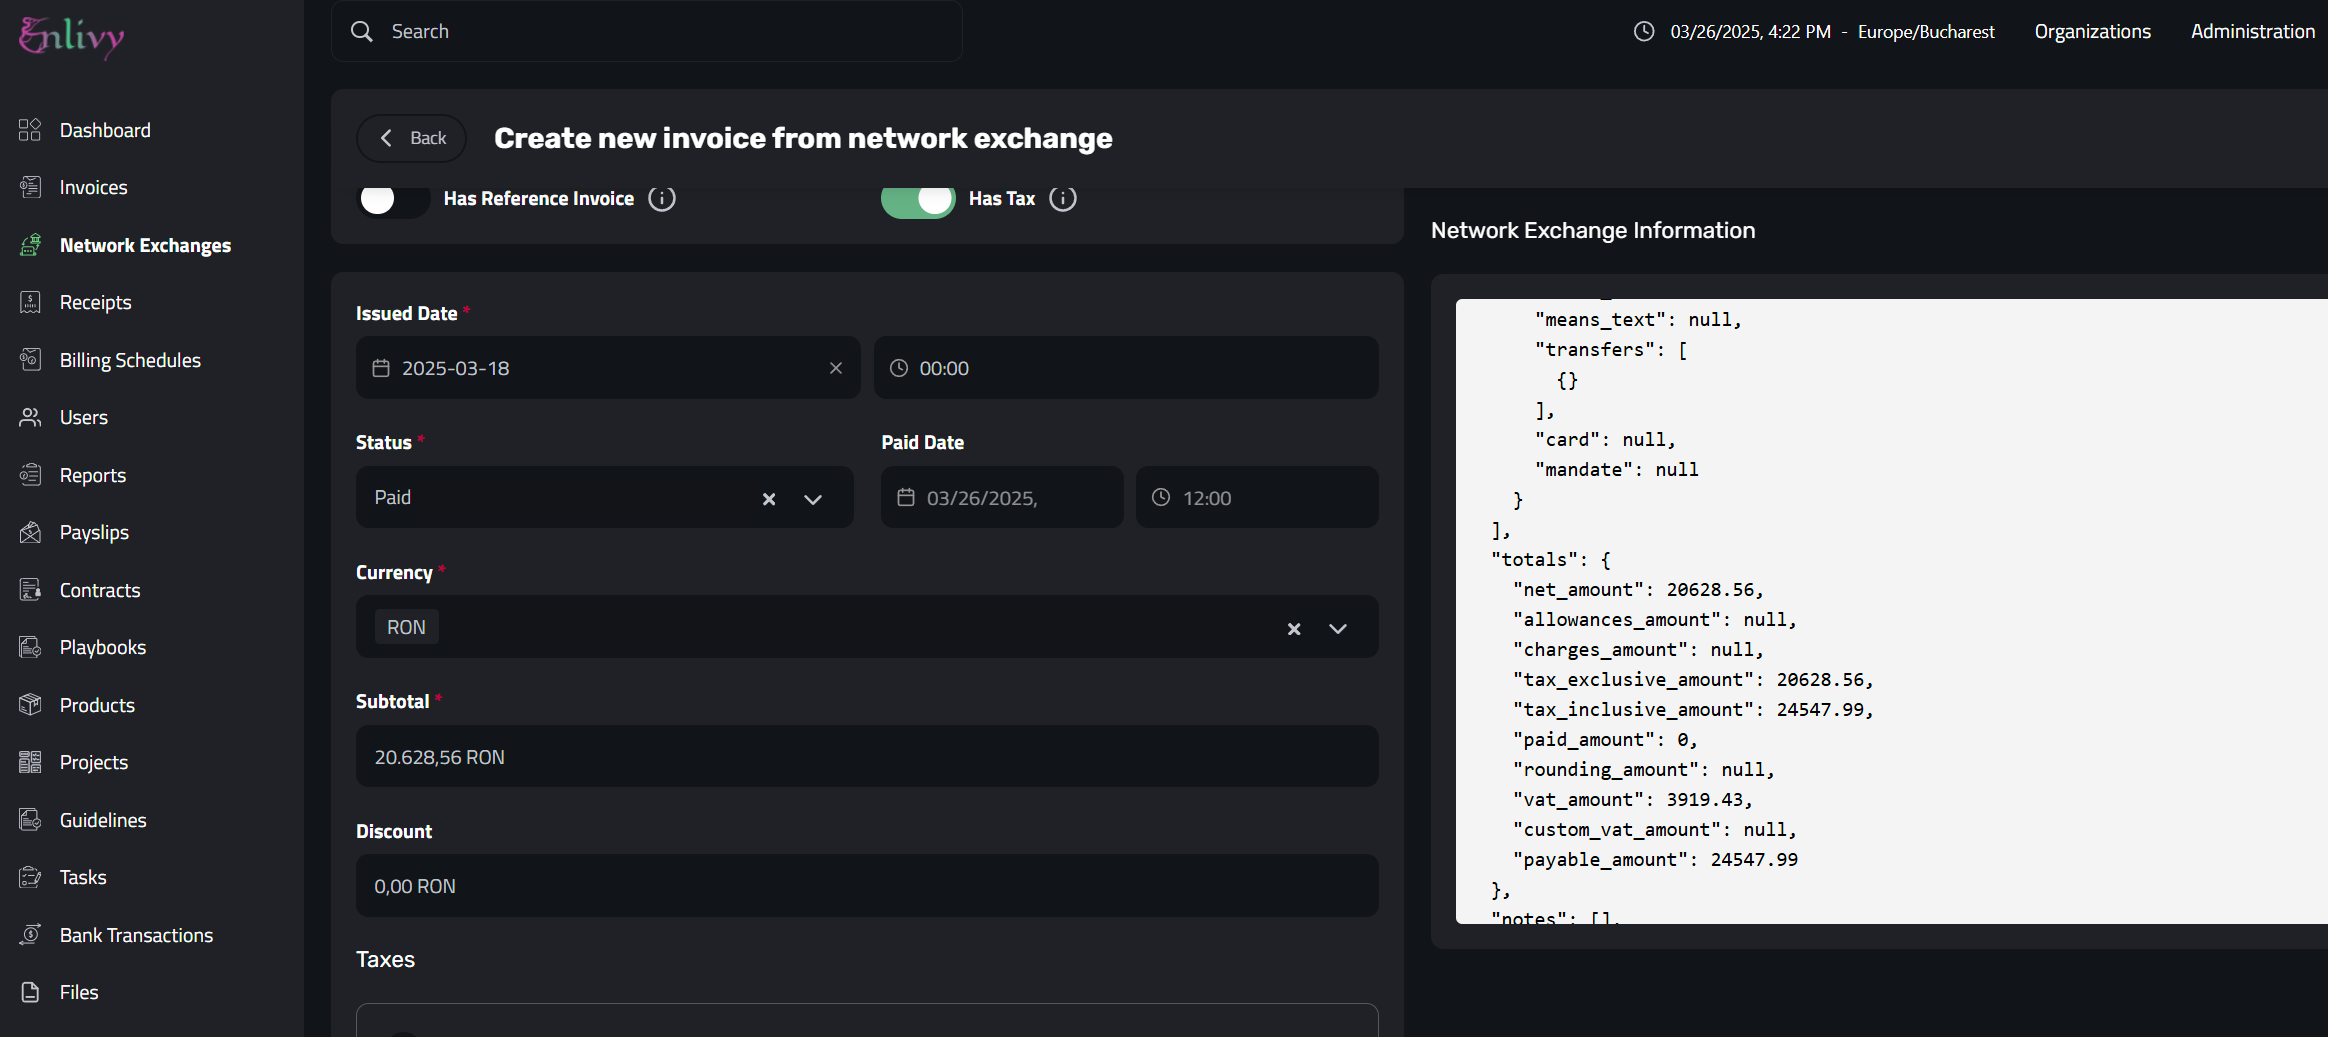
After clicking the Create New Invoice button, you will be taken to a menu where you can manually add the invoice.
On the right side, you will see the details of the ANAF eFactura invoice, including company RO number, sender and receiver details, sums, taxes, and the issued date.

Fill In the Invoice Details in Enlivy
Add the data needed to add the invoice into Enlivy:
- Select the
Direction: in most cases (90%), the eFactura invoice will beissued by someone else to us. - Add the
bank accountused for the payment. - Select the
sending user(the company that issued the invoice). - Select the
receiving user(your company). - Verify the invoice
numberto ensure it matches the eFactura invoice. - If the invoice includes VAT, the
Has Taxoption should automatically be checked, but confirm it’s correct. - Select the
Issue Date: this should be automatically detected by the system, but double-check to ensure it matches the eFactura invoice. - Select the
StatusasPaid, and select the date when you’ve paid the invoice. - Make sure the
Subtotalis the correct one, also make sure to add theTaxesto match the amount on the invoice.
Match Invoice Data with eFactura Details
If the Sending User is not created, click the + in order to create it:

Add a New Supplier (Sending User) If Needed
Adding an User in Enlivy:
You can choose a user role from the drop-down menu. Additionally, the app allows you to create custom user roles if needed. For now, please select Physical Goods Company from the list.
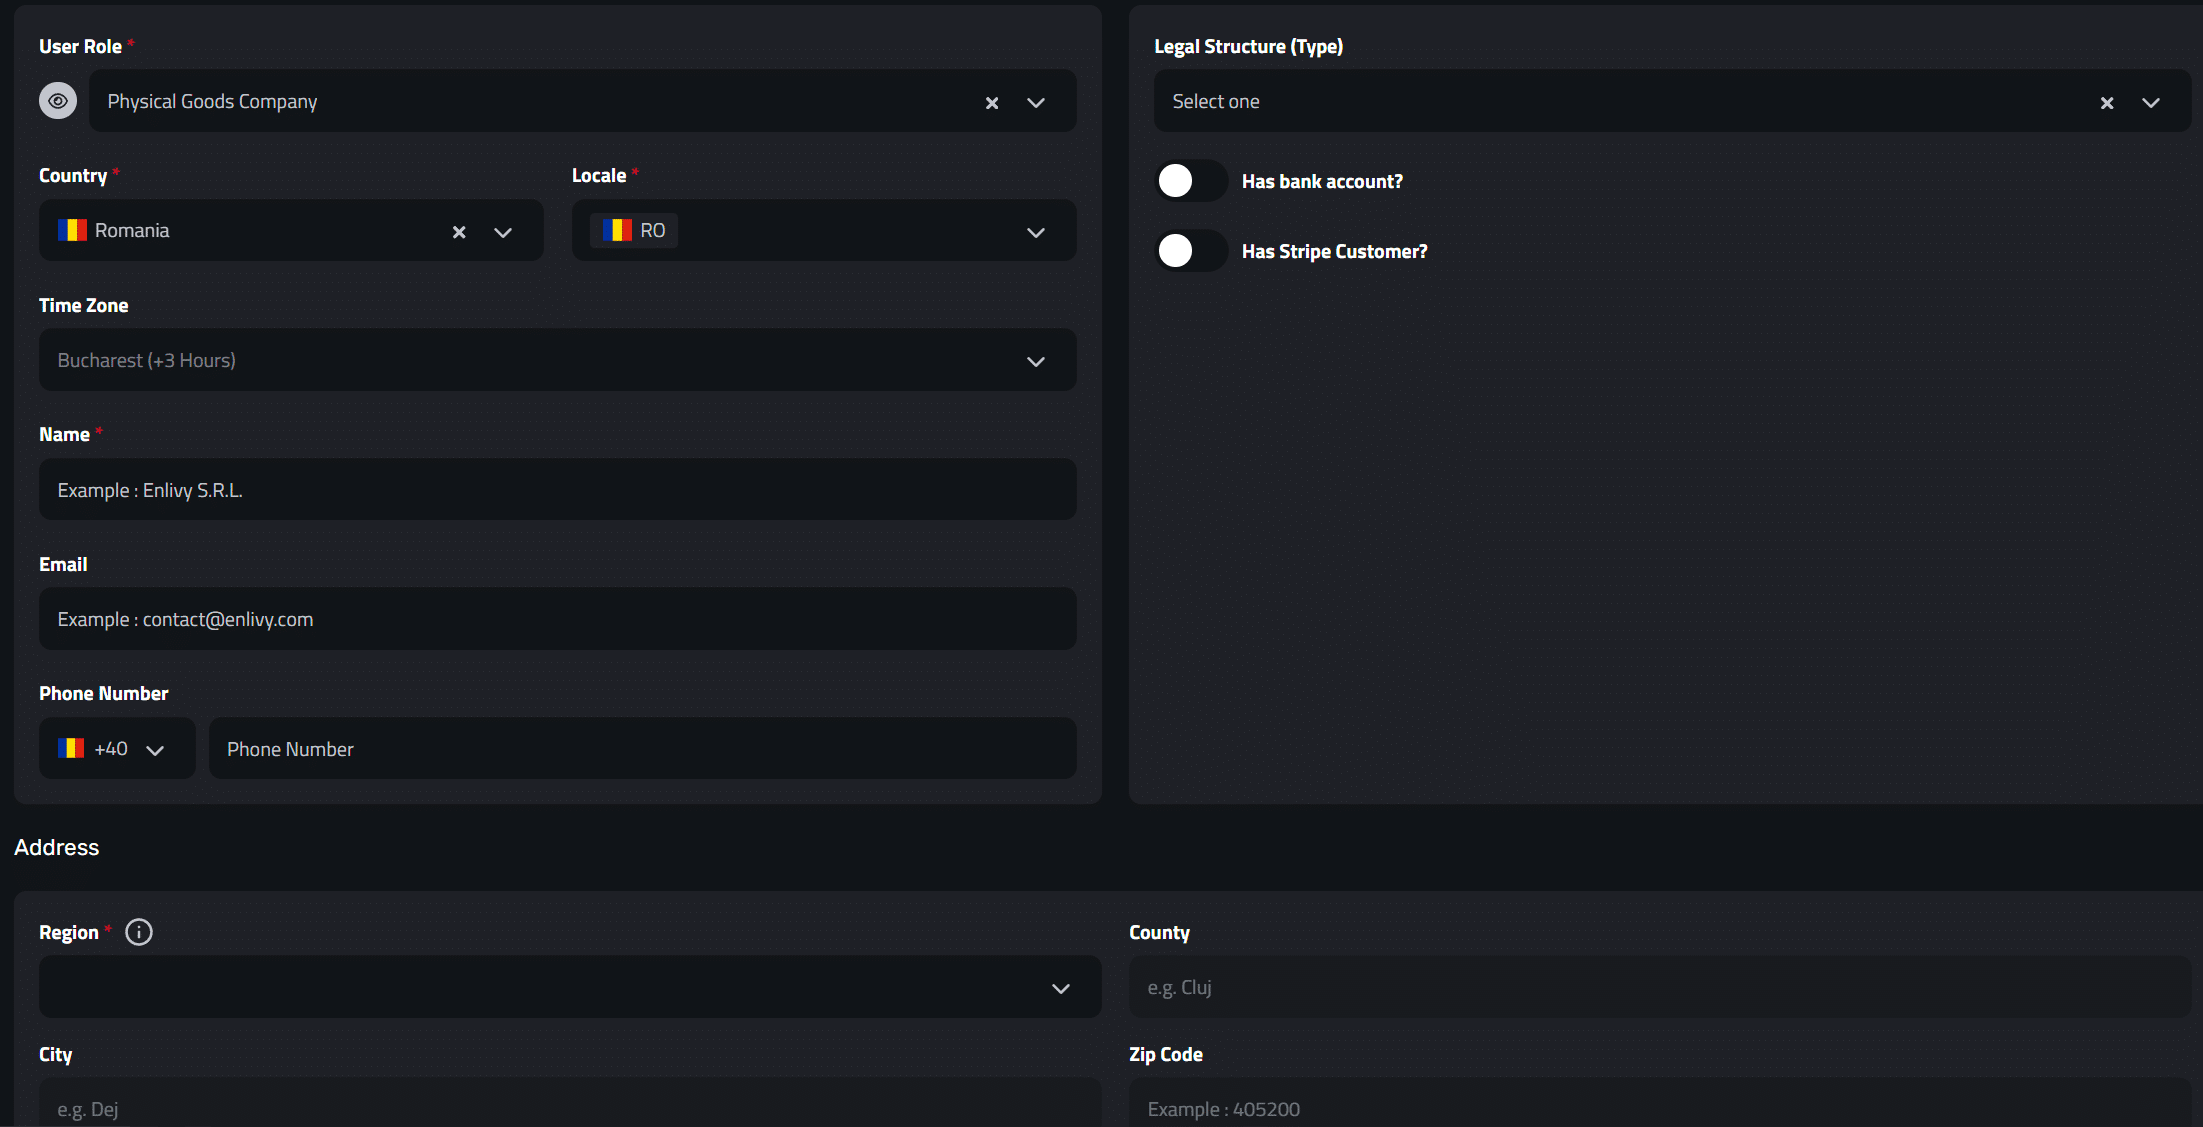
Select the correct country and locale for the supplier from the available options. Then, input the supplier’s name, email address, and phone number (if applicable). Below the contact details, provide the supplier’s full address.
In the Legal Structure(Type) field, select the appropriate legal structure for the company, which varies by country. For example, if the user is from Romania and the company is an SRL, select SRL - Societate cu răspundere limitată. Then, input the relevant fiscal information, such as the RO (CUI) and J (Reg. Commerce number).
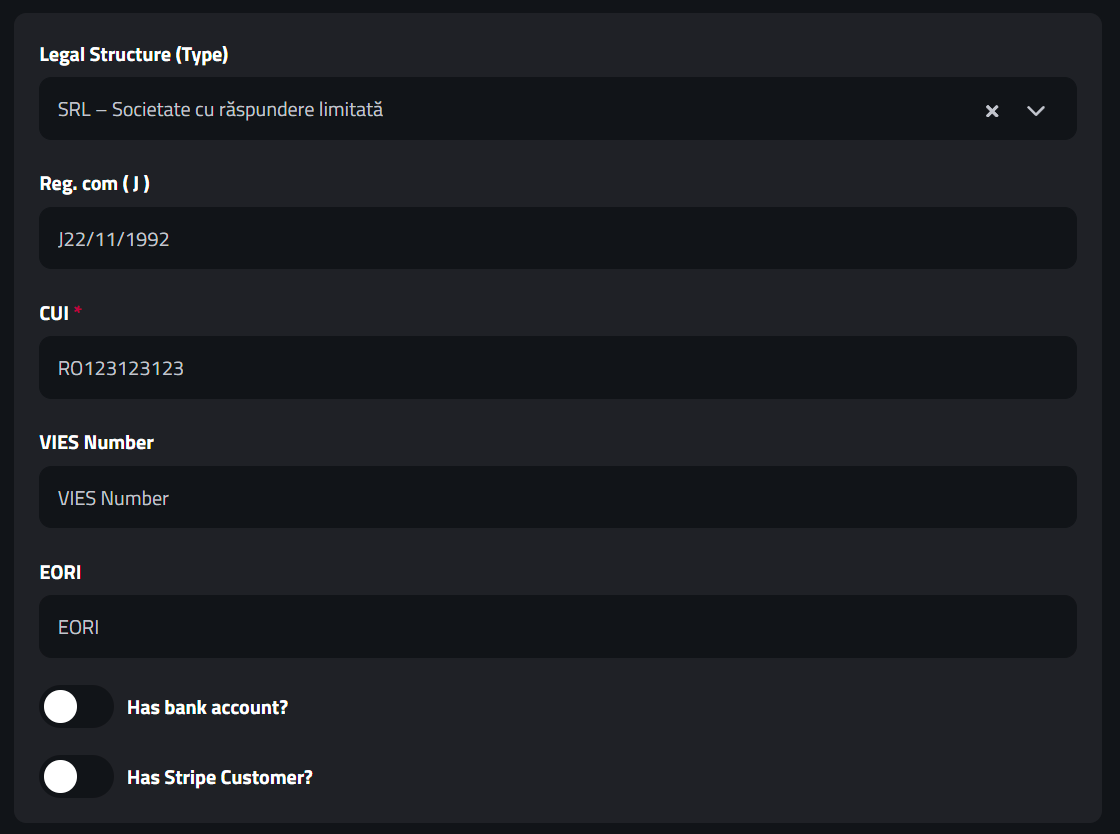
Finally, click Save Changes at the bottom of the window to save the information.
Final Check – Taxes, Amounts & Status
Make sure that the fields of the invoice are correctly completed, including the taxes, if there are any taxes.
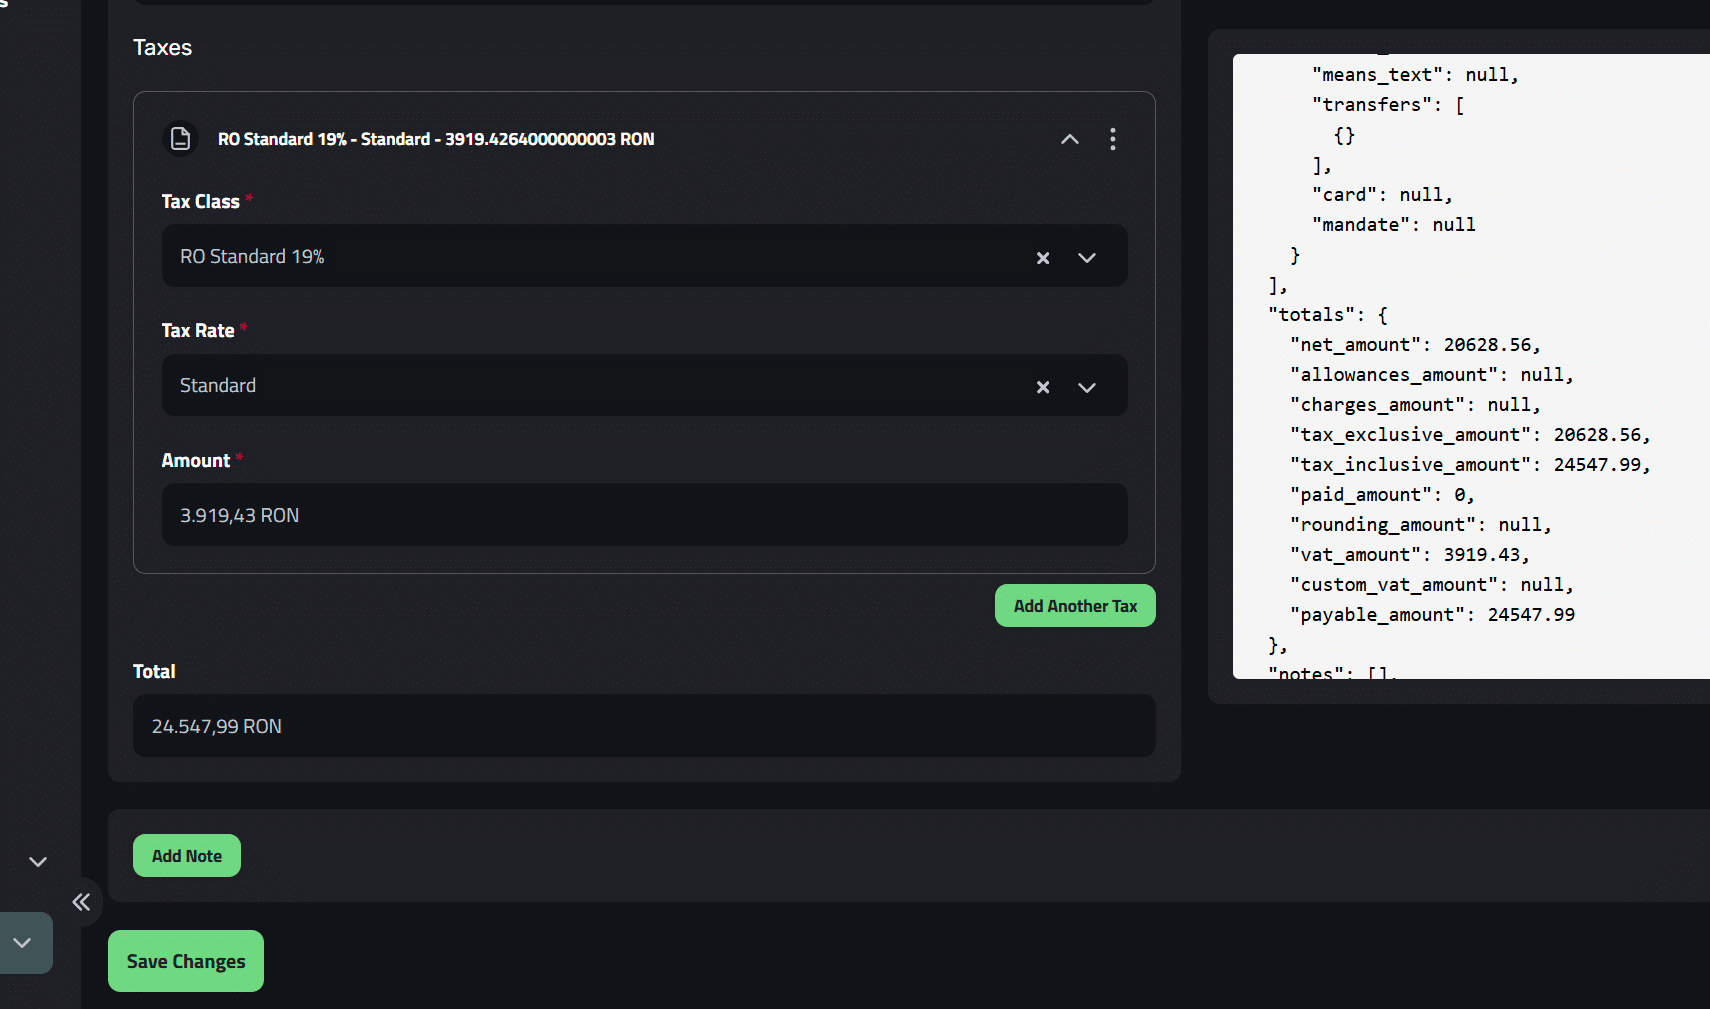
Save the Invoice
Click on Save Changes and the Invoice will be added to Enlivy.