Bank Statement File Import
Preparing your CSV file
This guide will lead you through the process of importing your bank transactions, or any other relevant transactions, from a CSV file directly into your company account within the Enlivy app.
By utilizing this convenient feature, you can save time and ensure accuracy.
We’ll provide comprehensive instructions, covering everything from selecting the appropriate file format to mapping data points and completing the import.
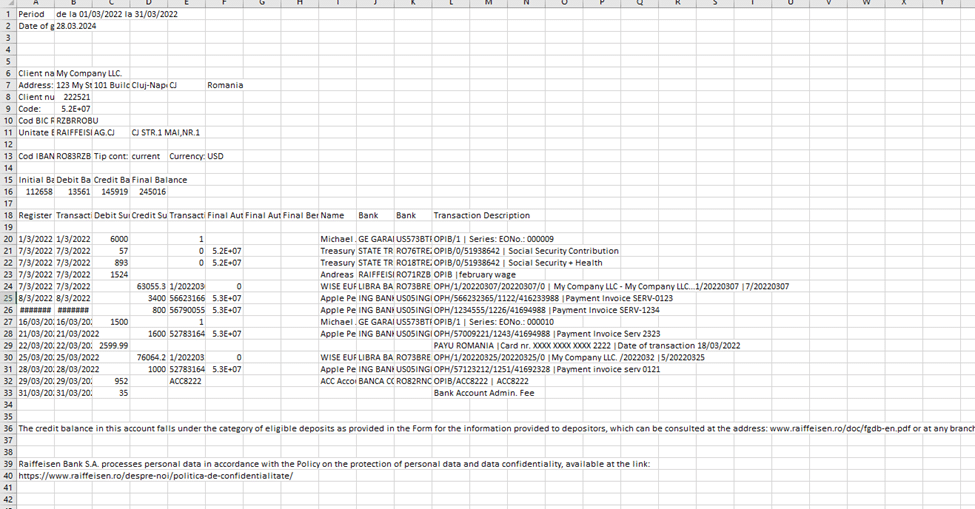
Throughout this guide, we’ll use a sample bank statement to illustrate the steps. However, the process is applicable to most actual bank statements you download from your financial institution, typically in formats like XLS (.xls) or XLSX (.xlsx).
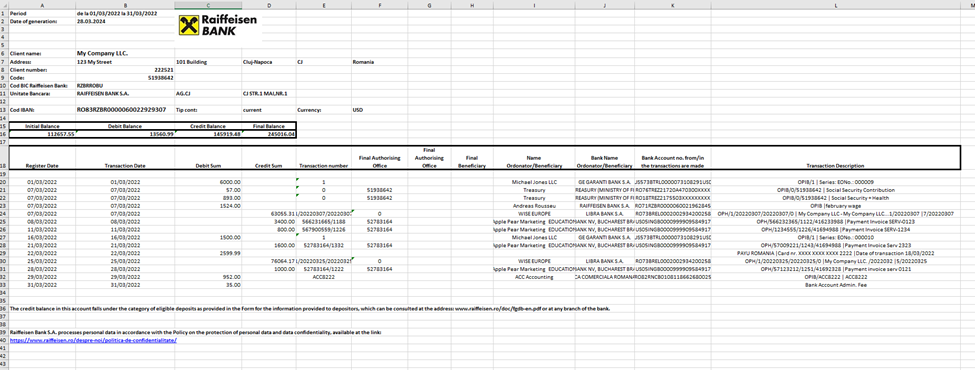
We will use a bank statement from March 2022, containing both debit and credit transactions. You can access it in the provided XLS format above.
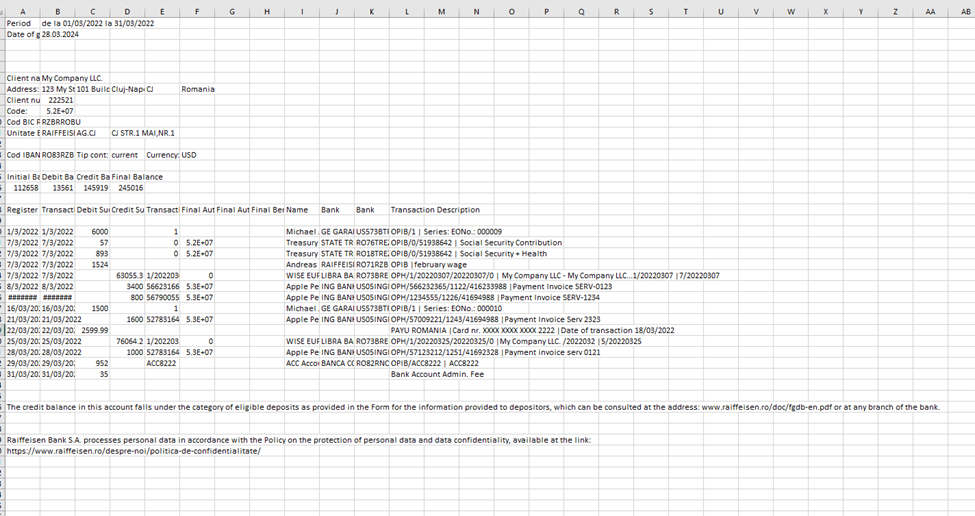
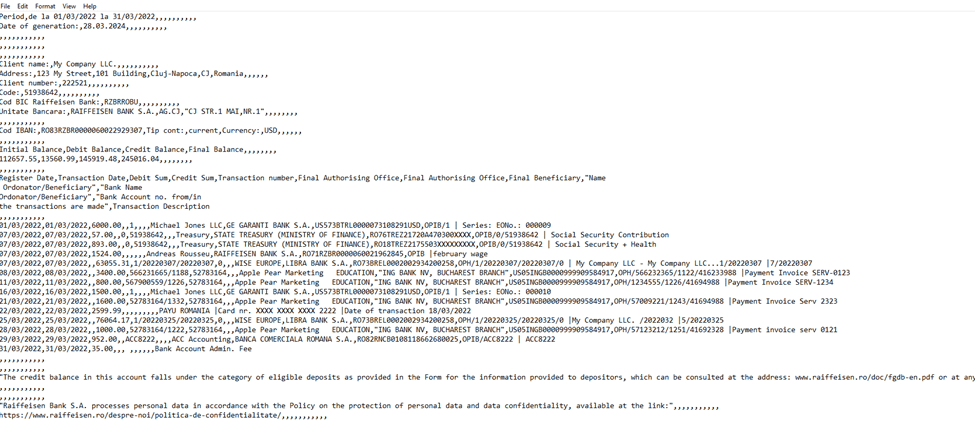
The initial step is to convert the XLS file to CSV format. Once converted, the file will display in Excel as a CSV or like this in a text editor.
And in the text editor:
Now that you’ve prepared your CSV file for import, we can begin the import process.
Importing Bank Transactions to the Enlivy App from a CSV file
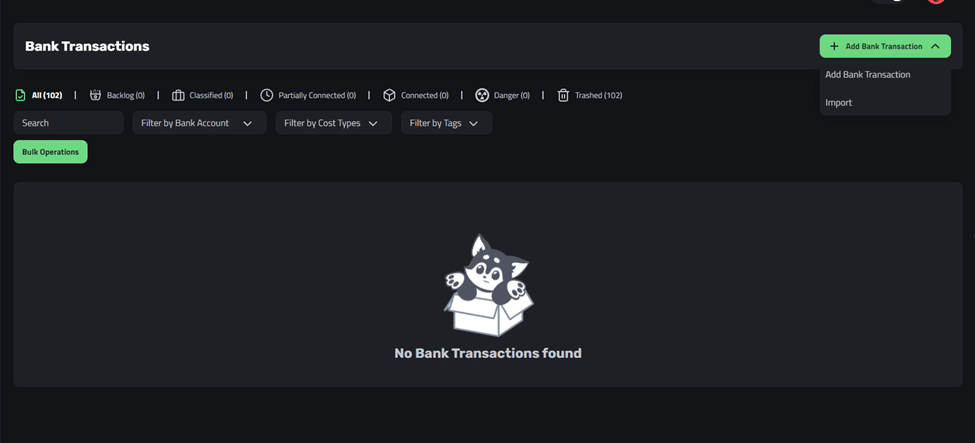
First, navigate to the Bank Transactions tab in the Enlivy App.
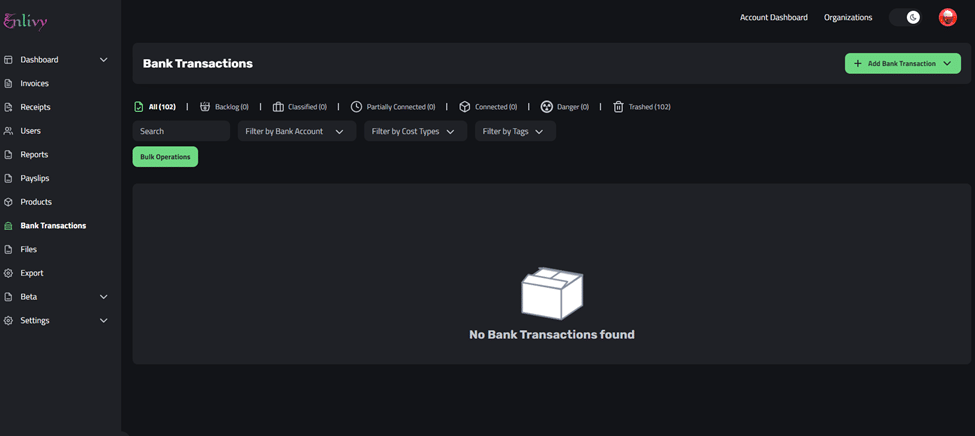
On the right side of the screen, click the Add Bank Transaction button, followed by the Import button.
After clicking the Import button, you will be prompted to choose a CSV file and select a bank account where the imported transactions will be stored.
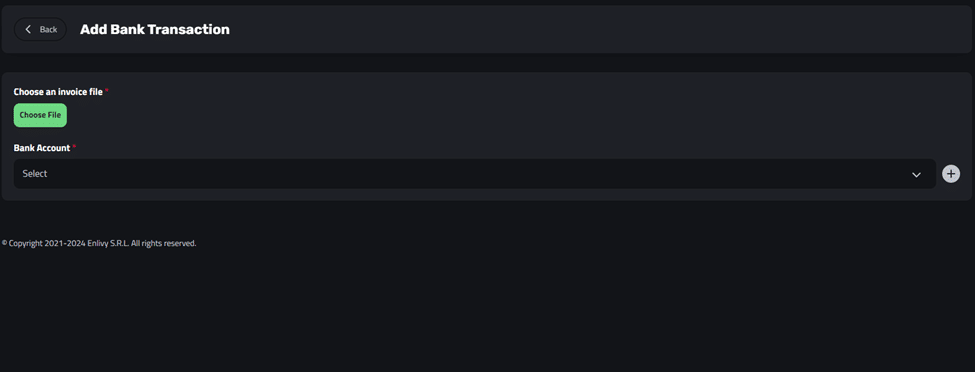
Choose your CSV file; I will use the one mentioned at the beginning of this document. Next, select a bank account; I will opt for one of my existing accounts in the Enlivy Application, named Banca Test.
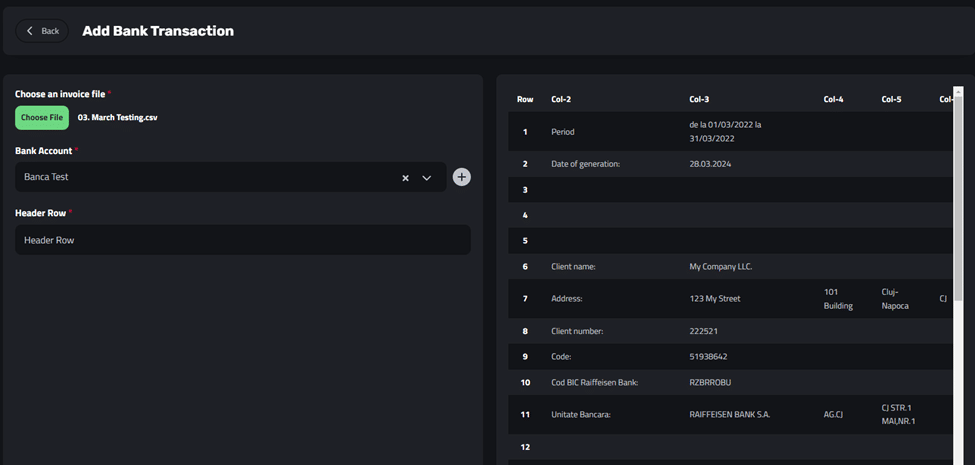
After selecting a CSV file, the preview of that file appears on the right side of the screen, as shown in the screenshot above.
Our next step is to identify the Header Row of the table in the bank statement.
Let’s revisit the bank statement to determine its Header Row:
We can observe that the statement’s row is represented by Row 18, as depicted in the CSV file preview on the right side:
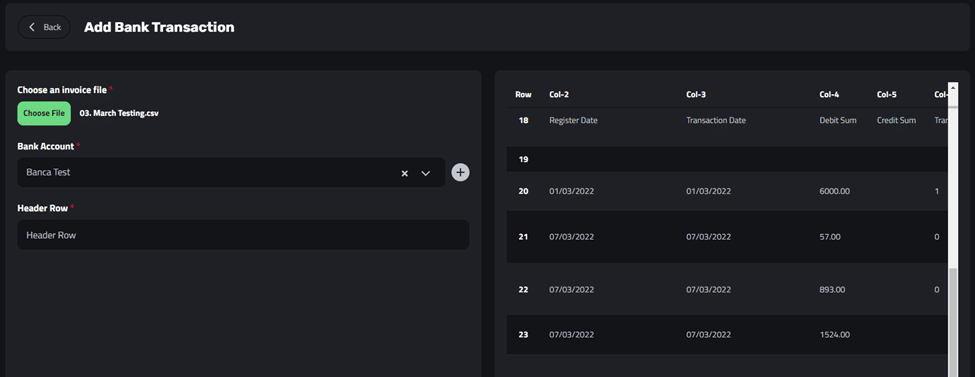
We will select Row 18 as the Header Row, after which additional fields will appear, as shown in the following screenshot:
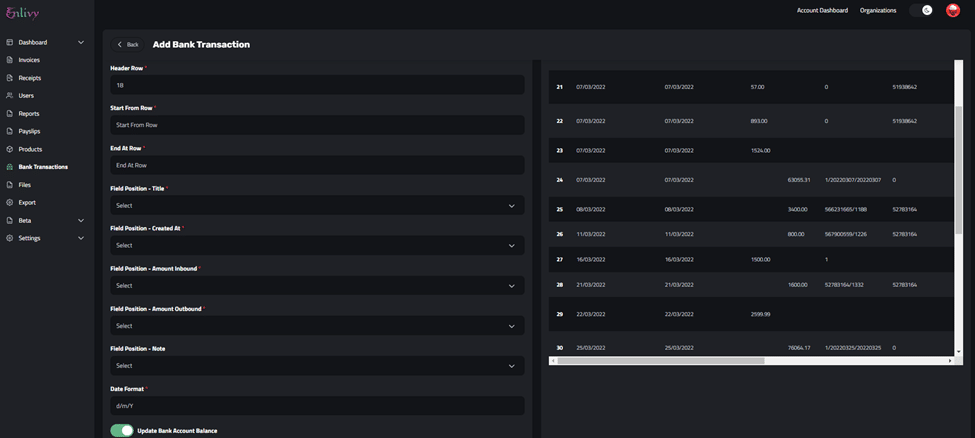
Here’s an explanation of all the fields in the Bank Transactions – Import section
-
Header Row
Specifies the row that will serve as the header in your CSV during the import process.
-
Start from Row
Indicates the row from which the data should be collected.
-
End at Row
Specifies the row at which the data collection should conclude (i.e., the last transaction line).
-
Field Position – Title
Choose the column or field position from the table to designate the transaction title.
-
Field Position – Created At
Select the column or field position from the table to indicate the transaction date or registration date.
-
Field Position – Amount Inbound
Select the column or field position from the table that shows the amount transferred out of the bank account.
-
Field Position – Amount Outbound
Select the column or field position from the table that shows the amount transferred into the bank account.
-
Field Position – Note
Designate a column or field position to act as a note.
-
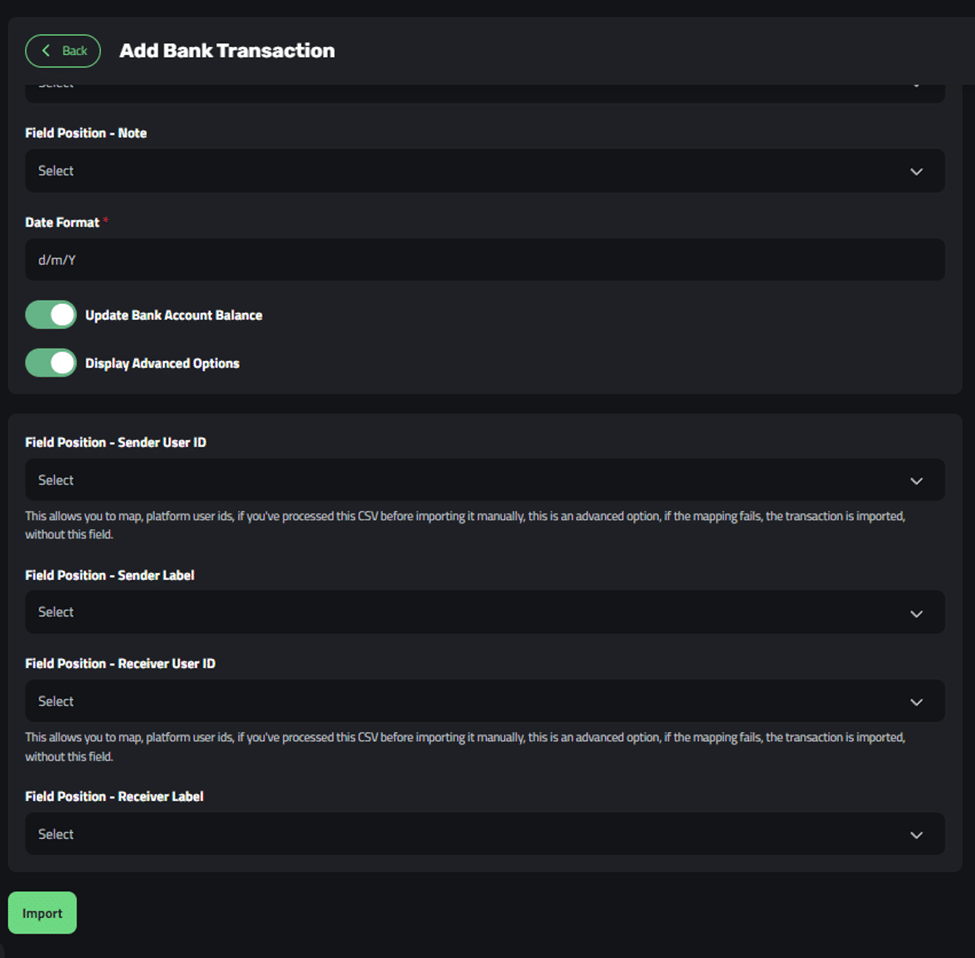
Date Format
Input the date format; the standard format is ‘d/m/Y’.
Update Bank Account Balance: If checked, it will update the balance of the selected bank account with the imported transactions.
Display Advanced Options: When checked, it will reveal additional advanced options:
- Field Position –
Sender User ID - Field Position –
Sender Label - Field Position –
Receiver User ID - Field Position –
Receiver Label
These fields allow you to map more information from the CSV (additional fields/columns) as needed.
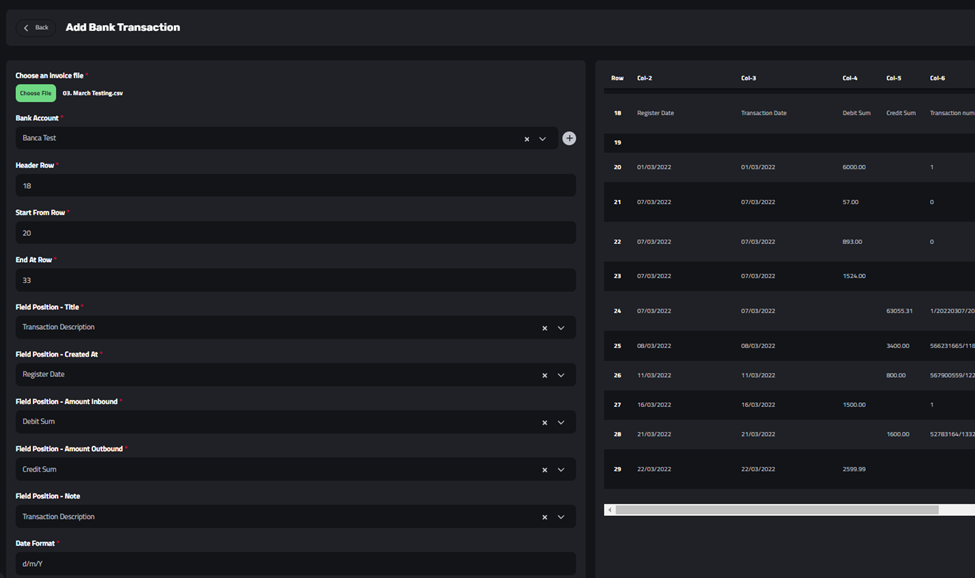
Here’s the recommended mapping setup for the CSV, based on the example we’ve provided
-
Header Row: 18
This row represents the header for our bank statement table.
-
Start from Row: 20
We will start importing transactions from this row. Upon inspection of the CSV and its preview, we can see that row 19 is blank, making row 20 our starting point.
-
End at Row: 33
This is the last transaction row we wish to import. Although the file contains additional rows, they are irrelevant to us as they do not contain transaction information.
-
Field Position – Title
Transaction Description – We have selected the ‘Transaction Description’ column from the file to serve as the title of each transaction in the import.
-
Field Position – Created At : Register Date
We have chosen the ‘Register Date’ from our file to represent the transaction date in the Enlivy App after the import is completed.
-
Field Position – Amount Inbound: Debit Sum
We selected the column that shows the amount of currency leaving the bank account in the file we are importing.
-
Field Position – Amount Outbound: Credit Sum
We selected the column that shows the amount of currency entering the bank account in the file we are importing.
-
Field Position – Note: Transaction Description
We selected the ‘Transaction Description’ column to act as a note in the Enlivy App.
-
Date Format: d/m/Y
This setting remains unchanged.
After entering the desired information in the fields above, a new preview will be generated at the bottom of the page by the App. This preview will display how the lines from the CSV will be mapped in the Enlivy App and how they will appear. The preview is automatically generated based on the inputs we provided in the fields above. In our case, it looks like this:
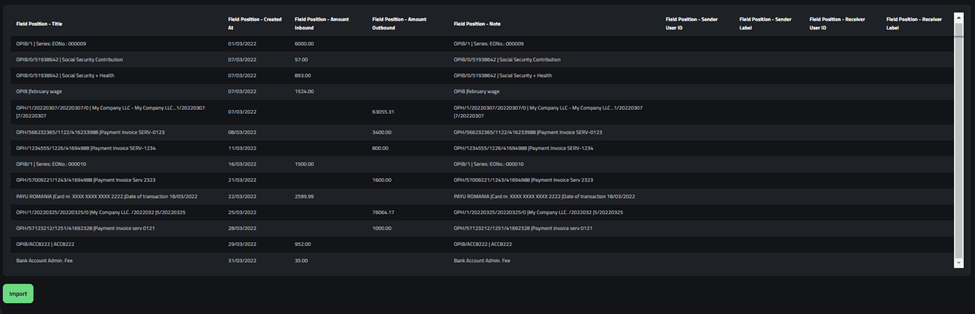
If we have entered the correct fields, the table should appear as intended. If everything is correct, we can proceed by clicking the Import button.
Congratulations 👏, you’ve imported your first transactions file to Enlivy.