Adding a Bank Account
In this guide, we’ll walk you through how to manually add a bank account in the Enlivy application, so you can easily select it when creating invoices.
Navigate to Bank Accounts
First, navigate to Settings from the left menu, then go to Accounting – Bank Accounts.
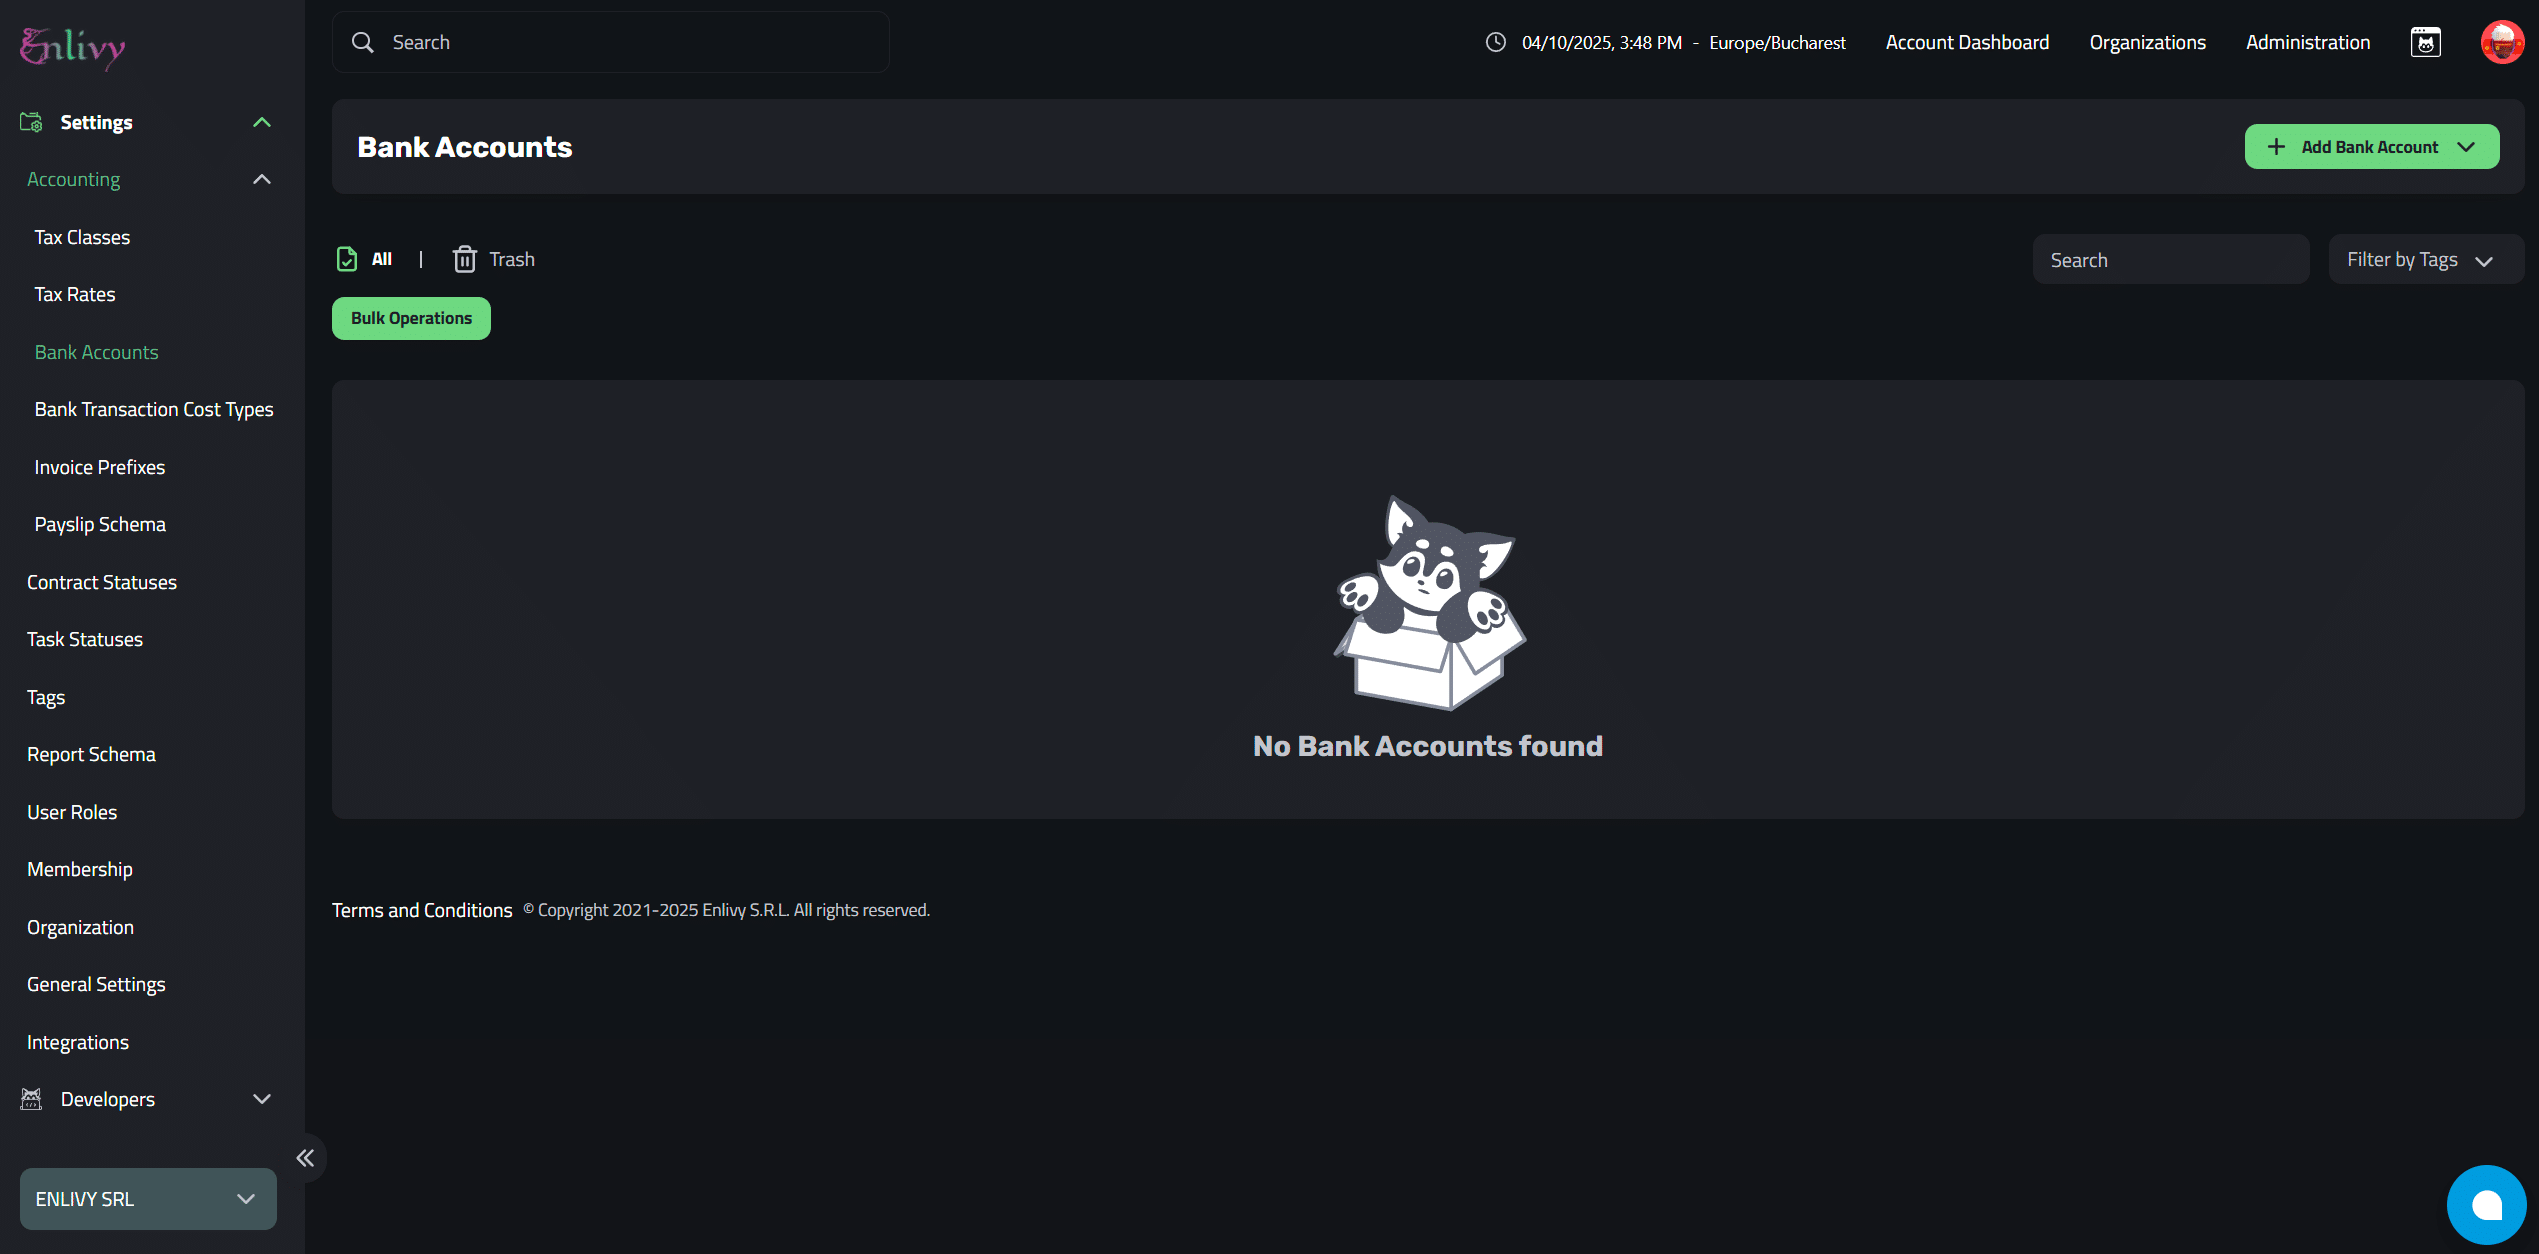
The Bank Accounts Dashboard
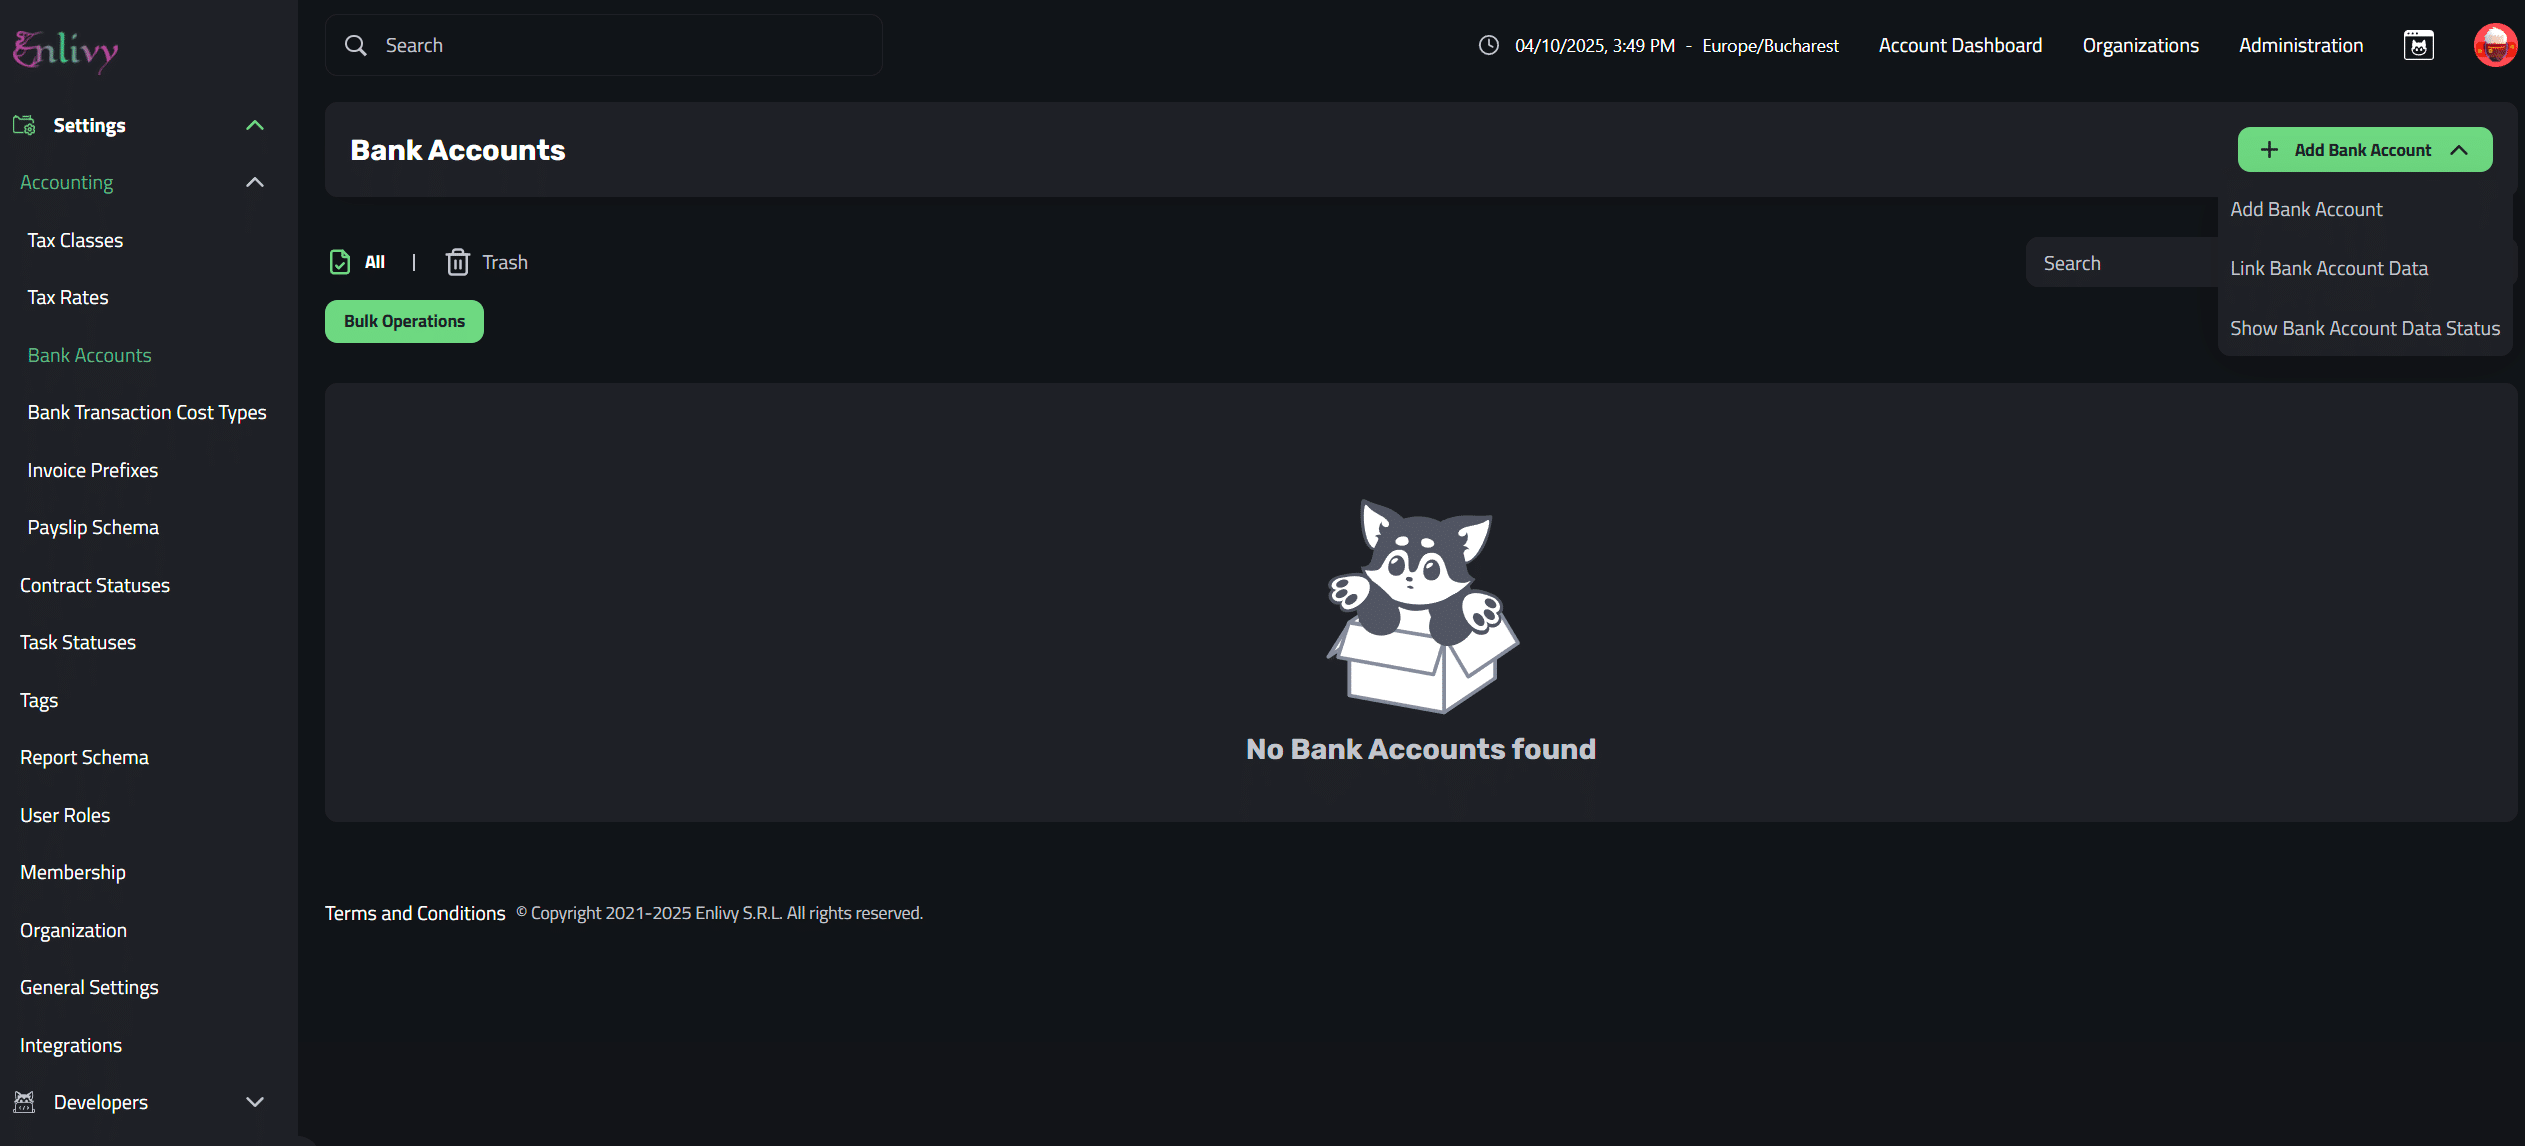
Then, click the + Add Bank Account button in the right side of the screen, it has 3 options Add Bank Account, Link Bank Account Data and Show Bank Account Data Status.
When adding a new bank account, you’ll have to click on Add Bank Account button.
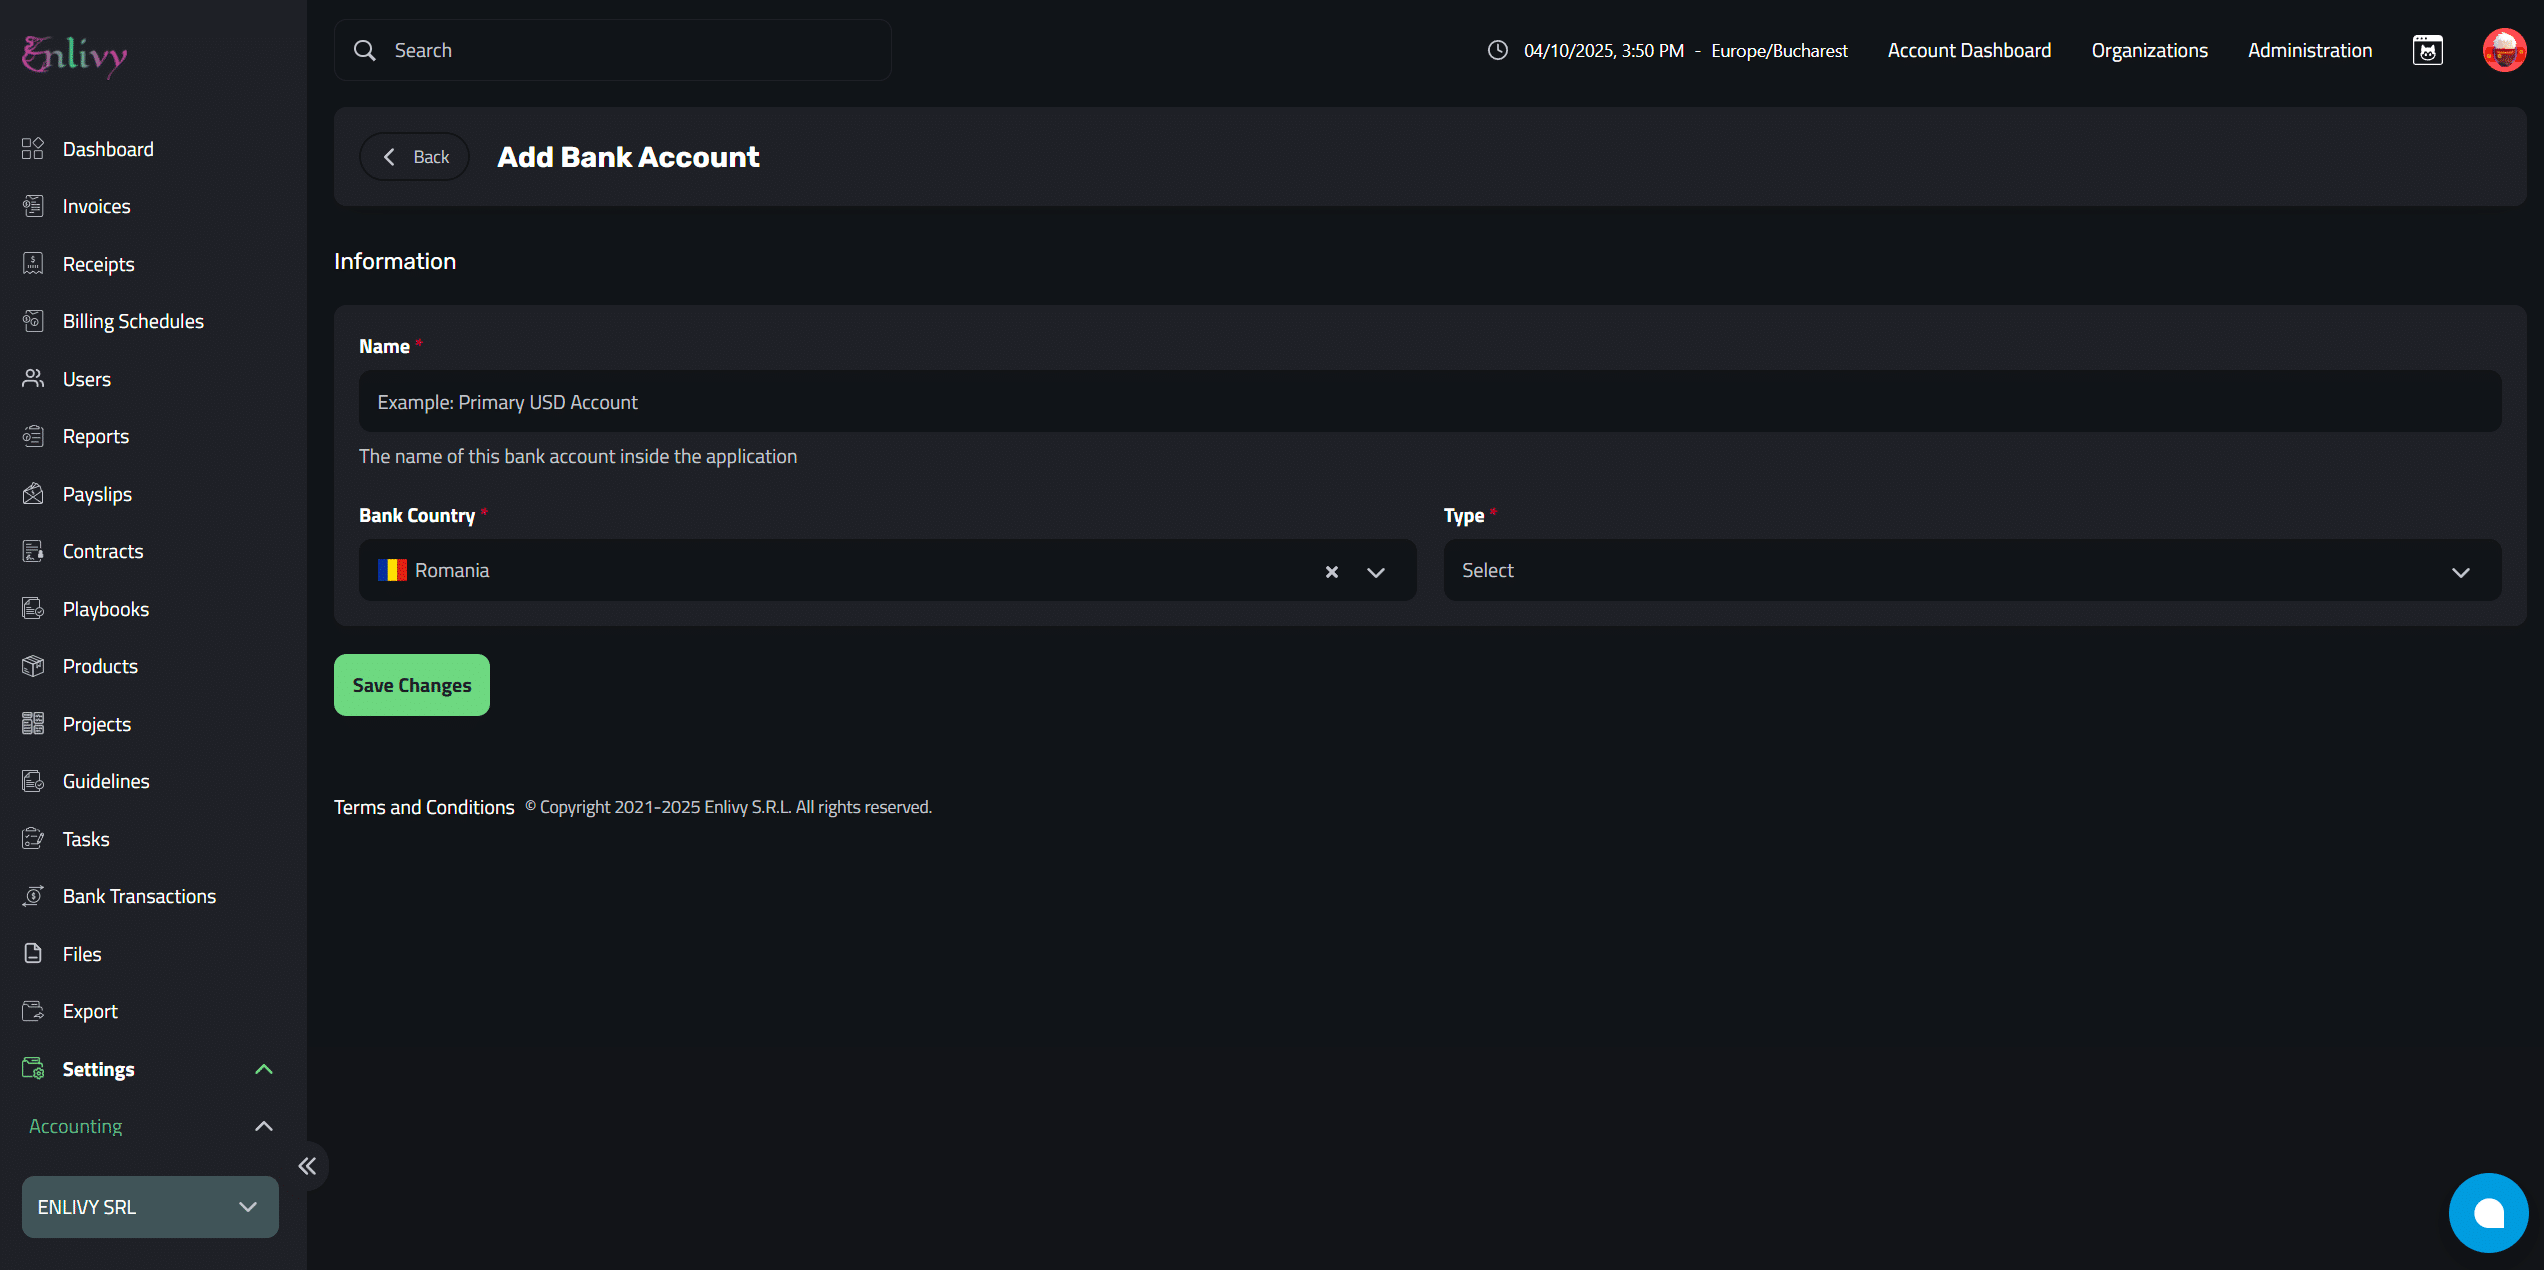
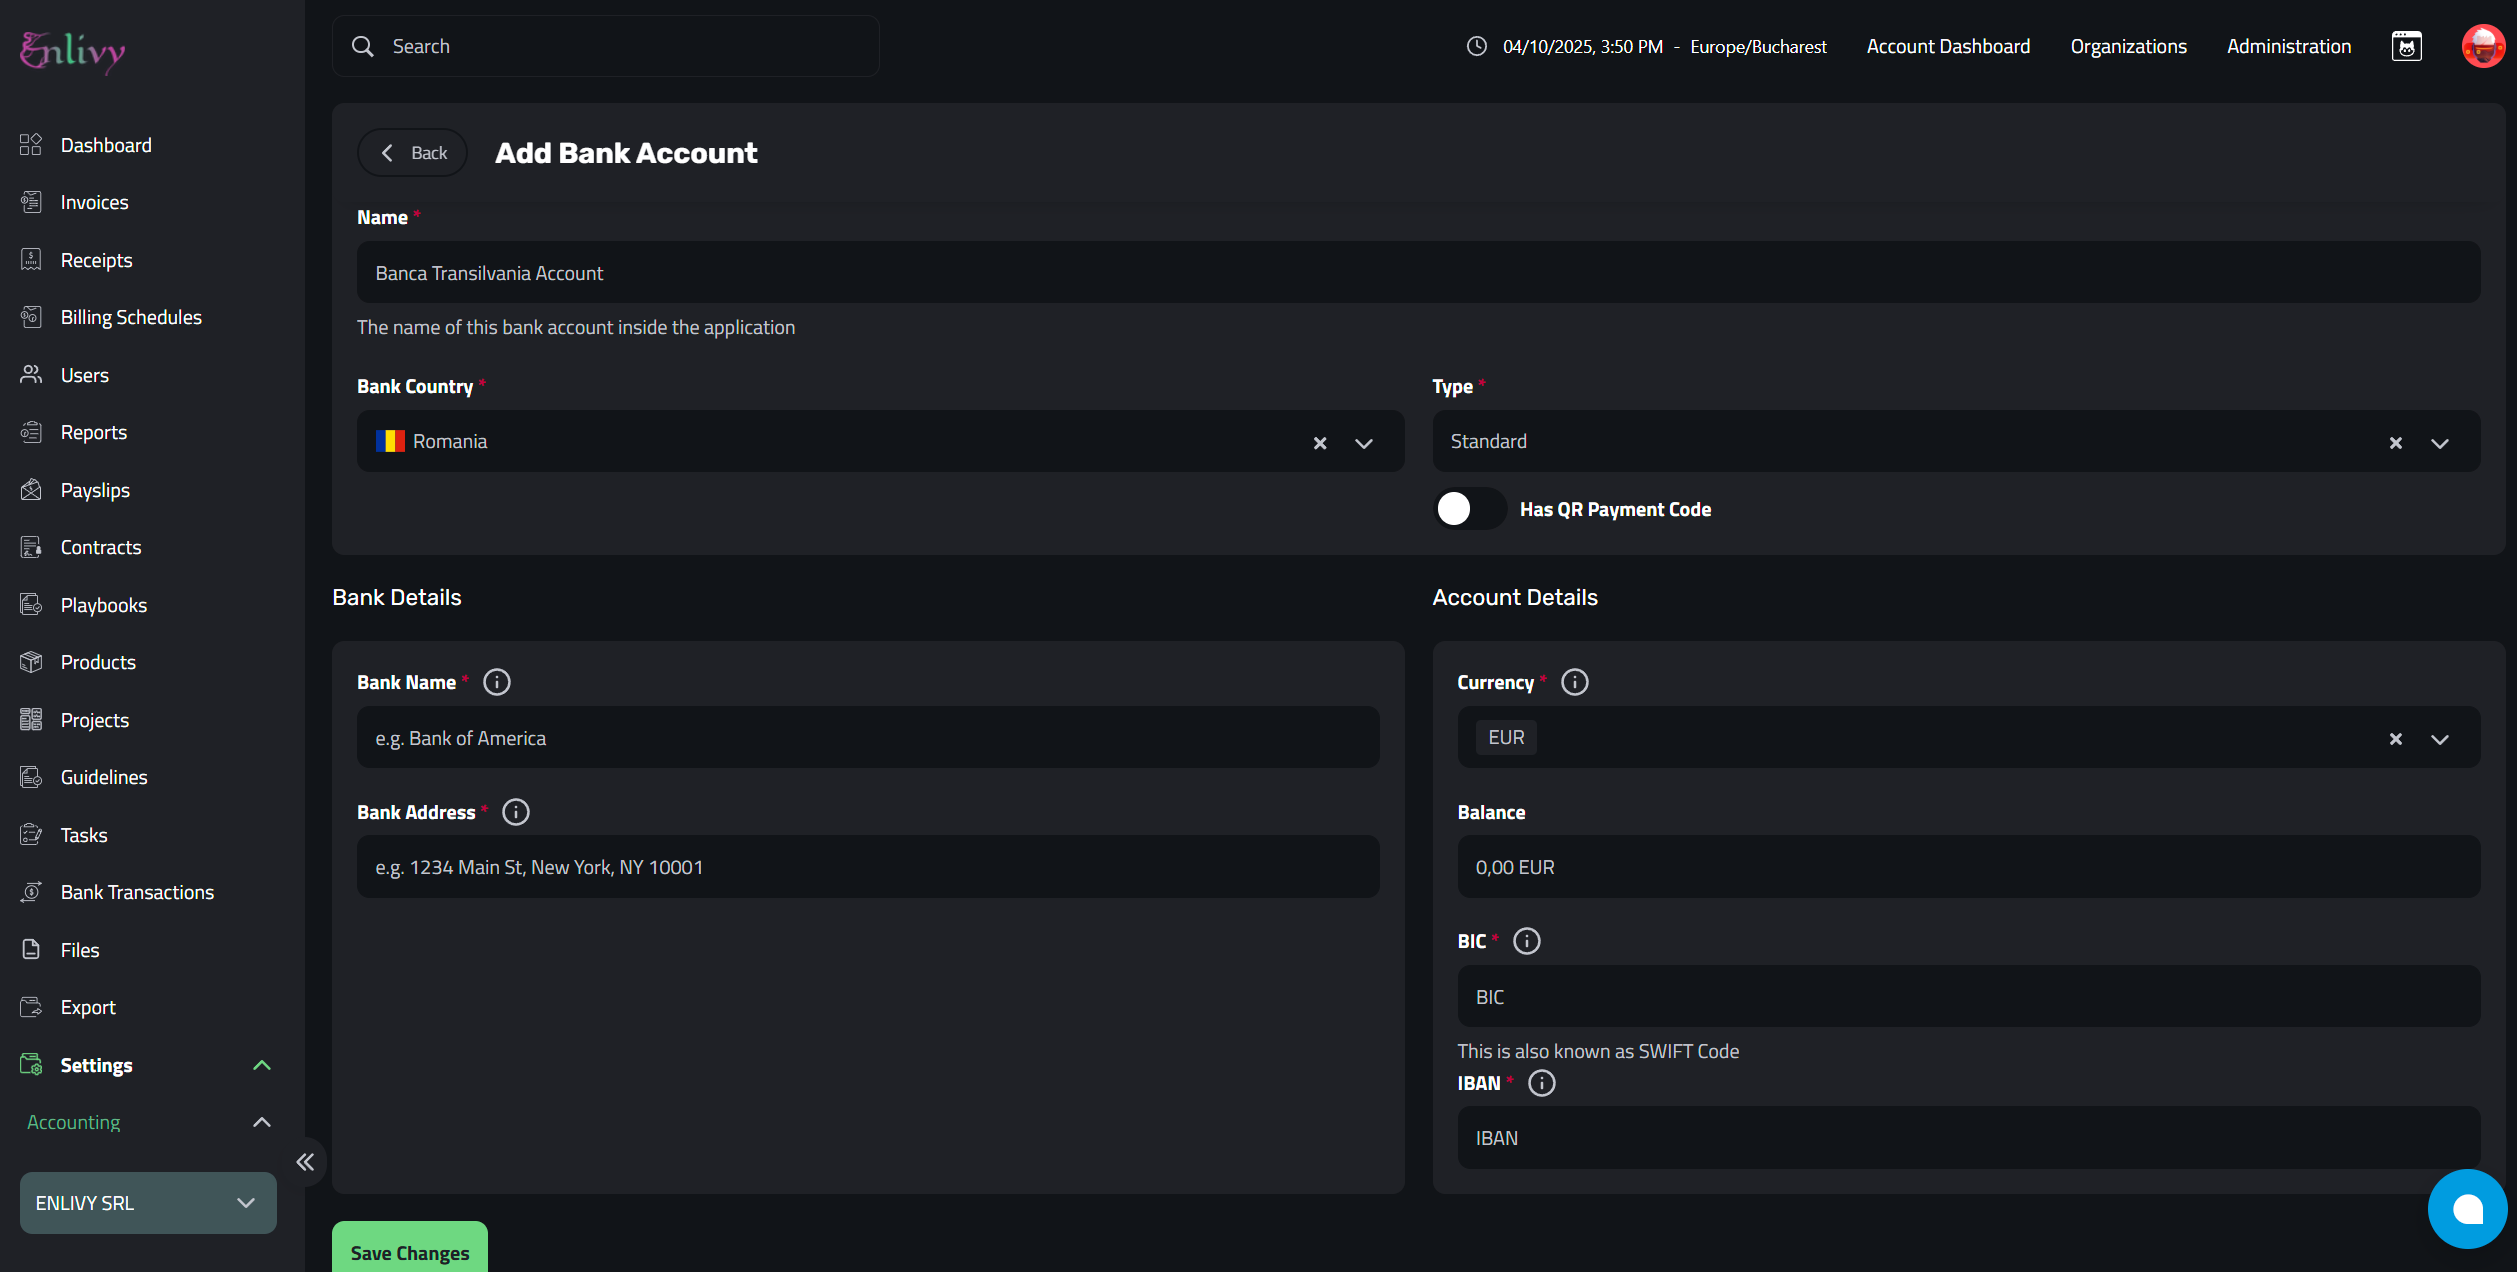
Add a new Bank Account
In the next window, you’ll be able to add a new bank account to the Enlivy app.
Start by selecting the Account Name, Bank Country, and Account Type. After that, you’ll need to fill in the remaining details.
Check the screenshots below for guidance, along with a complete list of fields and their explanations.
Field Explanation
In the next section, we’ll walk you through all the fields you need to complete in order to successfully add a bank account to your organization in Enlivy.
-
Name
This is the label you’ll use to identify the bank account inside Enlivy. It can be something like “Primary USD Account” or “Main Business Account”, whatever helps you and your team quickly recognize the purpose of the account.
-
Bank Country
Here you select the country where the bank account is registered. This helps ensure proper formatting of banking details like IBAN and BIC, and can influence other localized features in the app.
-
Type
You can choose between three types: Standard, PayPal, or Stripe. Once selected, additional fields will appear depending on the type. For instance, selecting PayPal or Stripe will require some platform-specific credentials.
-
Has QR Payment Code
If your bank account supports QR-based payments, check this box. Once checked, you’ll be able to select the QR standard it follows, such as ISO 20022, ROPay (used in Romania), or SEPA, which is widely used across the European Union.
-
Bank Name
This is the name of the financial institution where the account is held. Use the official name as listed by the bank, for example “Bank of America” or “Banca Transilvania”.
-
Bank Address
Provide the full physical address of the bank’s headquarters or the specific branch tied to the account. This should include the street, city, postal code, and any other identifying location info.
-
Currency
Specify the currency used by this bank account. It could be USD, EUR, RON, or any other official currency depending on where the account is held.
-
Balance
This is the current amount of funds available in the account. It’s mainly used for internal tracking or reporting purposes inside Enlivy, and doesn’t affect live bank data.
-
BIC
The BIC (Bank Identifier Code), also known as the SWIFT code, is an international identifier used for sending money across borders. It helps locate the exact bank involved in a transaction and usually consists of 8 to 11 characters. For example, “BOFAUS3N” refers to Bank of America in the U.S.
-
IBAN
The IBAN (International Bank Account Number) is a standardized international account number used primarily in Europe. It includes the country code, bank code, and your actual account number, ensuring proper routing for international and domestic payments. An example for Romania would look like “RO49AAAA1B31007593840000”.
Save Your New Bank Account
After putting in all the information needed, you can click on Save Changes and the bank account will be added to your organization in Enlivy.
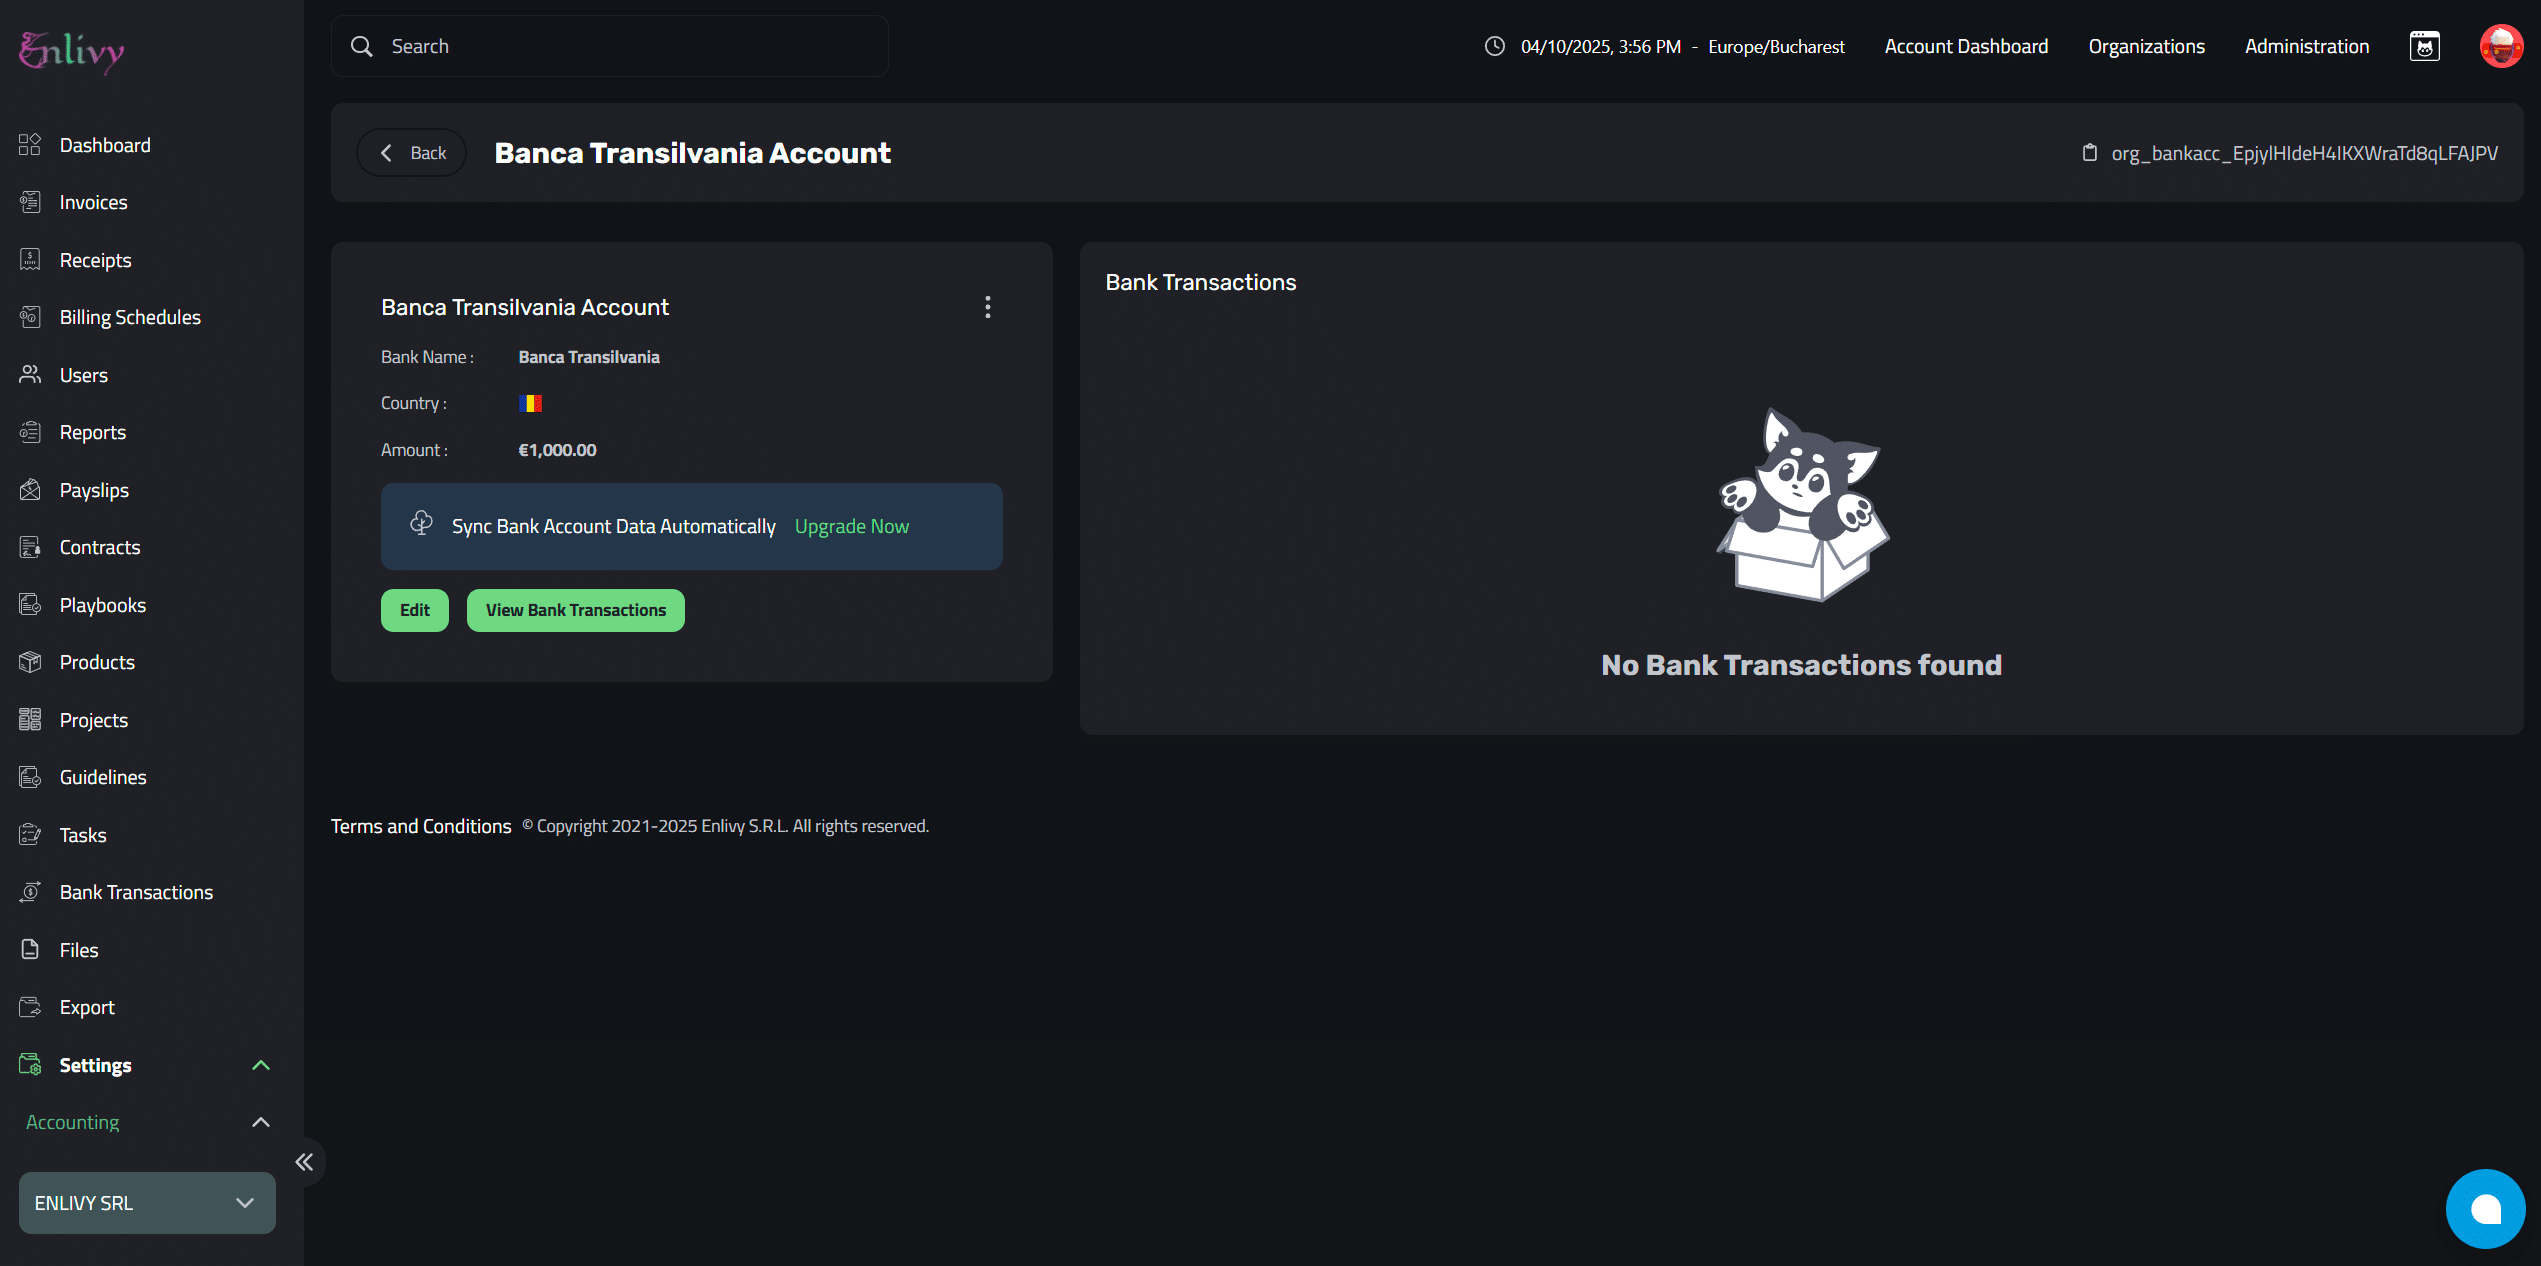
Example: Adding a Bank Account
In the next example, we’ll walk through the process of adding a bank account to your organization in Enlivy. Follow the screenshot provided for step-by-step guidance if needed.

Don’t forget to click on Save Changes, your new bank account should look like this in the Bank Account section in Enlivy: