Adding Tax Classes to Enlivy
In this guide, we’ll walk you through the basics of adding tax classes in the Enlivy app.
Navigating to the Tax Classes Section
To get started, navigate to the Settings tab, then go to Accounting and select Tax Classes.
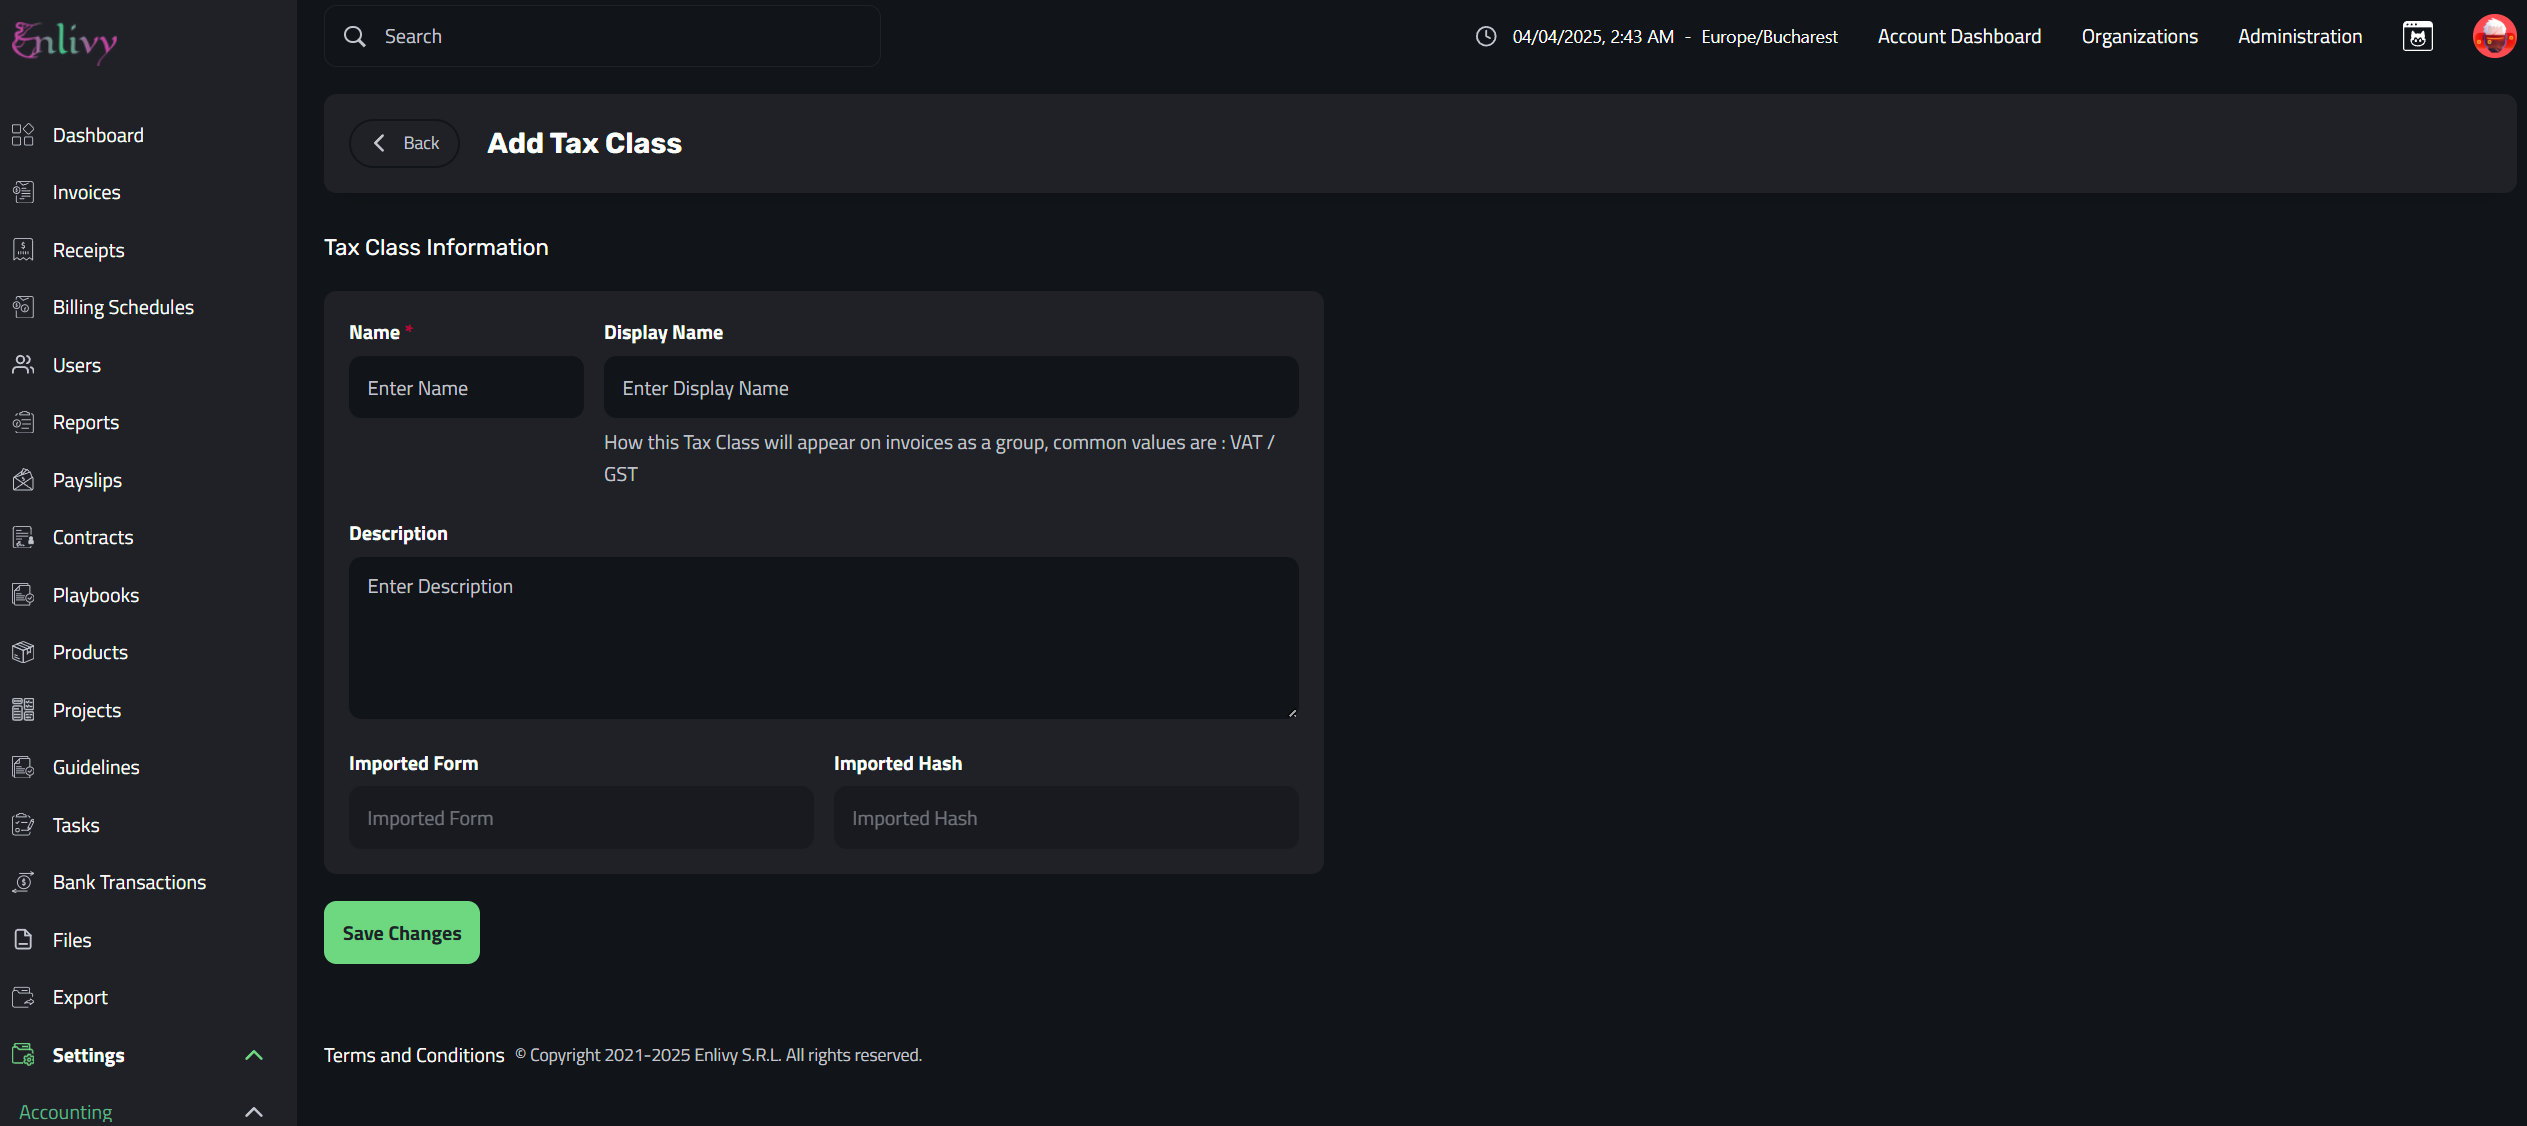
Once you’re in the Tax Classes section, click on the Add Tax Class + button on the right side of the screen to create a new tax class.
Adding a New Tax Class & Explanation of Fields
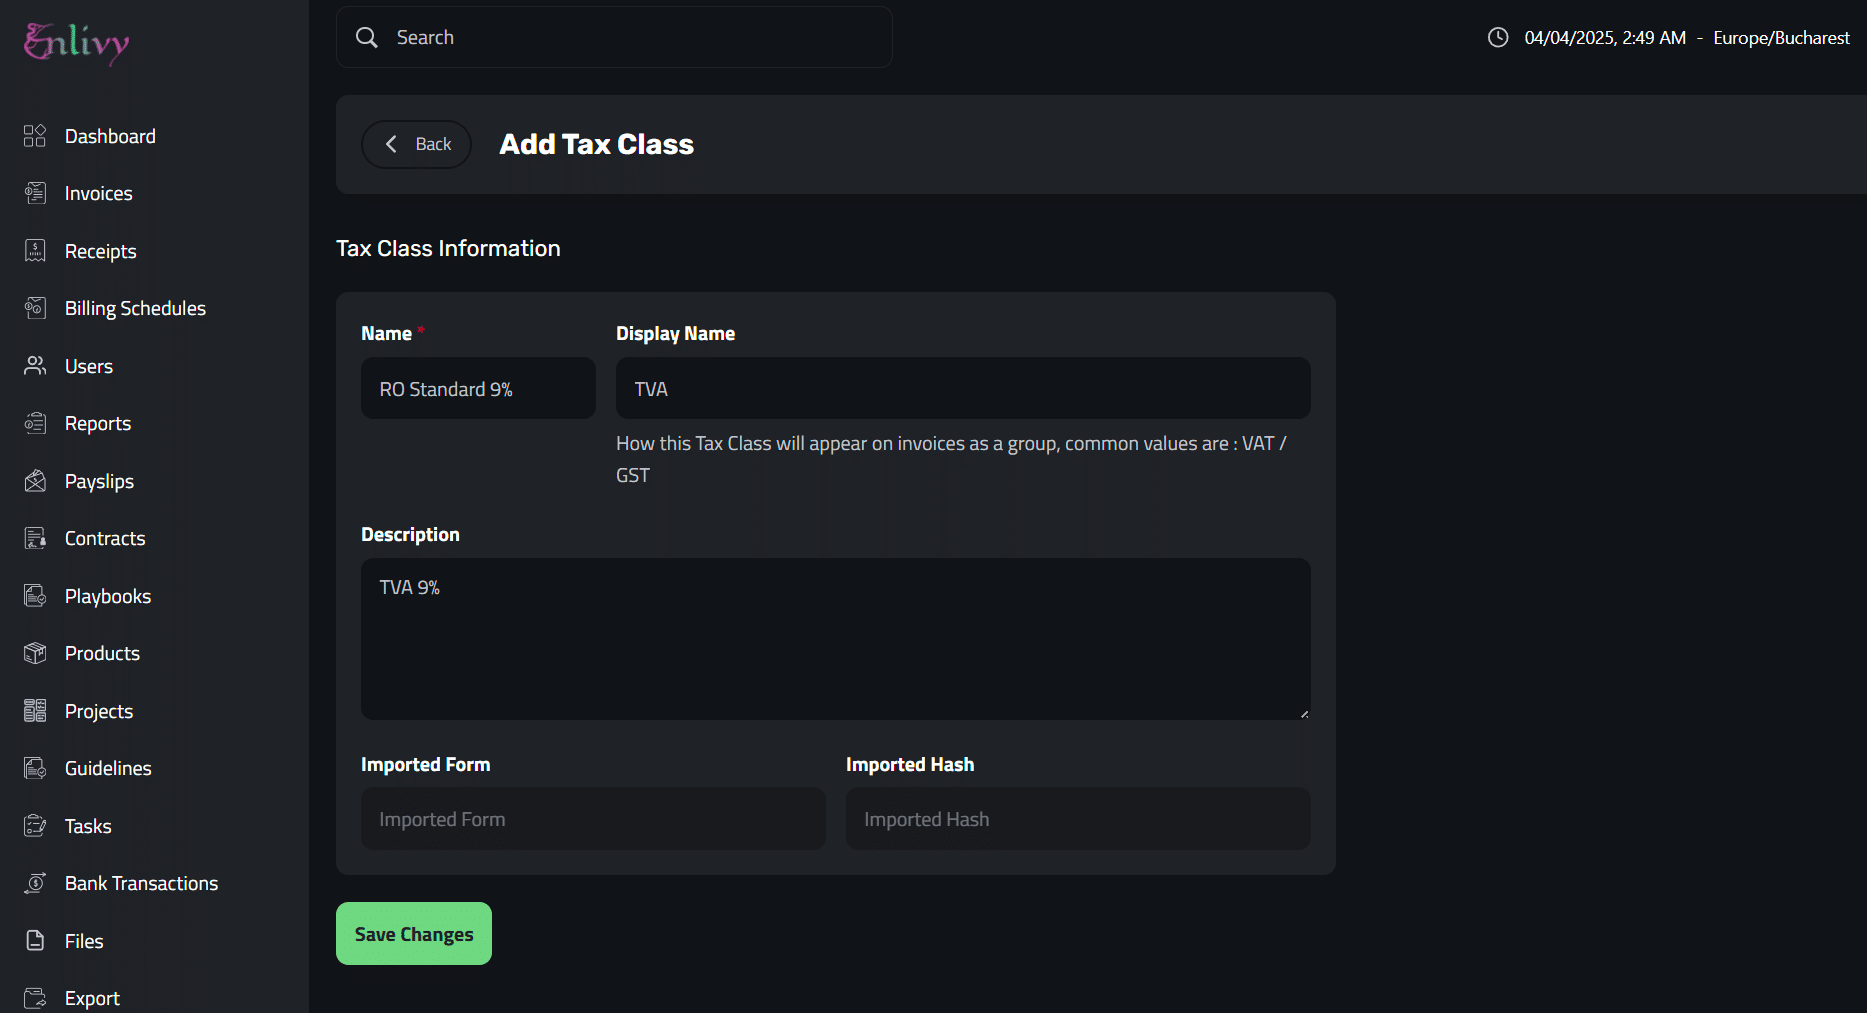
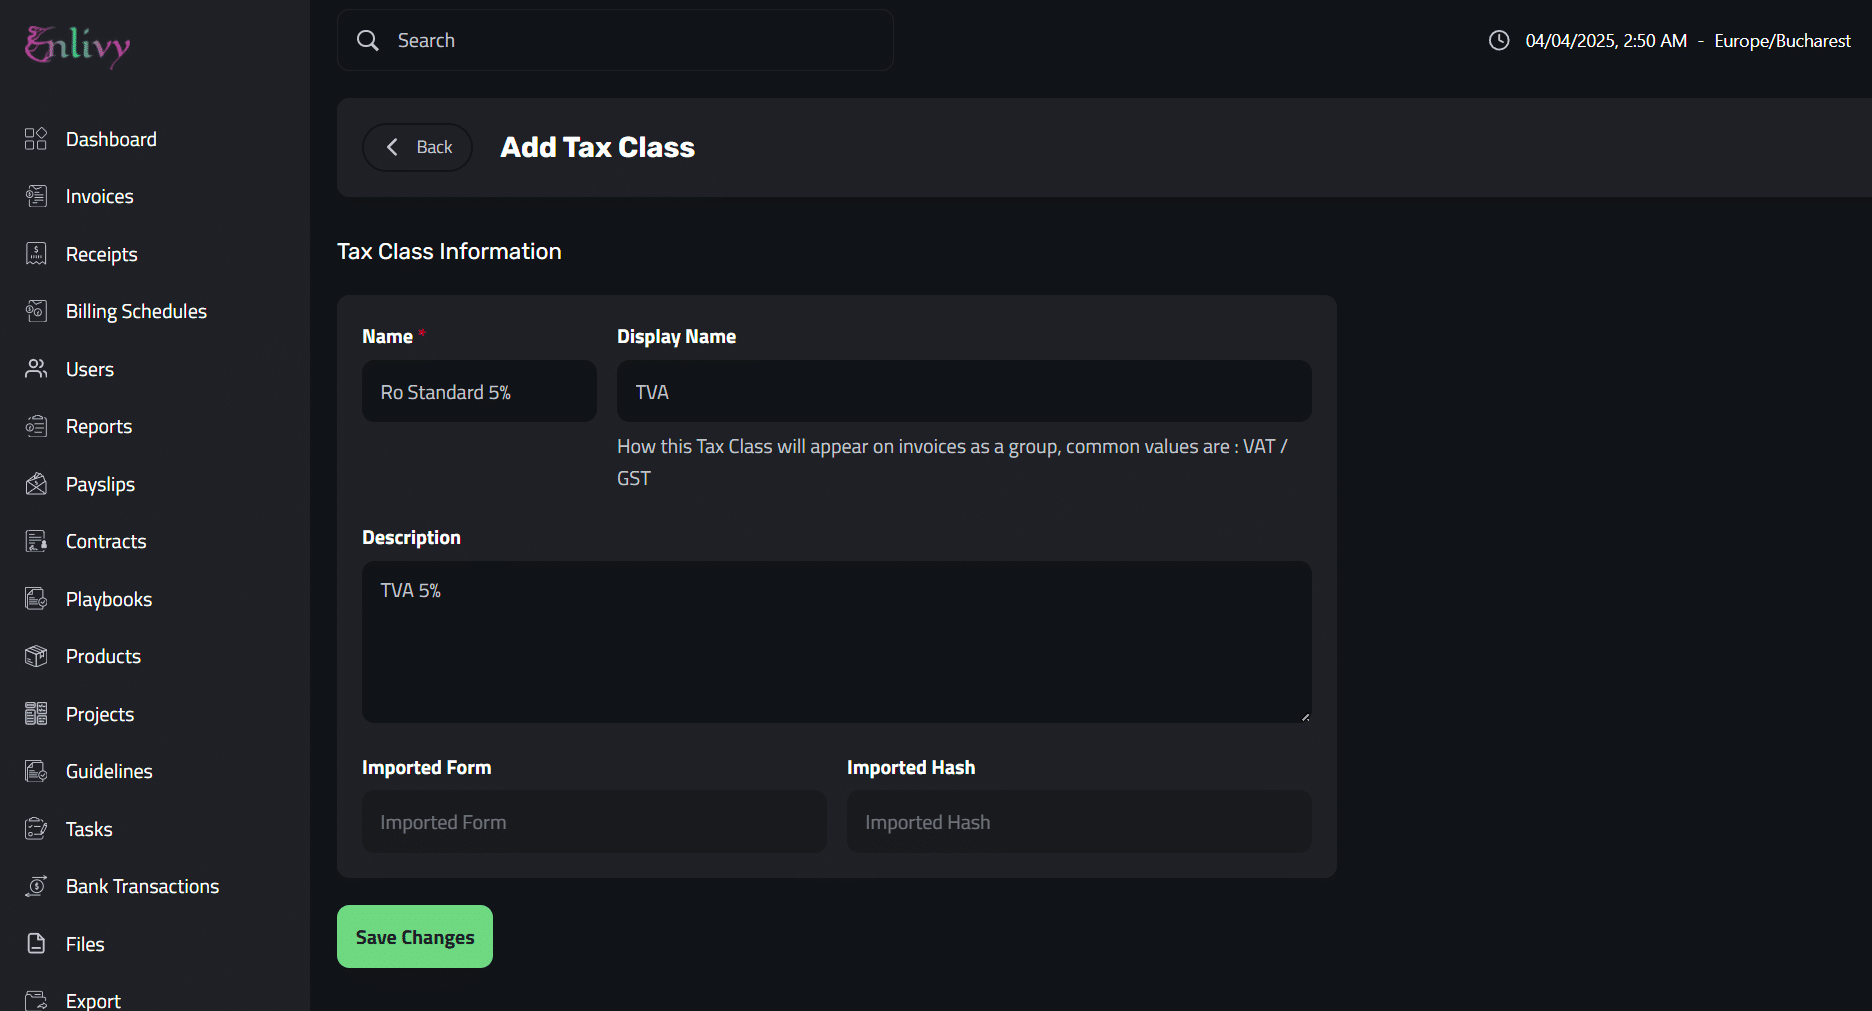
To add a Tax Class, you’ll need to complete three key fields:
- Name – A unique identifier for the tax class used internally.
- Display Name – The label that will appear on invoices (e.g. VAT, GST, or other relevant terms)
- Description – A brief explanation of the tax class and its purpose.
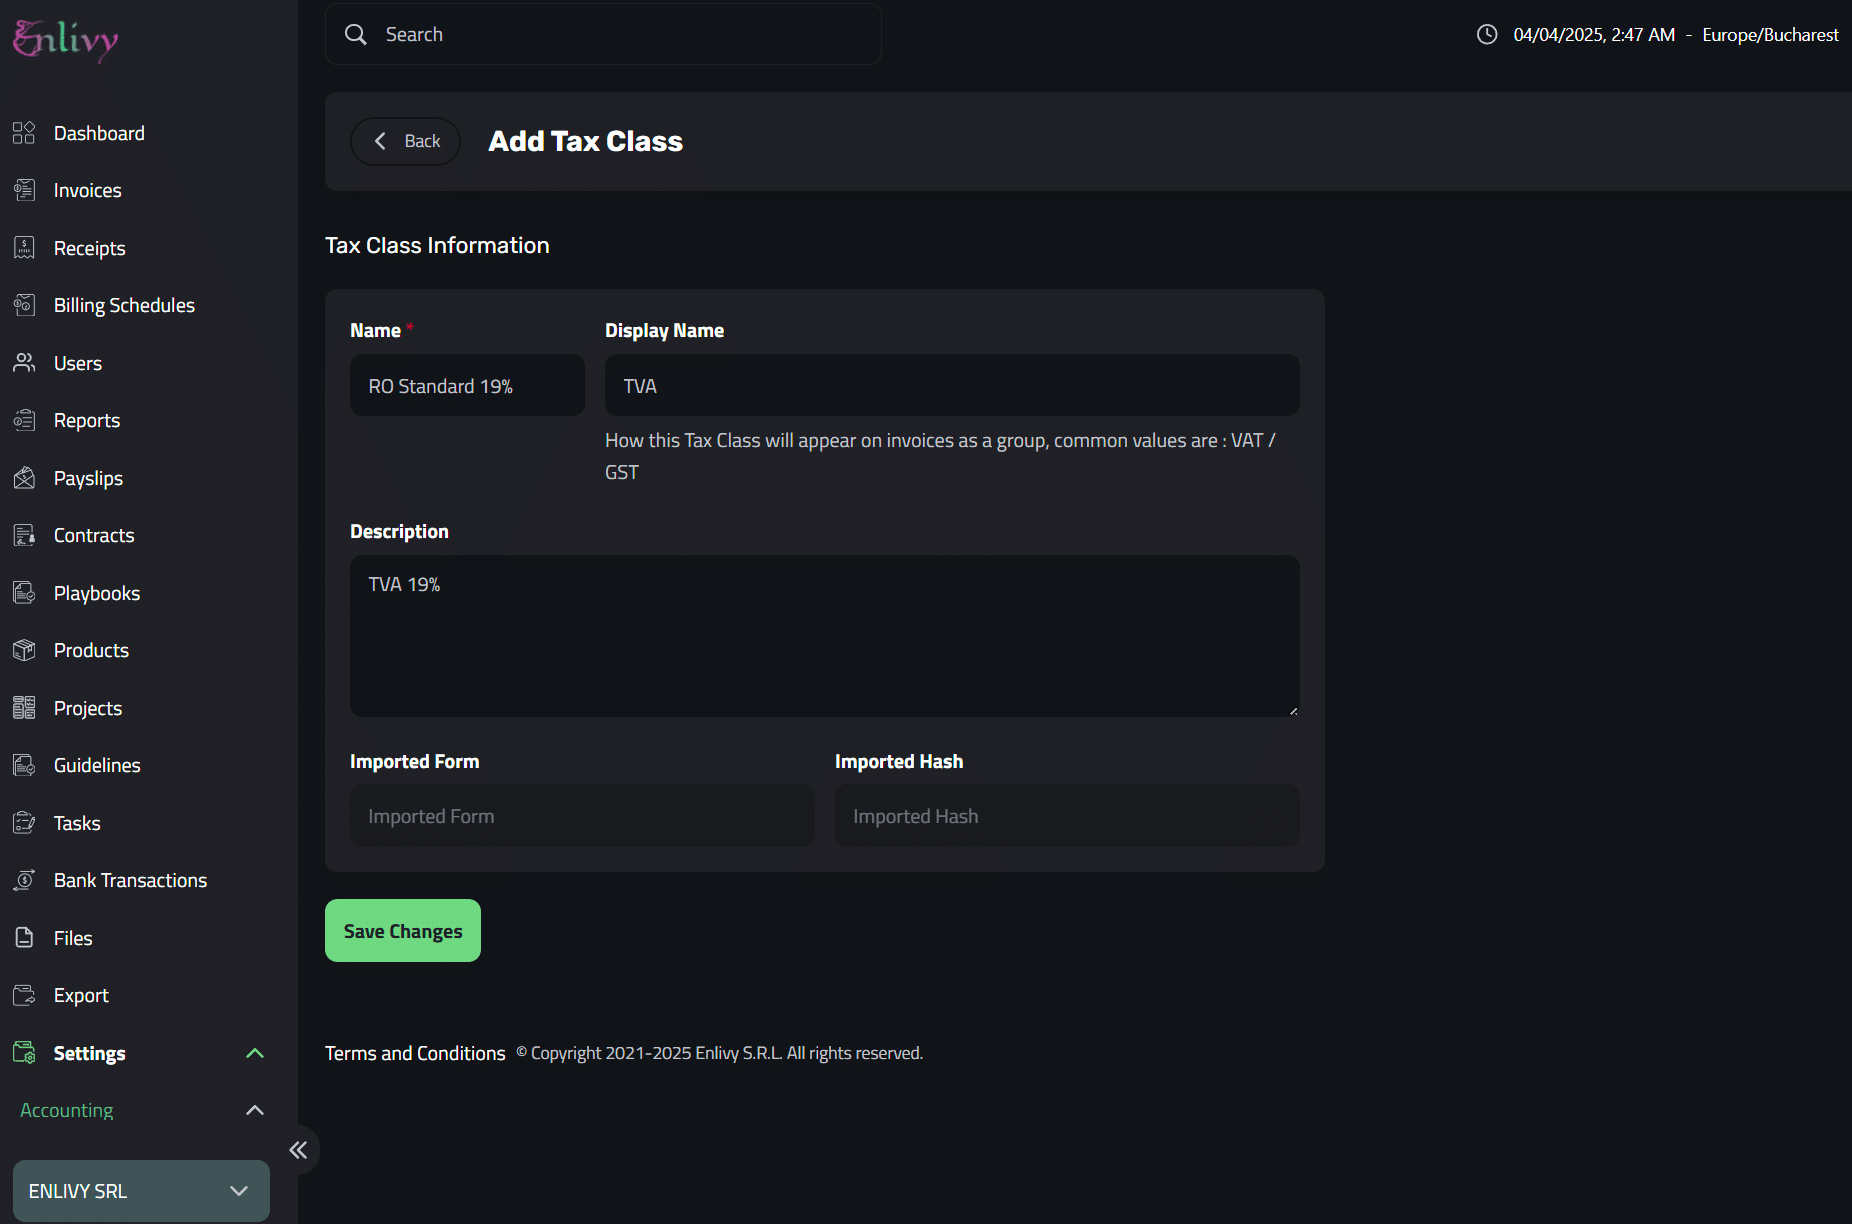
In the following screenshots, I’ll show you how I added the three VAT classes in Romania: 5%, 9%, and 19%, and how they appear in the Enlivy app.
Example: Adding VAT Tax Classes in Romania
TVA 19%
TVA 9%
TVA 5%
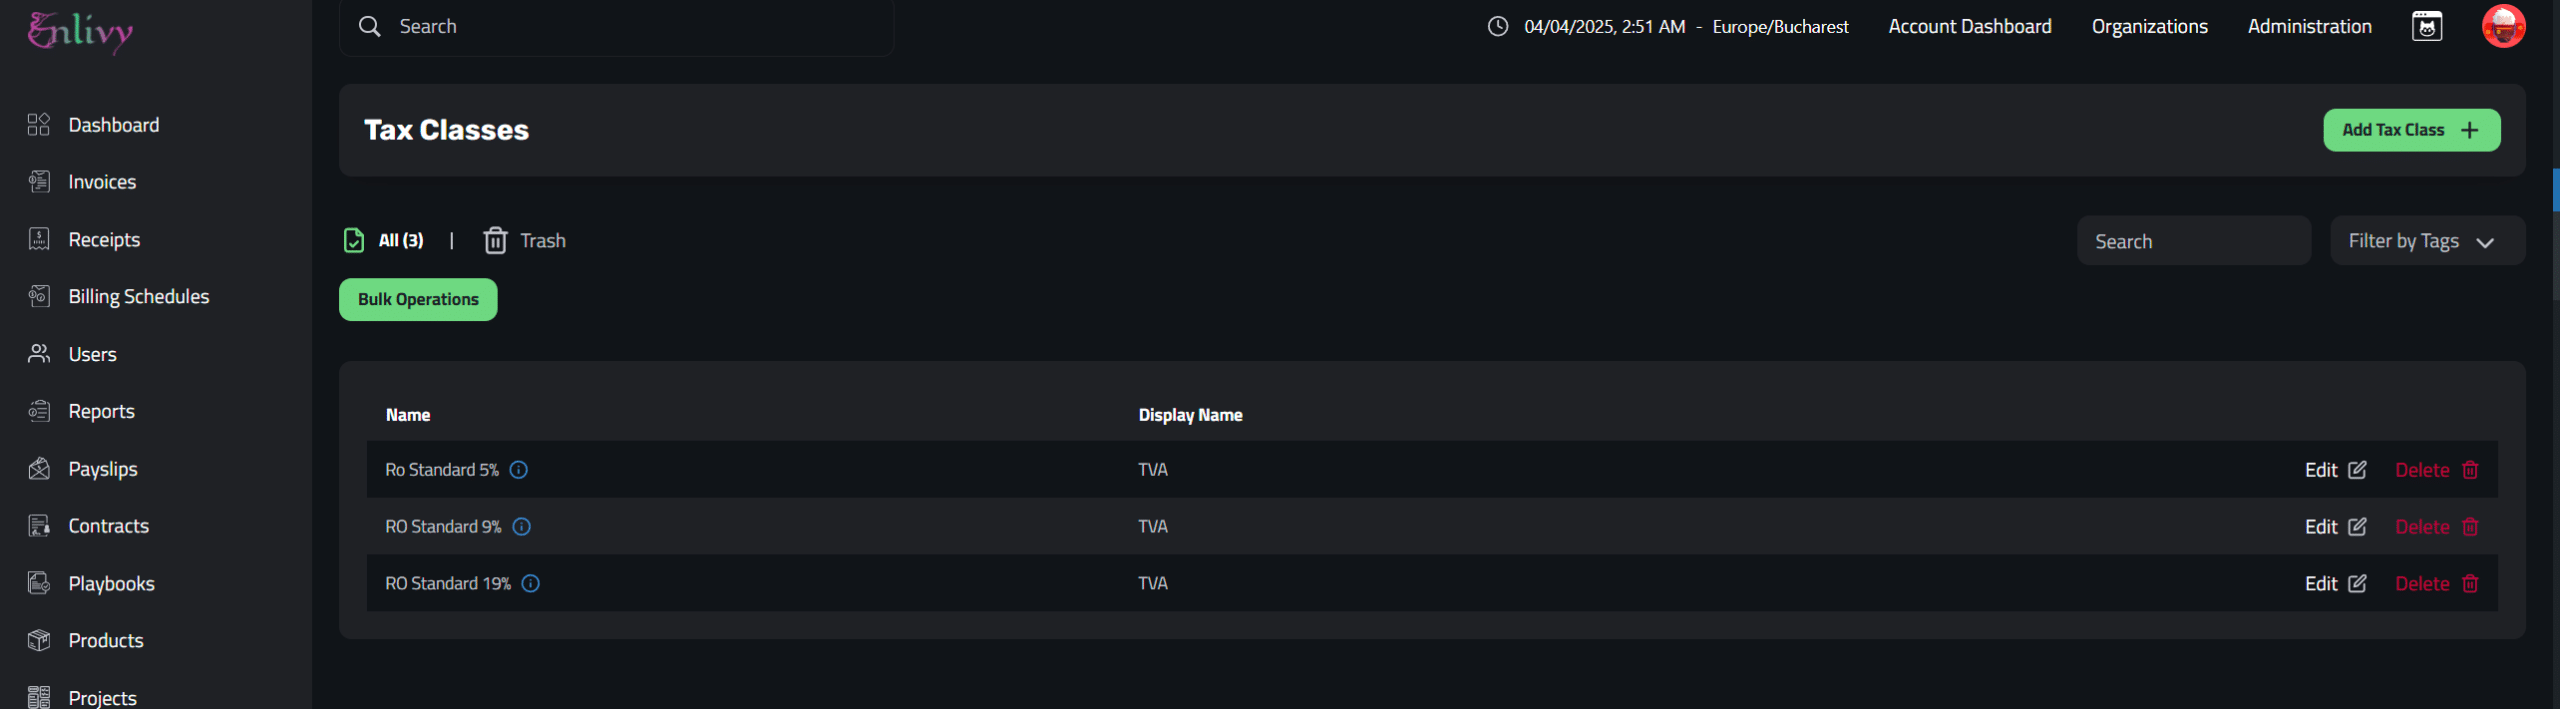
Here’s how the tax classes appear in the Tax Classes tab after clicking Save Changes.