Adding Tax Rates
In this guide, we’ll walk you through how to add tax rates to your organization in the Enlivy application.
The process is simple and easy to follow just by reading through this guide. At the end, we’ll include examples showing how to add the Romanian VAT rates (19%, 9%, and 5%) for your organization.
Navigating to the Tax Rates Section
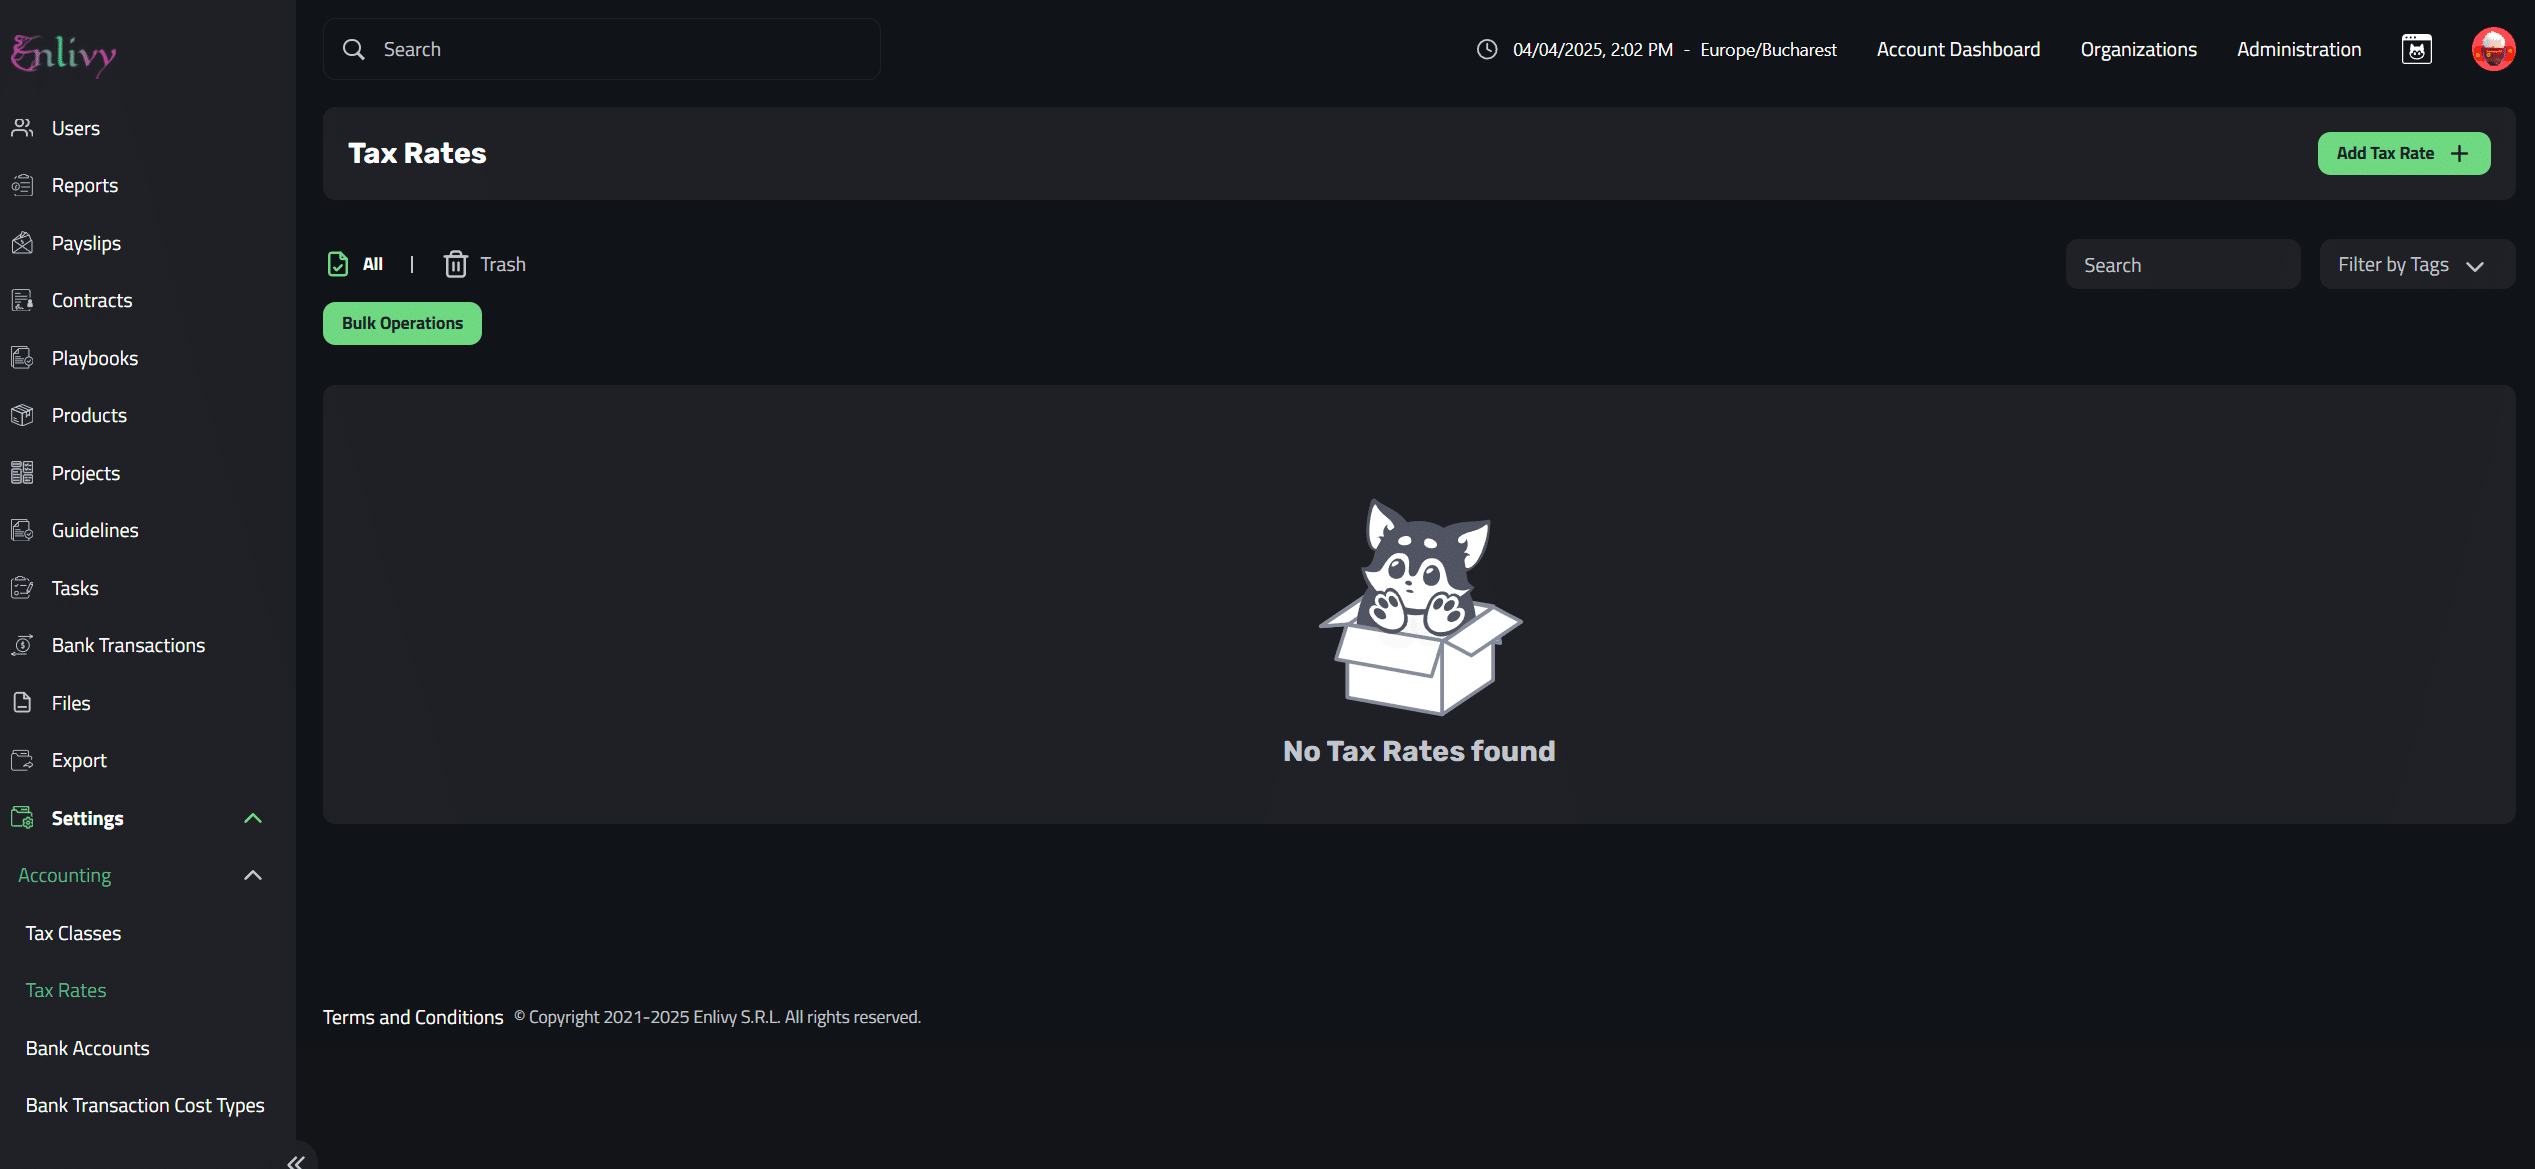
First, from your dashboard, navigate to the left-hand menu. Click on Accounting, then select Tax Rates. Your screen should now look similar to the screenshot below.
Adding a New Tax Rate
To add a new tax rate, click the Add Tax Rate + button located on the right side of the screen.
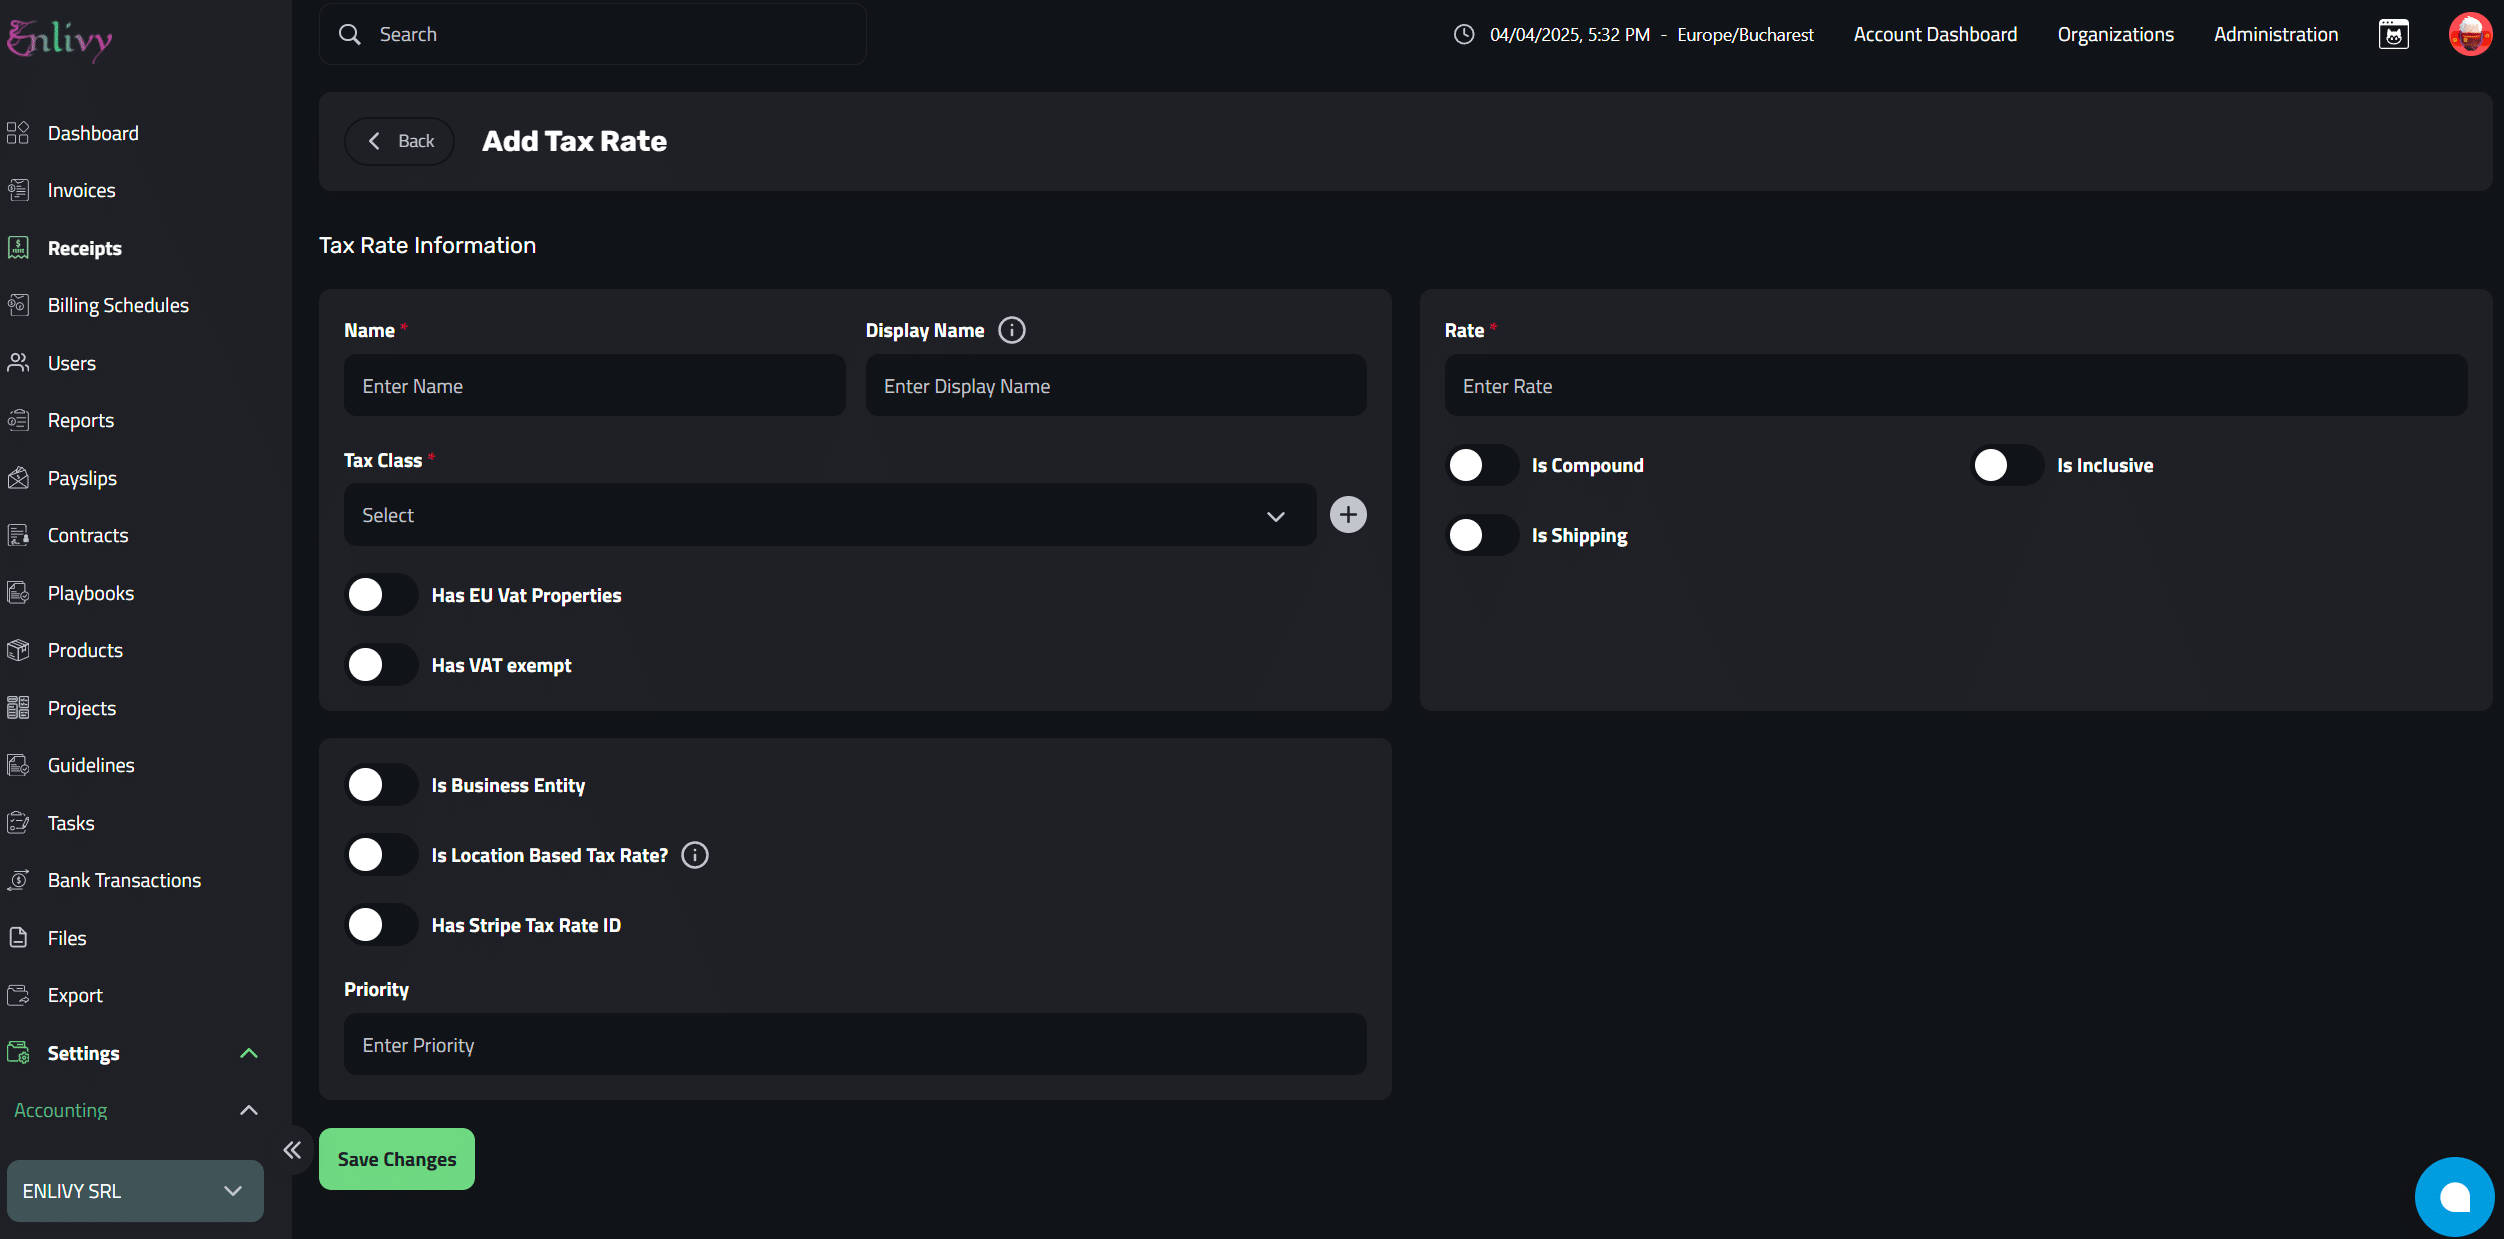
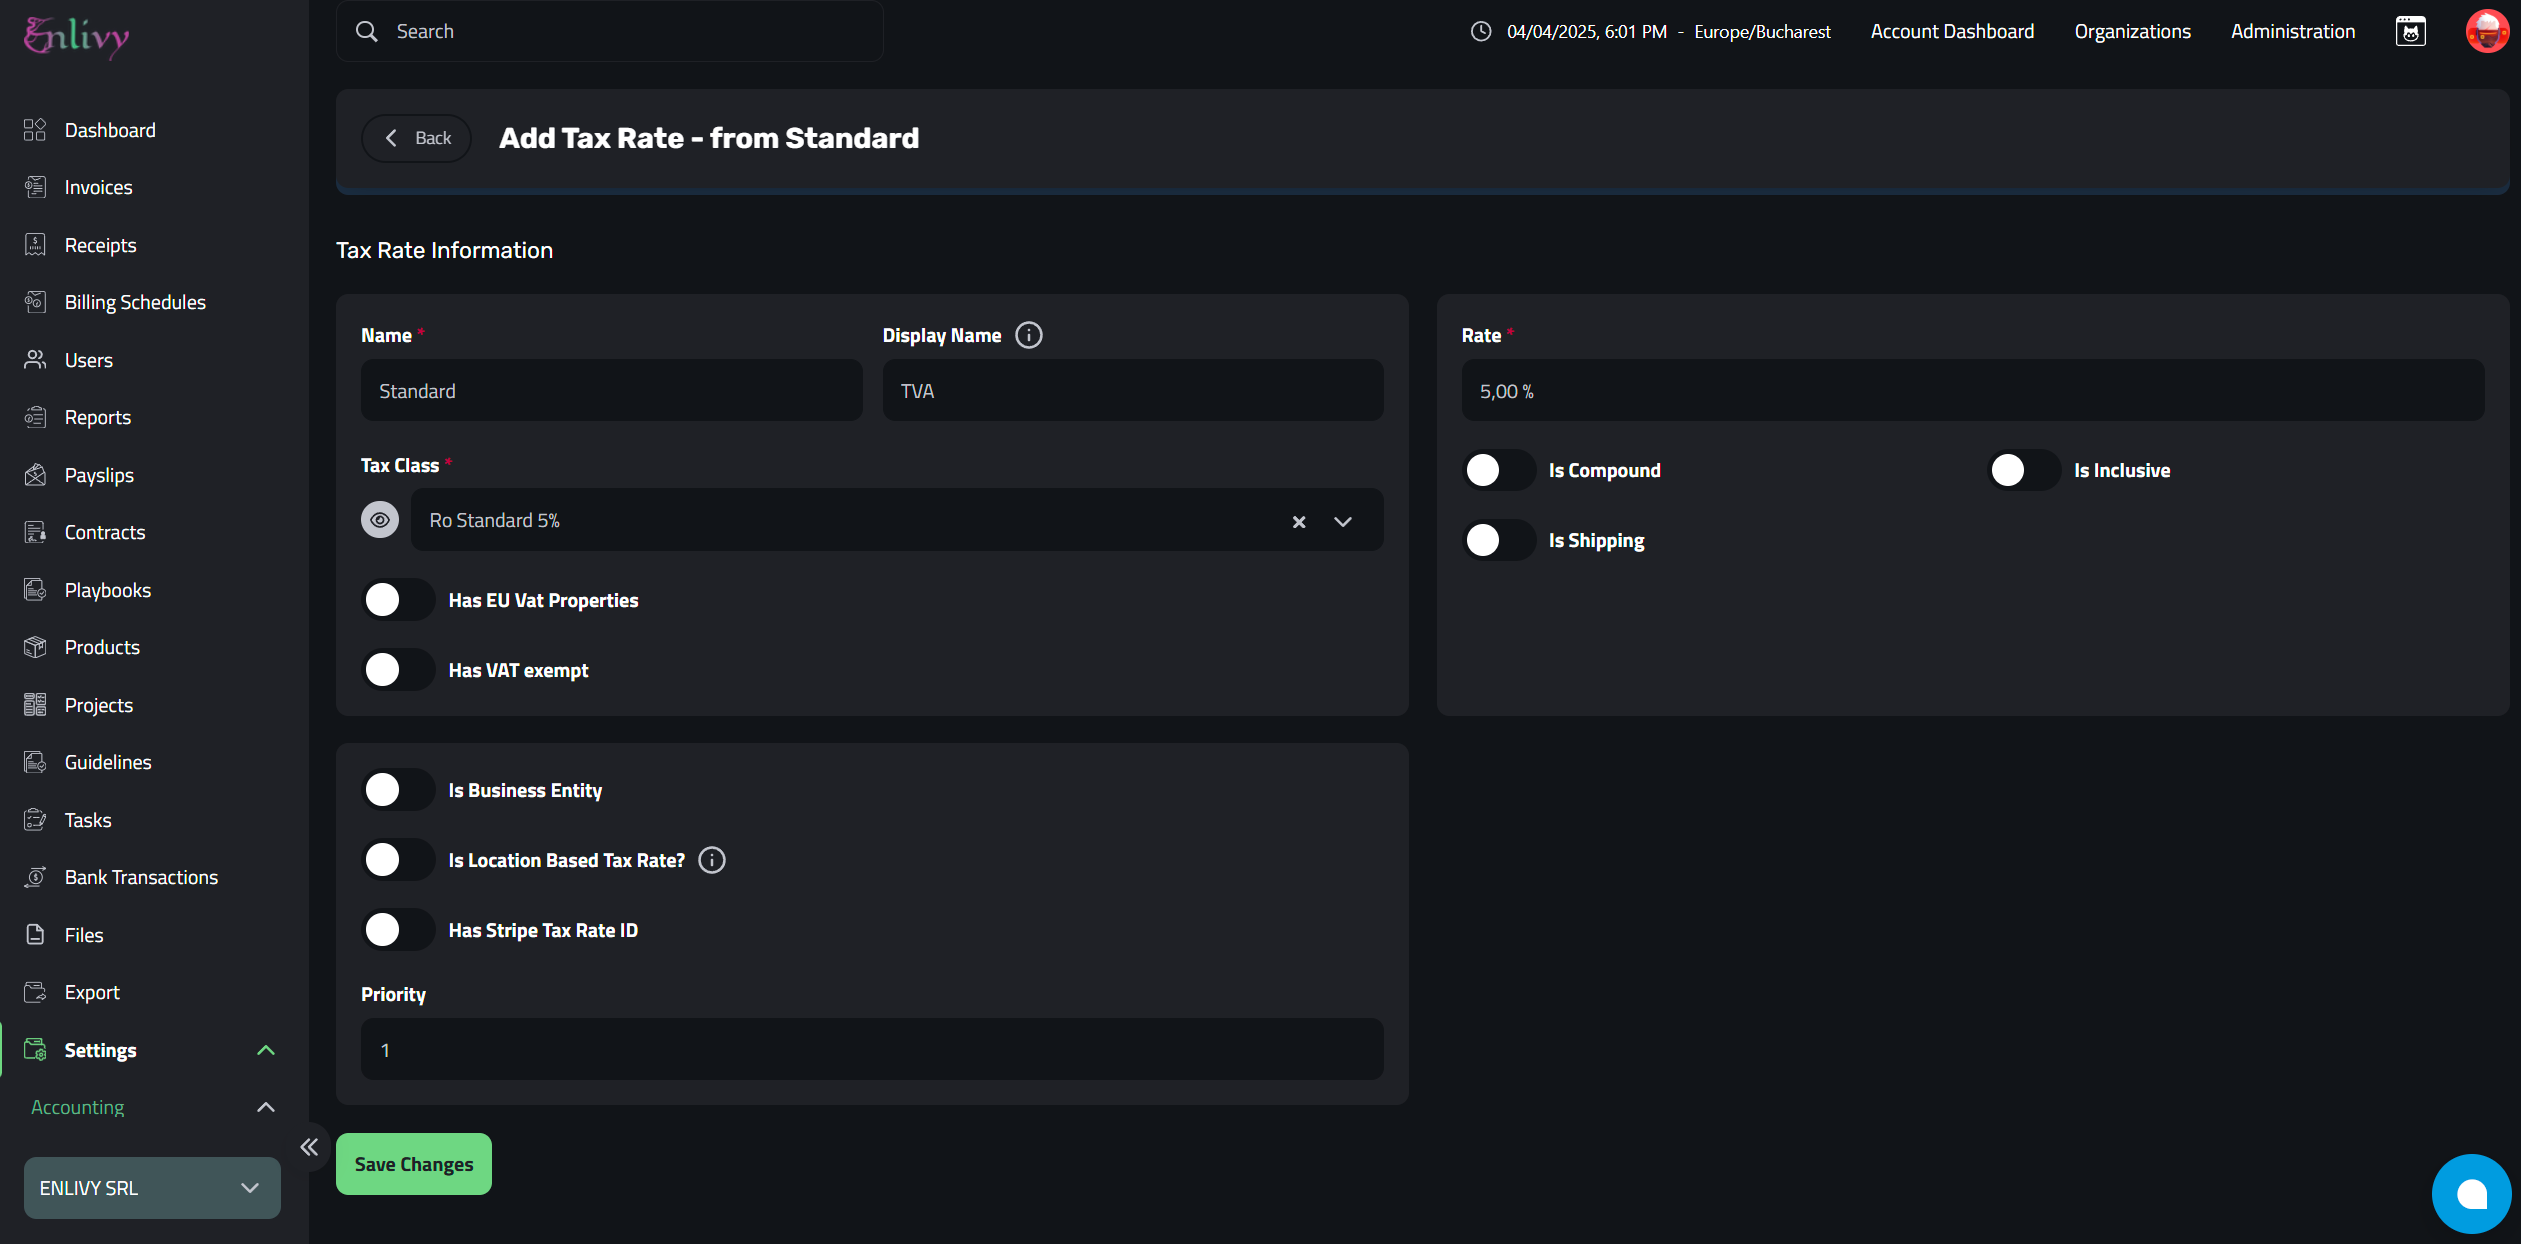
A new window will appear, as shown in the screenshot below.
Here, you’ll need to fill in the fields with information about the tax rate you’re adding.
Please note that not all fields are required, some are only used in specific or exceptional cases, so make sure to fill in only what’s relevant for your situation.
Explanation of Fields
The most important fields that you have to complete are the one marked with the * : Name, Tax Class and Rate.
Below is an explanation of all the fields:
-
Name
The internal name used to identify the tax rate within your organization.
-
Display Name
The Display name of the Tax Rate (e.g., “VAT 19%”).
-
Tax Class
Select the Tax Class (That was created earlier).
-
Rate
The percentage of the value of the tax (e.g., 19% for 19% VAT)
-
Has EU VAT Properties
Enable this if the tax rate needs to comply with EU VAT rules, typically for cross-border B2B or B2C transactions within the EU.
-
Has VAT Exempt
Check this if this rate represents a VAT-exempt status for specific goods/services.
-
Is Location-Based Tax Rate
Enable this if the tax rate should apply based on the customer’s or company’s location.
-
Has Stripe Tax Rate ID
Use this if you’re syncing this tax rate with Stripe, and you have a corresponding Stripe tax rate ID.
-
Priority
Used when multiple tax rates apply. A lower number indicates higher priority (e.g., priority 1 is applied before priority 2).
Examples of Adding Tax Rates
19% VAT
Now that you’re familiar with the key fields and understand which ones are required to add a tax rate, check the next screenshot for an example of how to create a 19% VAT rate for Romania.
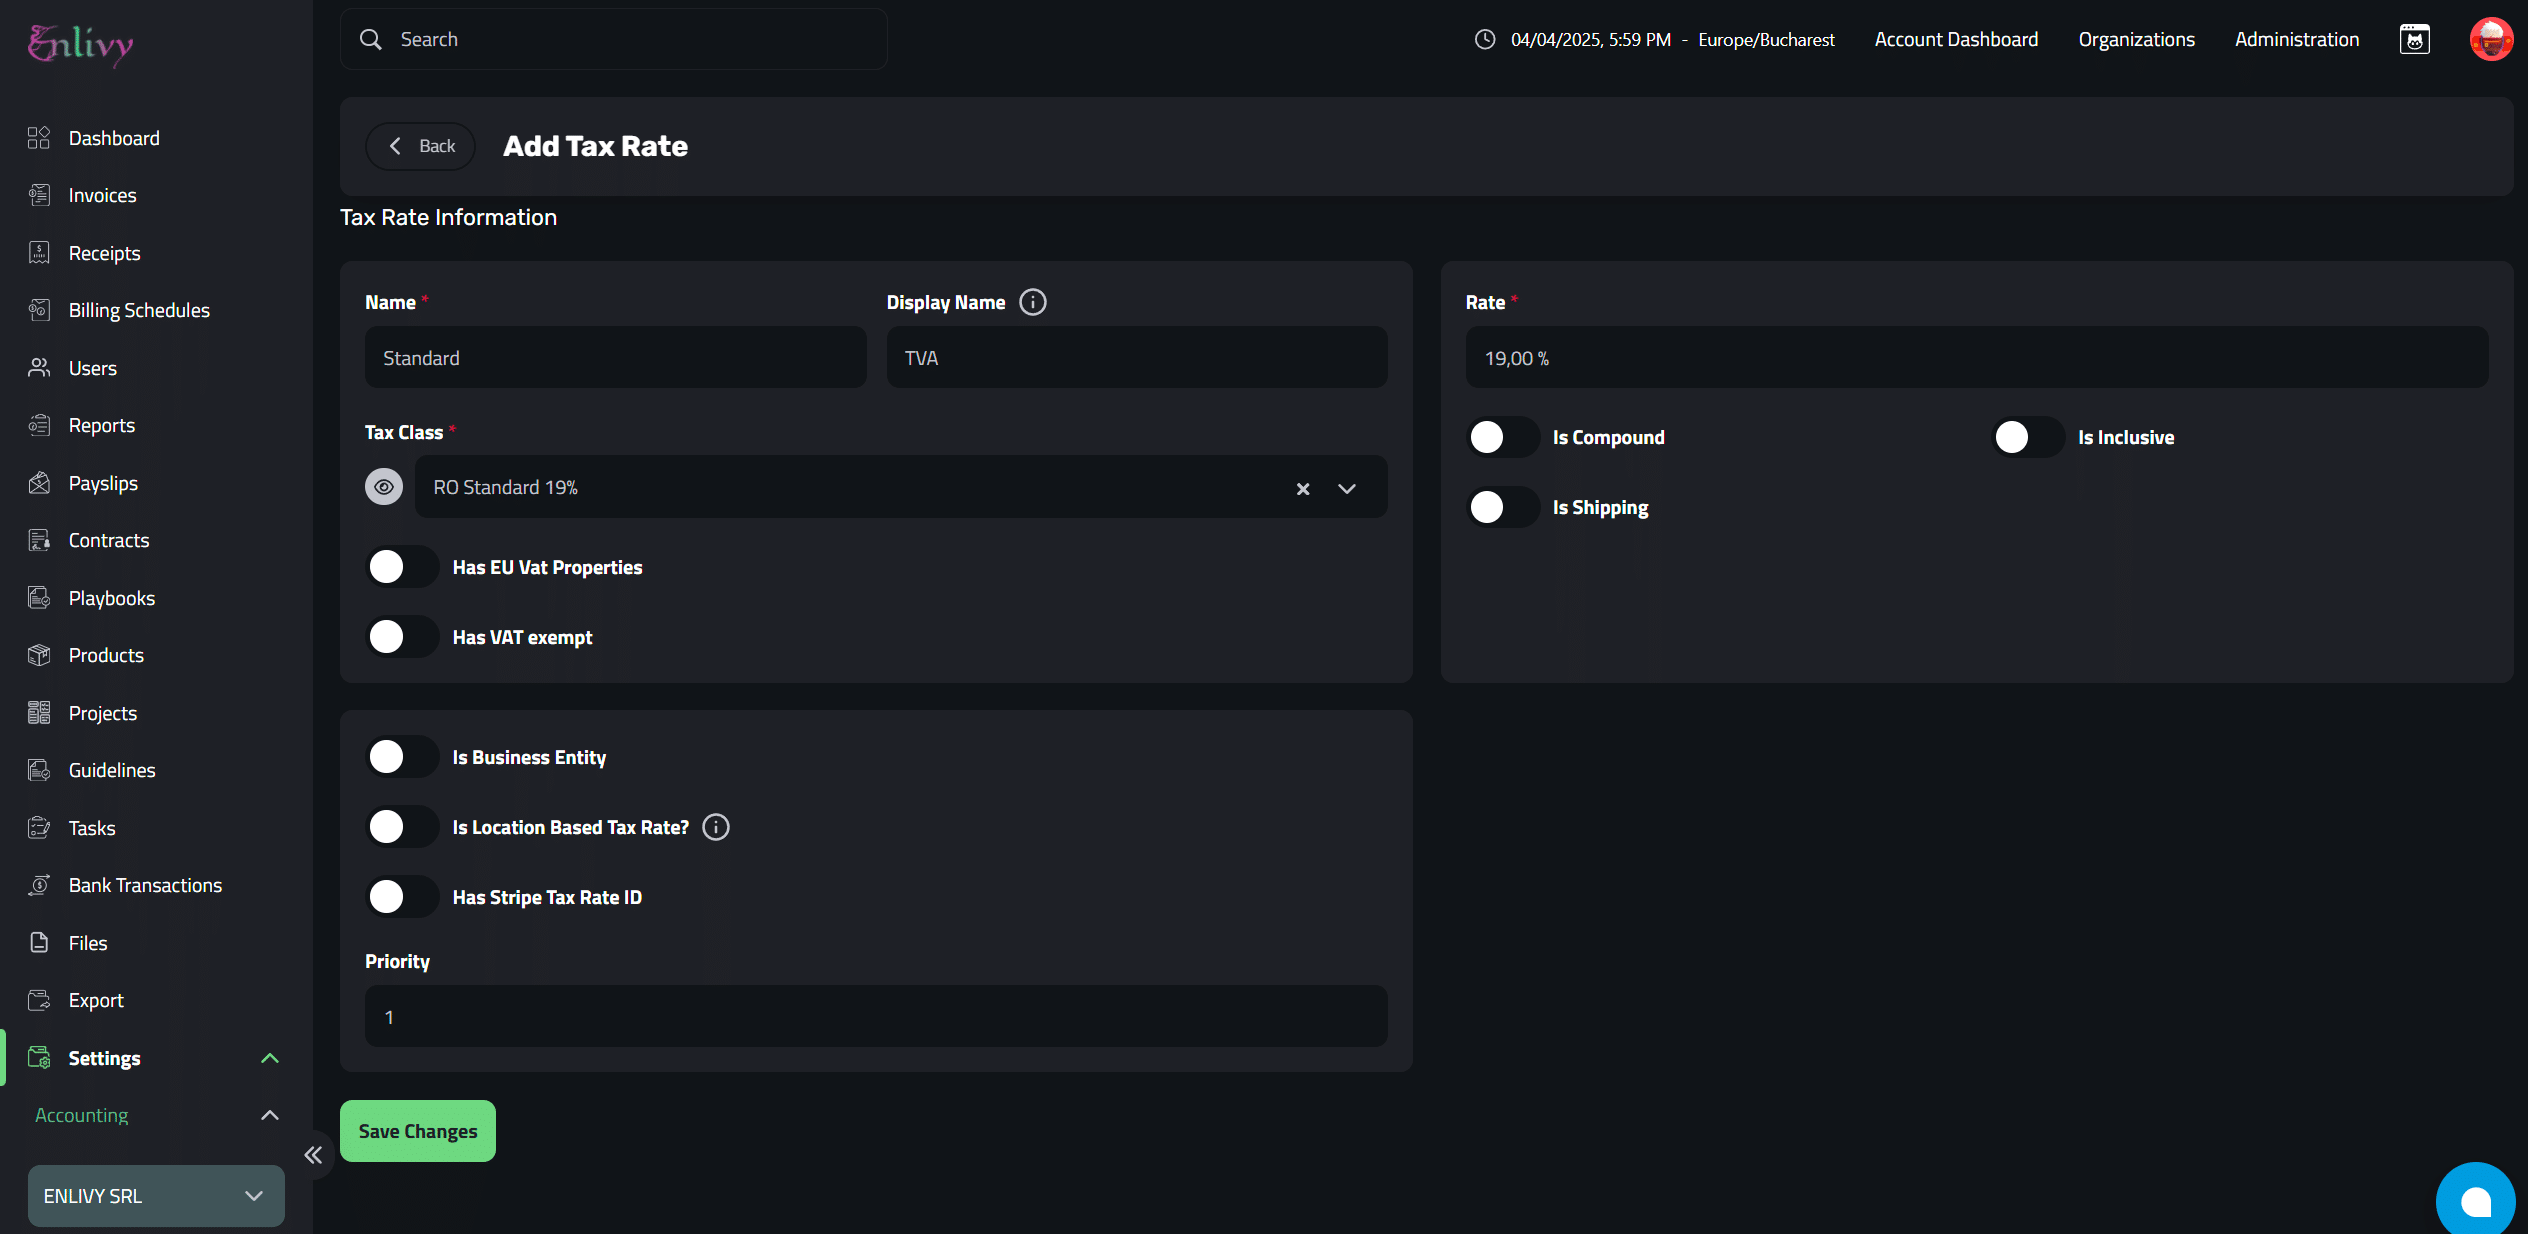
Don’t forget to click on Save Changes.
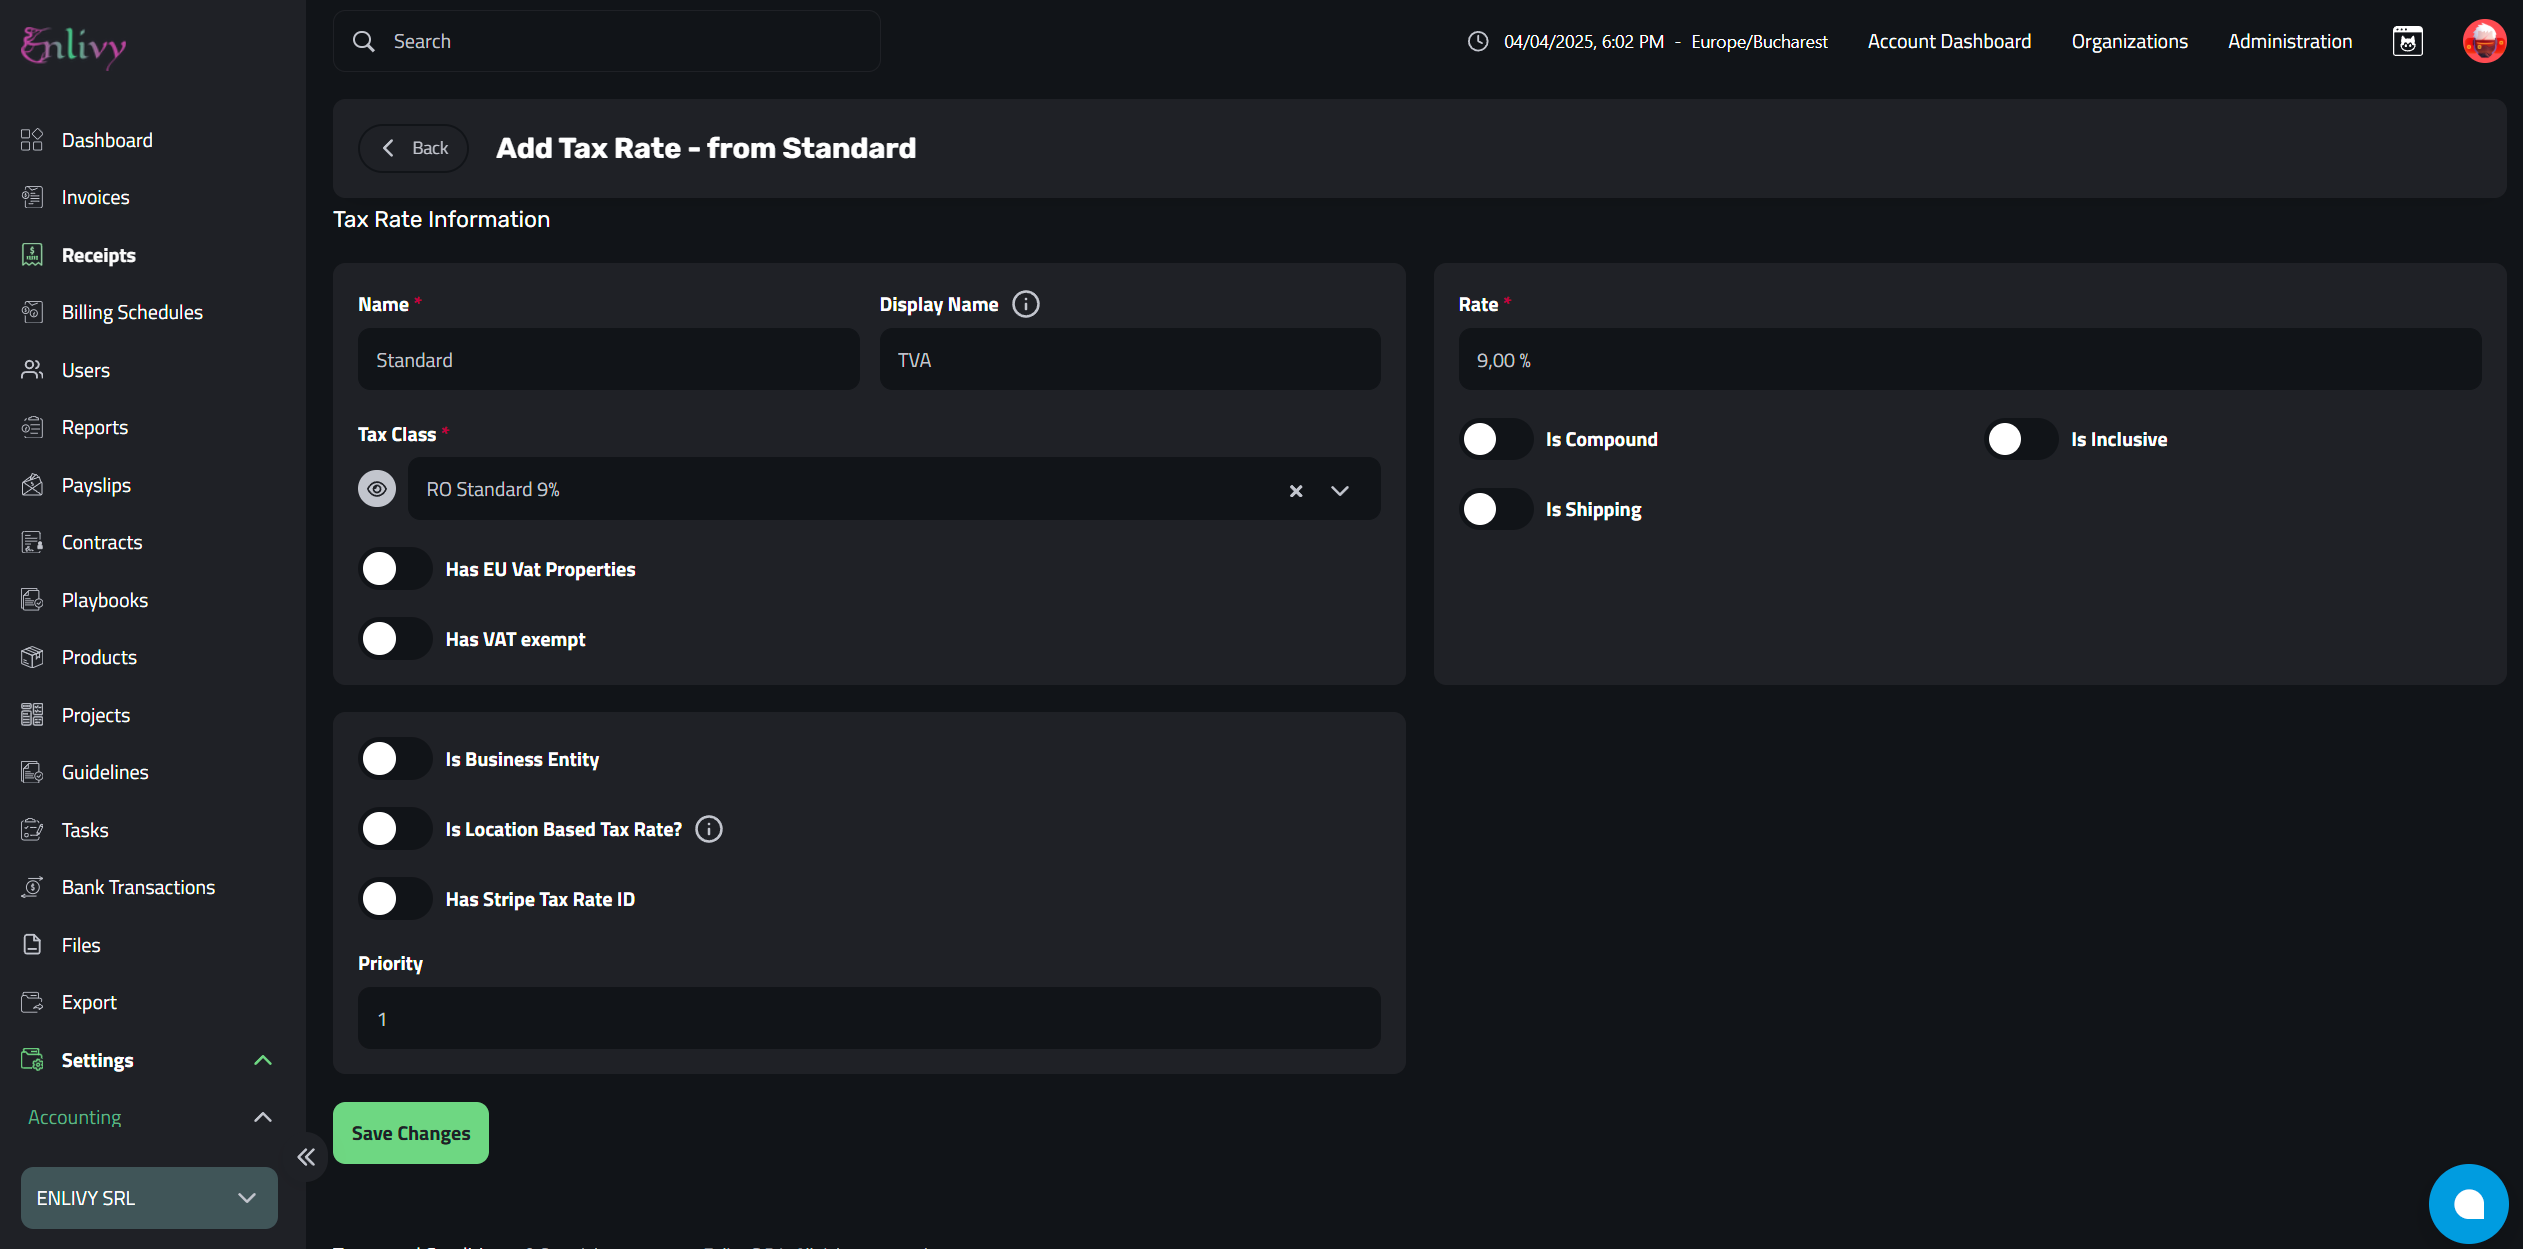
In the following two screenshots, you’ll see the details required to add the 5% VAT and 9% VAT tax rates for Romania.
Use these as a reference to ensure the correct setup for each rate.
5% VAT
9% VAT